How to Charge AirPods for All Generation [Step-by-Step]
Keeping your AirPods charged is key to enjoying uninterrupted music and calls. In this article, we demystify the charging process for all AirPods generations, offering clear, step-by-step instructions.
Learn not just how to charge them, but also how to maximize their battery life and performance.
Charge AirPods or AirPods Pro
Charging AirPods and AirPods Pro, regardless of the generation, is a straightforward process. Here's a general guide that applies to all generations of AirPods and AirPods Pro.
Way 1: Place AirPods in the Charging Case
Place your AirPods in their case and close the lid. This will automatically power them down and initiate charging. The AirPods case is designed to hold multiple full charges, allowing you to recharge your AirPods while on the move.
For consistent charging and readiness, always return your AirPods to the case when they are not in use.

Way 2: Charge the AirPods or AirPods Pro case
You have two main options for charging the case, depending on whether you have a standard charging case or a wireless charging case.
Charging with a Cable (Standard Charging Case)
Connect the Lightning to USB cable that came with your AirPods to the Lightning connector on the case.
Connect the other end of the cable to a USB charger or a USB port on a computer (The computer must be on).
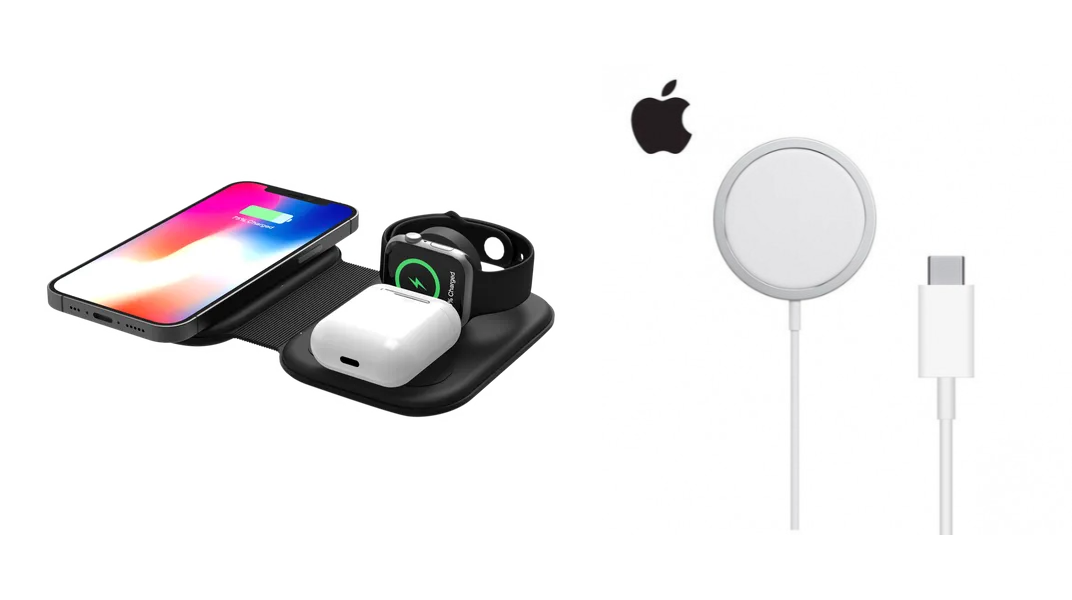
Charging Wirelessly (Wireless Charging Case or AirPods Pro)
This method works for AirPods (2nd generation), AirPods (3rd generation) with a wireless charging case, or AirPods Pro (all generations).
Place the case with your AirPods inside on a Qi-compatible wireless charging mat or a MagSafe wireless charger.
Make sure the status light is facing up and the lid is closed.
The light will indicate that your AirPods are charging. If not, reposition the case on the mat.
Turn off charging case sounds
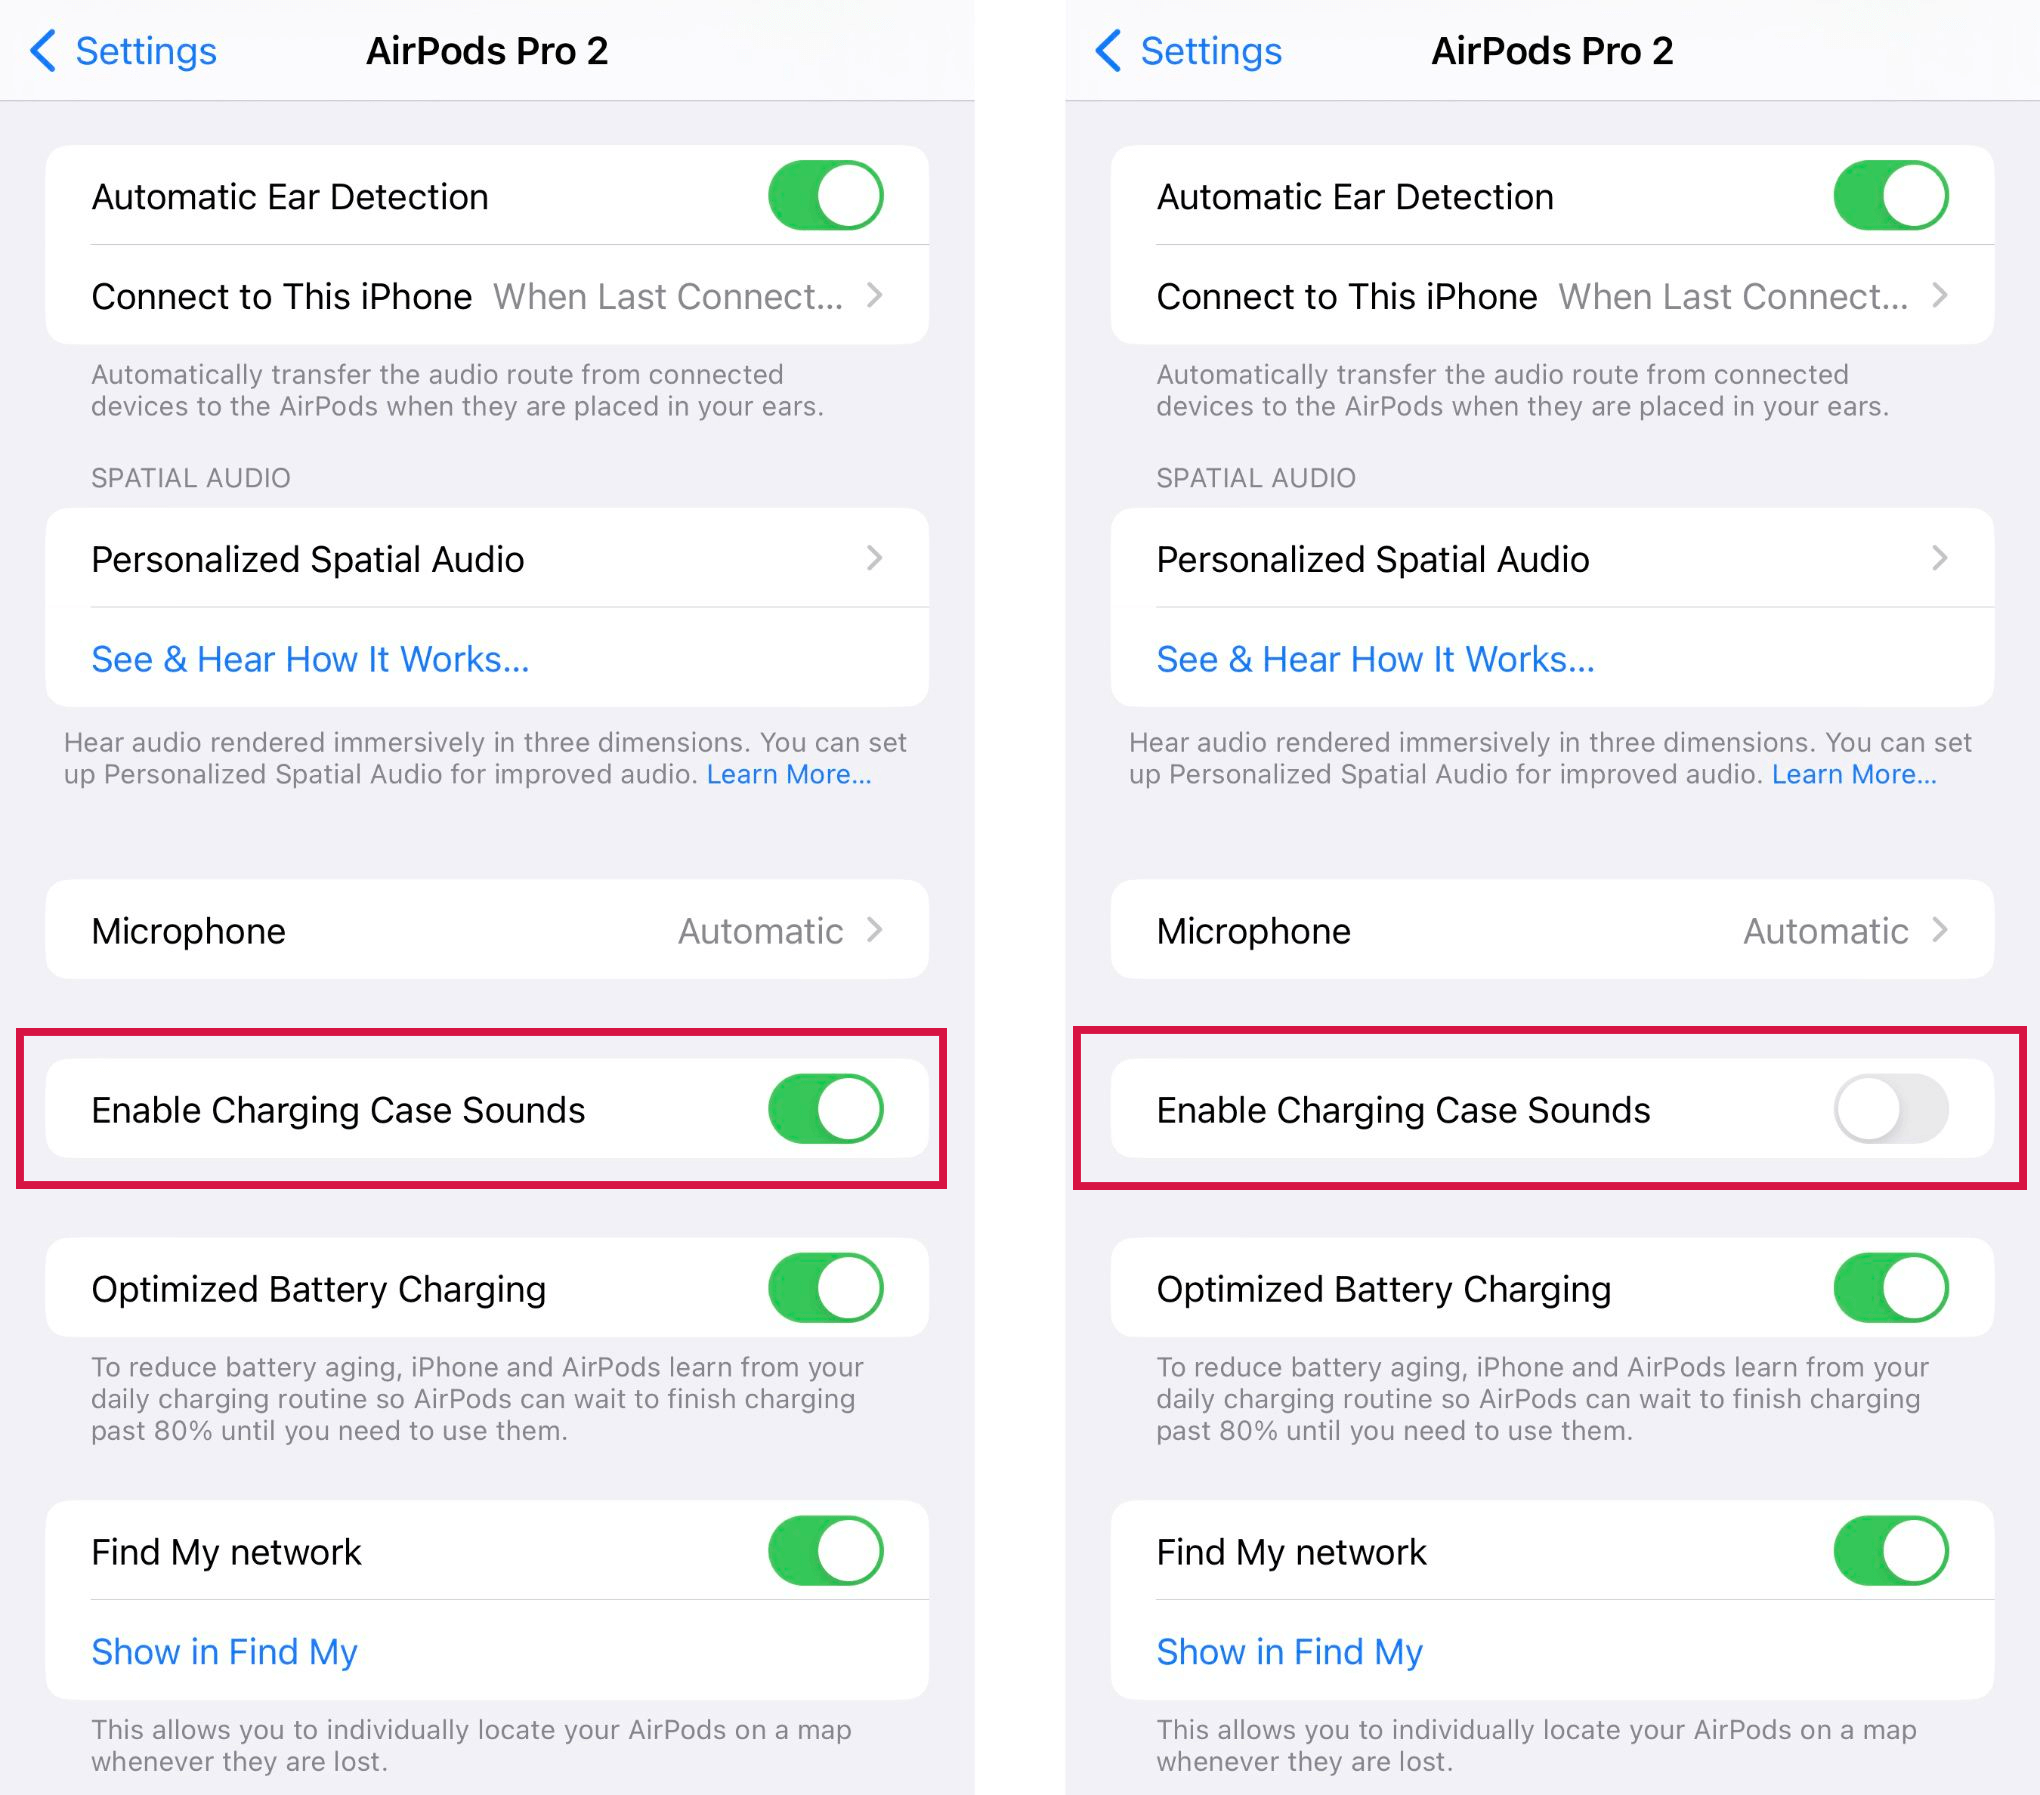
For the AirPods Pro (2nd generation) with a MagSafe Charging Case (Lightning or USB-C), you'll hear a sound when the case starts charging or if the battery is low. To turn off the sound, follow these steps:
Put your AirPods in your ears and ensure they're connected to your iPhone, iPad, or iPod touch.
Tap the name of your AirPods in Settings.
Turn off Enable Charging Case Sounds.
Charge AirPods Max
Find the Lightning port on your AirPods Max, usually located at the bottom of one of the ear cups.
Insert the Lightning end of the cable into the port.
Attach the other end of the cable to a USB charger or a USB port on your computer (The computer must be on).
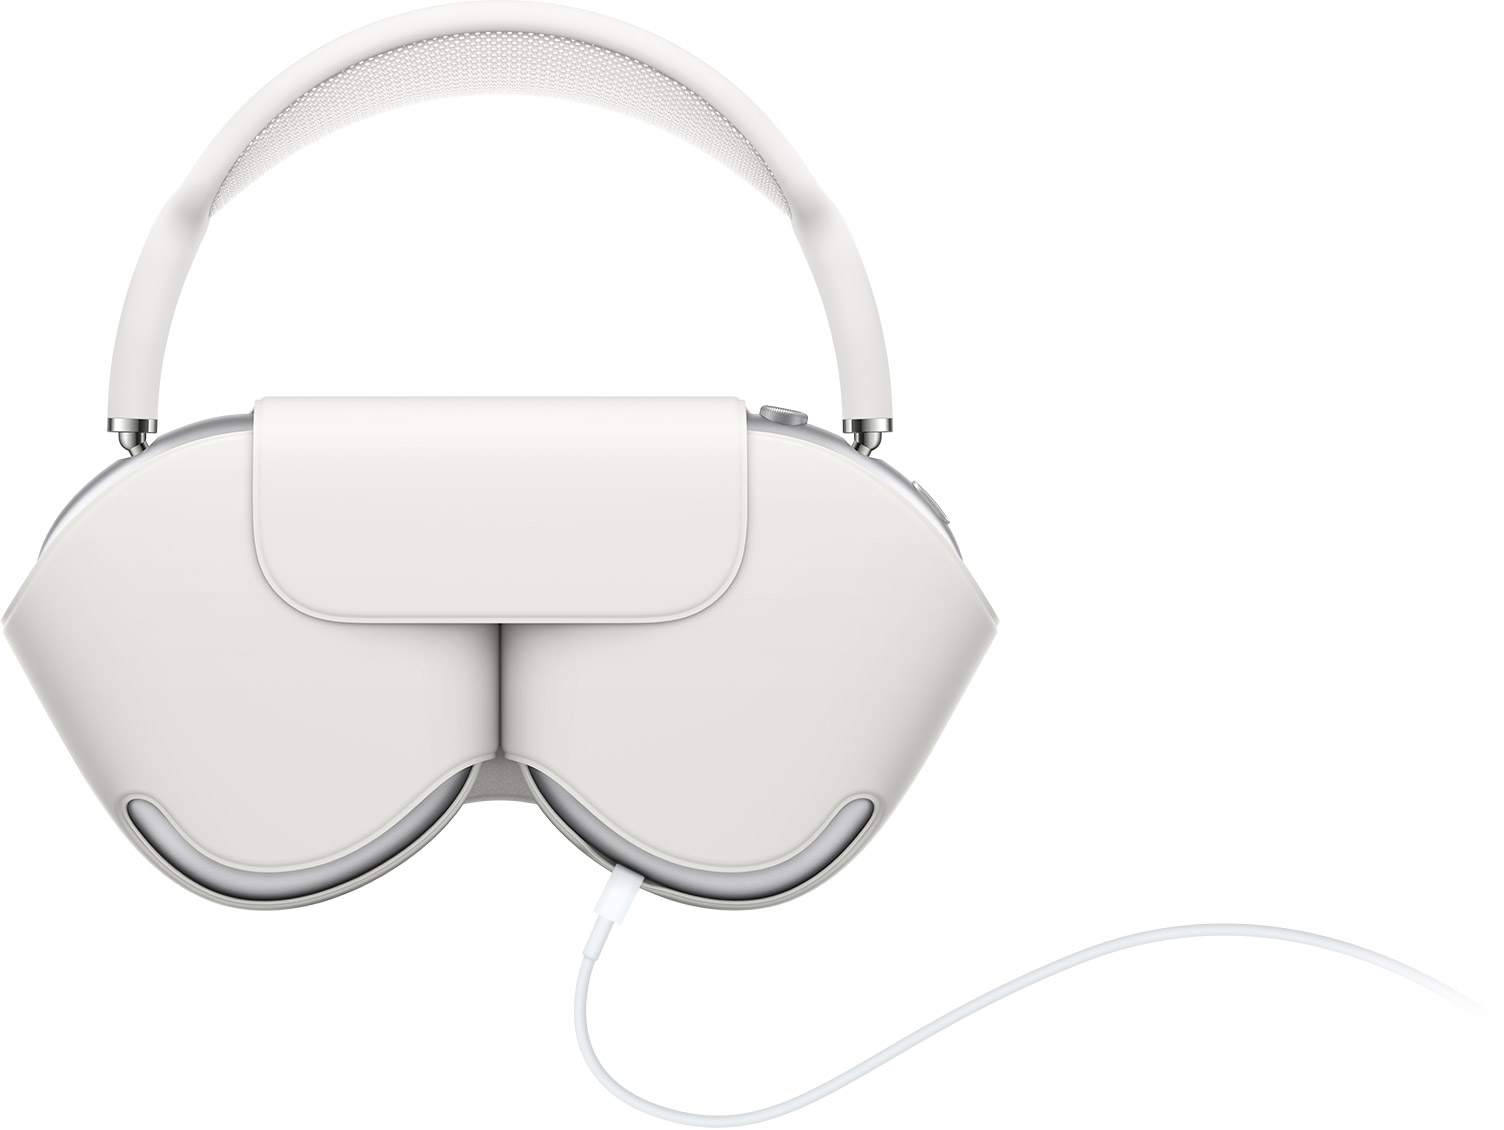
For charging AirPods Max in the Smart Case, align the case's cutout with the headphones' Lightning port.
To save battery, put AirPods Max in the Smart Case when not using them.
Learn about the status light
MagSafe Charging Case: the status light is on the front of the case.
Wireless Charging Case: the status light is on the front of the case.
Lightning Charging Case for AirPods (1st and 2nd generation): the status light in your charging case sits between the spaces for your AirPods.
Lightning Charging Case for AirPods (3rd generation): the status light is on the front of the case.

When AirPods are inside the case with the lid open, the light indicates their charging status.
If the AirPods are not in the case, the light shows the case's charging status.
Green Light: Full charge
Amber Light: Less than a full charge remains.
If no light appears, you may need to charge your AirPods before you can use them again.
The light stays on for 8 seconds when the case is connected to a charger or placed on a MagSafe or Qi-certified charging mat.
Flashing White: AirPods are ready to set up with a device.
Flashing Amber: You may need to set up your AirPods again.
Check the battery percentage
To check the battery percentage of your AirPods, you have several options with your iPhone, iPad, iPod touch, or Mac:
On your iPhone, iPad or iPod touch
Direct Method: Open your AirPods case with the AirPods inside and hold it near your device. The charge status will appear after a few seconds.
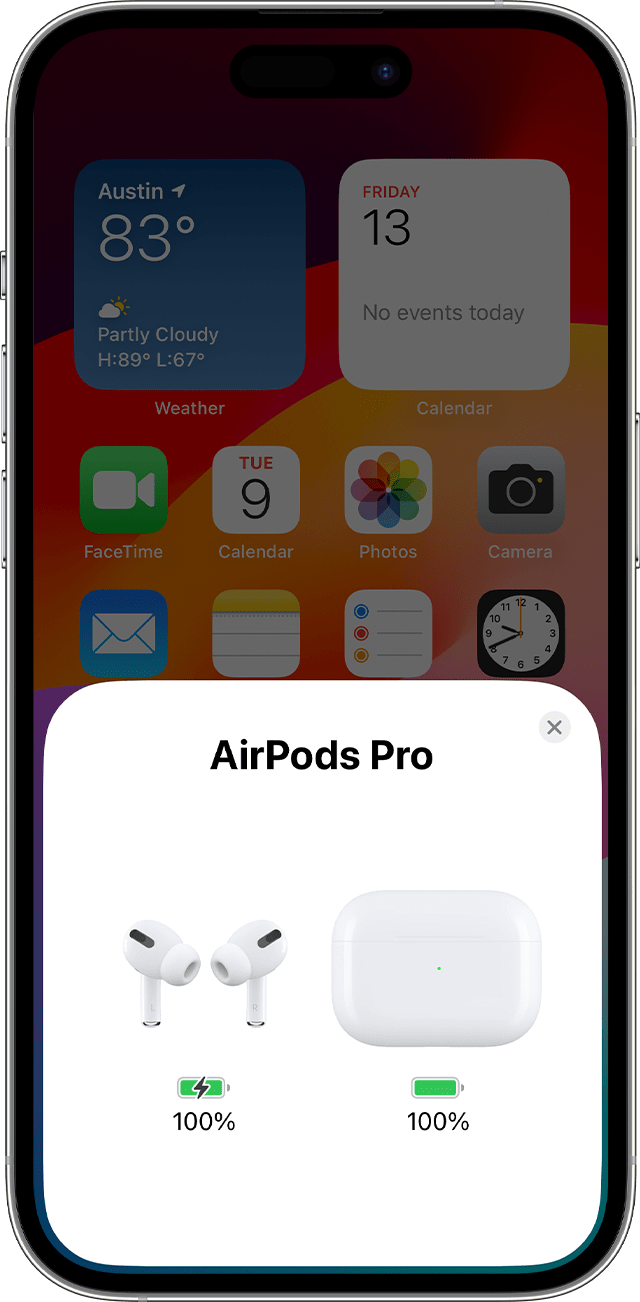
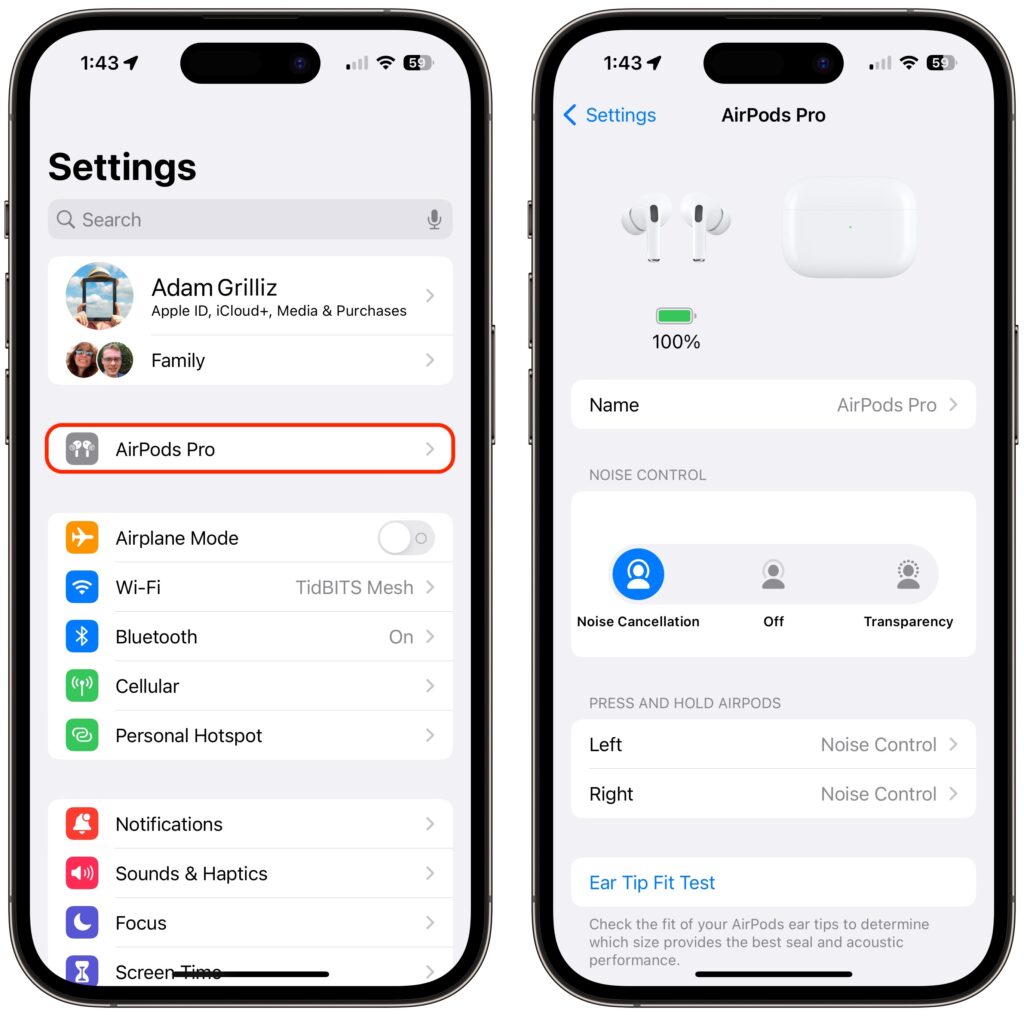
Settings Menu: When the AirPods are connected, navigate to Settings, then select your AirPods at the top of the screen to view their charge status.
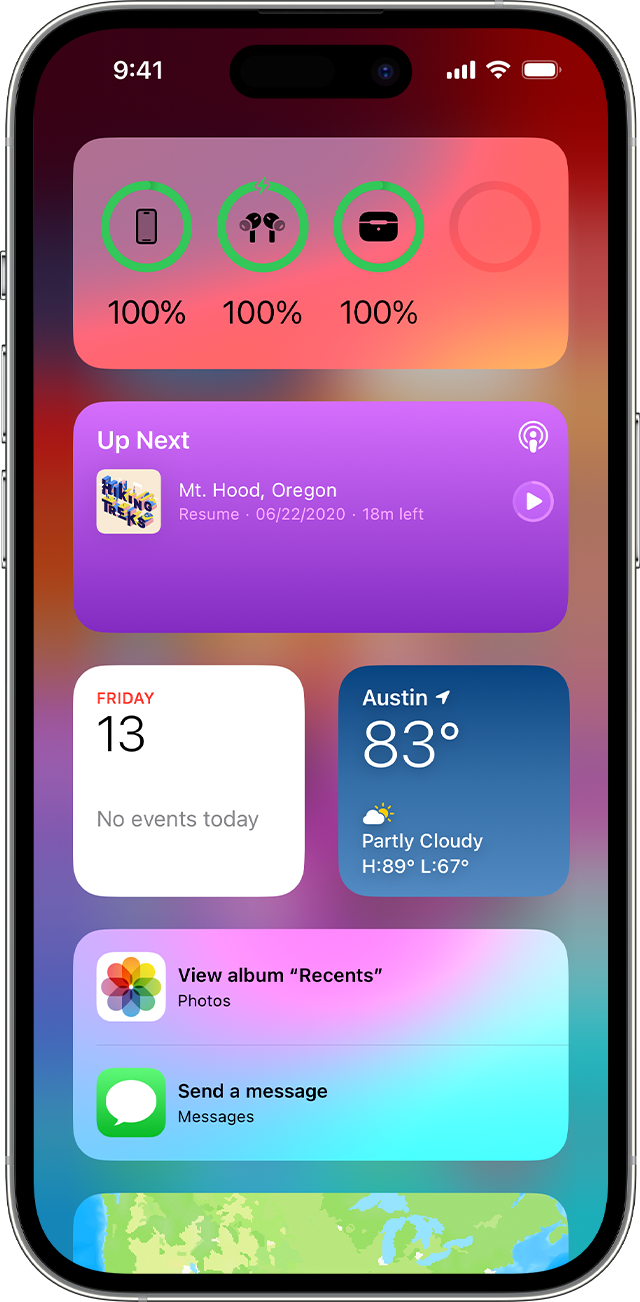
Using Widgets: Add a widget to the Lock Screen, Home Screen, or Today View of your iPhone or iPad. This allows for quick battery checks.
Note: The case's charge level only shows when at least one AirPod is inside the case.
On your Mac
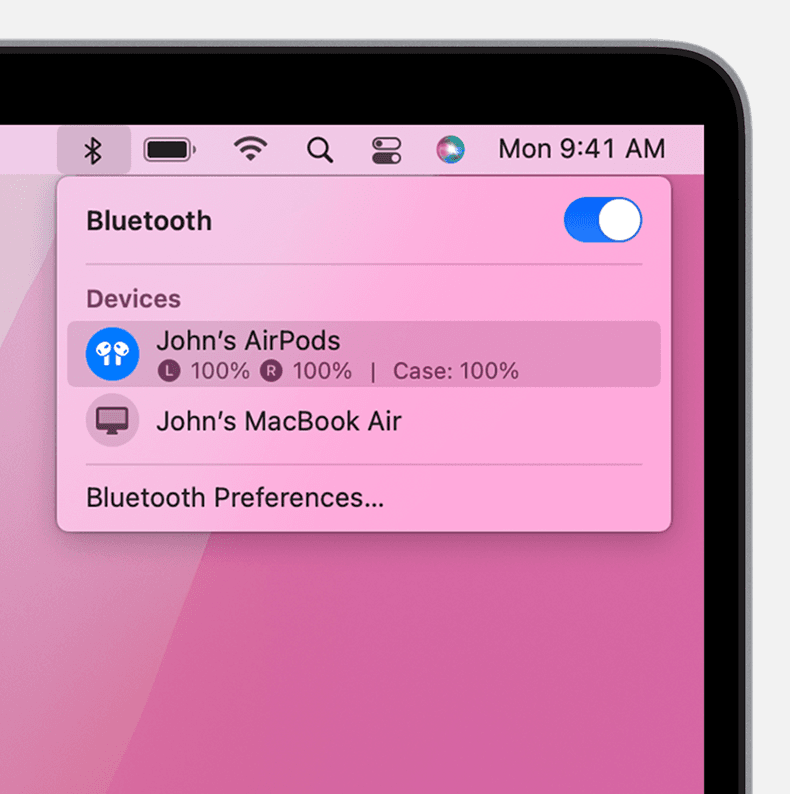
Open the lid or take your AirPods out of the case.
Click the Bluetooth icon in the menu bar.
Hover the pointer over your AirPods to see their battery status in the menu.
Find out about battery life
When your AirPods' battery level is running low, you'll receive notifications on your iPhone or iPad. These alerts appear when the battery reaches 20%, 10%, and 5%.
Additionally, you'll hear a tone in one or both AirPods to indicate a low battery level. The first tone occurs when the battery drops to 10%, and a second tone sounds shortly before the AirPods power off.
AirPods Pro (2nd Generation) Battery Performance
Overall: Up to 30 hours of listening or 24 hours of talk time with multiple case charges.
Single Charge: Up to 6 hours listening (5.5 hours with Spatial Audio and Head Tracking) or 4.5 hours talk time.
Quick Charge: 5 minutes in case gives 1 hour of listening or talk time.
AirPods (3rd Generation) Battery Performance
Overall: Up to 30 hours of listening or 20 hours of talk time with multiple case charges.
Single Charge: Up to 6 hours listening (5 hours with Spatial Audio) or 4 hours talk time.
Quick Charge: 5 minutes in case gives 1 hour of listening or talk time.
AirPods Pro (1st Generation) Battery Performance
Overall: More than 24 hours of listening or over 18 hours of talk time with multiple case charges.
Single Charge: Up to 4.5 hours listening or 3.5 hours talk time.
Quick Charge: 5 minutes in case gives 1 hour of listening or talk time.
AirPods (2nd Generation) Battery Performance
Overall: More than 24 hours of listening or up to 18 hours of talk time with multiple case charges.
Single Charge: Up to 5 hours listening or 3 hours talk time.
Quick Charge: 15 minutes in case gives up to 3 hours of listening or 2 hours of talk time.
AirPods Max Battery Performance
Battery Life: Up to 20 hours of listening, talk time, or movie playback with Active Noise Cancellation and Spatial Audio enabled.
Quick Charge: A 5-minute charge offers approximately 1.5 hours of listening time.
Stationary Mode: If left stationary for 5 minutes, AirPods Max enter a low-power mode to save battery. After 72 hours stationary without the Smart Case, they switch to a deeper power-saving mode, disabling Bluetooth and Find My feature.
Smart Case Use: Placing AirPods Max in the Smart Case immediately triggers a low-power mode. After 18 hours in the case, they shift to an ultra-low-power mode, turning off Bluetooth and Find My while maximizing battery life.
Understanding Optimized Battery Charging for AirPods Pro and AirPods (3rd Generation)
Optimized Battery Charging is engineered to extend your AirPods' battery life. It achieves this by learning your charging habits to minimize the duration your AirPods Pro or AirPods (3rd generation) stay at 100% charge. The system predicts when you'll use your AirPods and delays charging them beyond 80% until it anticipates you'll need them.
This feature, available for AirPods Pro and AirPods (3rd generation), requires an iPhone, iPad, or iPod touch. It is automatically enabled when you set up your AirPods on a device running iOS or iPadOS 15 or later.
If you wish to disable Optimized Battery Charging, simply open your AirPods case, go to Settings > Bluetooth on your device, tap the More Info button next to your AirPods in the device list, and turn off the feature.
Summary
This article has walked you through the whole process of charging AirPods, applicable to all generations. We've highlighted the practical steps for charging, how to monitor the battery status, and tips for maintaining battery health. Armed with this knowledge, you can now ensure your AirPods are always charged and ready for your listening needs.

