When users connect an iCloud account with their iPhone, the iPhone automatically have access to Find My iPhone. If users want to turn off Find My iPhone feature, it normally needs the user’s Apple ID and password.
This article will show you how to turn off Find My iPhone easily and quickly without a password.
Disable Find My iPhone for Any iOS Version via LockAway Software
Mobitrix LockAway- Unlock iPhone Passcode software is a professional tool that can help you turn off Find My iPhone without a password immediately.
It is the most efficient way to solve the problem, as LockAway software can be used in any iOS version, and it can disable the Find My iPhone feature with just a few steps. This tool has some great features that make it to be the best choice, these features include:
- It can turn off Find My iPhone without having the password.
- Takes a short time to turn off Find My iPhone.
- Very easy to use it.
- It fully supports iPhone 5s to iPhone 16 and iOS 18 and earlier versions.
To use LockAway follow these simple steps:
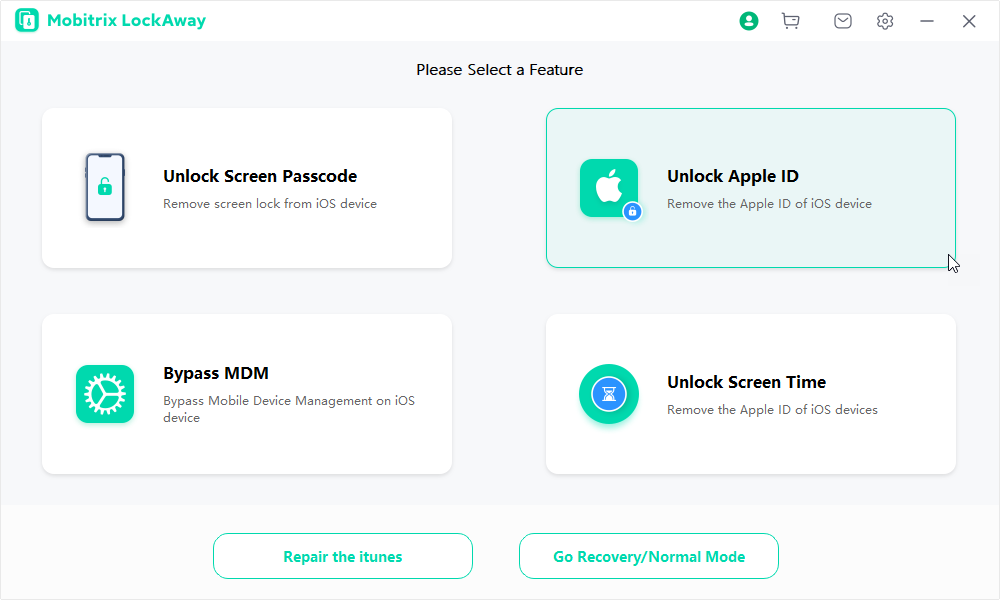
Step 1: Ensure first that LockAway is downloaded and installed on your computer, then open the software, connect your device to the computer and enable the Unlock Apple ID mode.

Mobitrix LockAway - Unlock Apple ID - Home
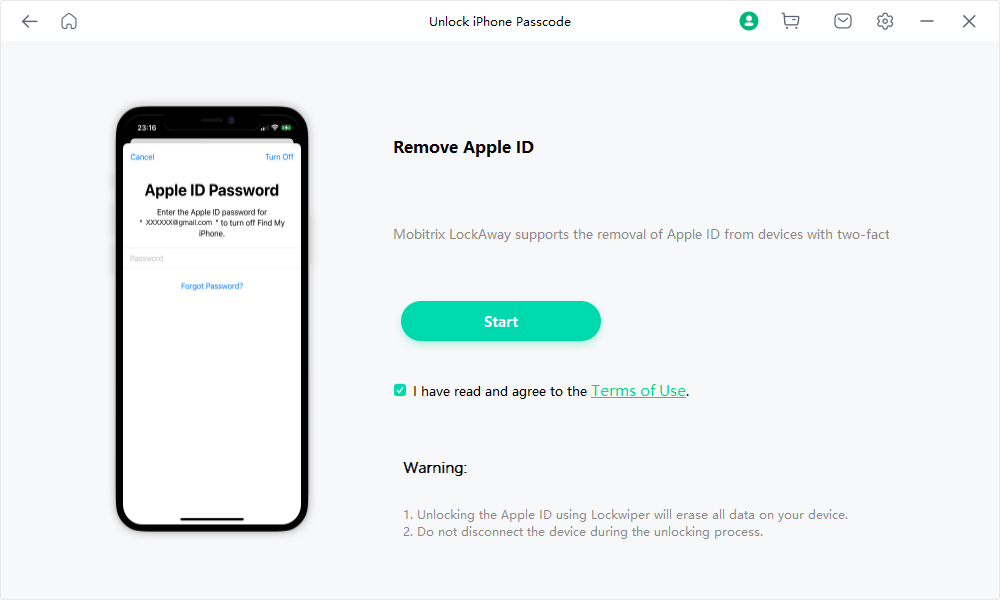
Step 2: Tap on Start to Remove to initiate the process of removing your Apple ID.

Mobitrix LockAway - Unlock Apple ID - Click Start to Remove
Step 3: Allow the process to complete.
With the above steps, you will be able to turn off Find My iPhone easily.
Disable Find My iPhone for iOS 12 via Settings

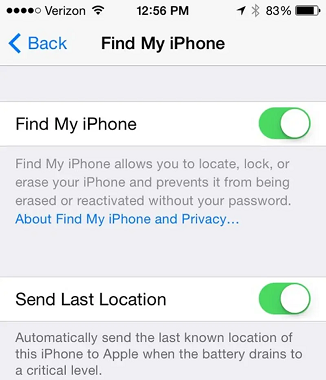
Find My iPhone in Settings
If you are using iOS 12, you can easily turn off "Find My iPhone" without using your password. The steps below will guide you on how to do that:
Step 1: Navigate to Settings on your iPhone then select iCloud.
Step 2: You will be asked for your password on the next screen, just enter any random number and tap on Done.
Step 3: You will get a notification that you have entered the wrong password, select OK and click on cancel.
Step 4: iCloud will be opened again, go to the account and delete the description. On the main section of the iCloud page that appears you will notice that Find My iPhone has been turned off.
Disable Find My iPhone for iOS 8 to iOS 10
Method 1: DNS Bypass

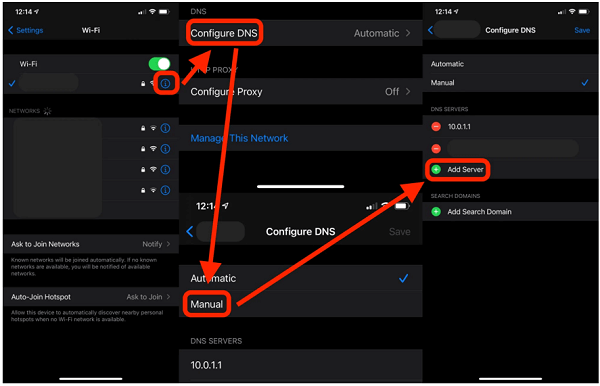
Remove Activation Lock via DNS
A user can easily turn off Find My iPhone by use of DNS Bypass. With this method, any user with iOS 8 to iOS 10 can use this method. Some of the features of this method include:
It is completely free to use meaning you don’t encounter any charges.
It is very easy to use.
It can bypass iCloud Activation temporarily enabling Find My iPhone to be turned off.
It works in a simple way, whenever iOS devices are connected to the Apple servers, they perform different operations such as updating Find my iPhone.
Therefore, DNS Bypass prevents your iPhone from authenticating your iCloud account and communicating with Find My iPhone, thereby, it makes it ineffective and disables it.
Steps for DNS bypass:
Step 1: Go to the menu on your screen then choose your country and language.
Step 2: You will be directed to the Wi-Fi settings where you will select the network to connect to. Search for an icon with the letter “i” alongside the network, if the icon is not found then go to Home > More > Wi-Fi settings and look for it.
Step 3: After finding the icon select “Forget this Network” from connection and settings.
Step 4: Tap on the letter, key in the DNS server to continue.
Step 5: After entering the DNS server IP, click back. Turn on your Wi-Fi to discover networks and select the network to connect to.
Step 6: Don’t click on “Next Page” instead tap on the Back button and you will be taken to the iCloud bypass screen and you can try to turn off the feature.
This method can temporarily help you turn off the Find My iPhone feature without a password, but the downside that comes with it include:
- Restricted iPhone functionality, which is probably not what most users want.
- Not effective as it only blocks the DNS server temporarily.
- Only suitable for few iOS versions; iOS 8 to iOS 10.
- In case you restart your iPhone it will be turned on again
If you are looking for a one-and-done solution, then try the other methods that are mentioned in the article.
Method 2: iCloud account.
This method can help users who are using iOS 10 to disable the Find My iPhone feature, but this method will only work for iOS 10.
Steps for this are:
Step 1: Navigate to your iCloud account and then delete your current password.
Step 2: Key in any code and click OK.
Step 3: A pop-up message will notify you of the wrong password and ID, go ahead and click OK.
Step 4: On top of the screen click cancel and then click OK.
Step 5: The iCloud page will be displayed again tap on “Account”.
Step 6: Ensure you delete the description and hit OK.
Step 7: You will be redirected to the iCloud main page, once there you will notice that Find My iPhone feature is disabled.
Disable Find My iPhone for iOS 7
This is a straightforward method to disable the Find My iPhone feature by just deleting your account in your iPhone. However, it is not the method that can always work, only a handful of users will be able to take advantage of it.
If you find this method is not working for you, please try another method in this article.
Step 1: Navigate to the iCloud setting and click on “Delete account”.
Step 2: On this screen, you can disable “Find My iPhone”.
Step 3: You will be prompted to enter your password on the next screen but don’t provide it, instead turn off the iPhone.
Step 4: Turn it on and navigate to iCloud settings again.
Step 5: Tap on “Delete account” to disable the Find My iPhone feature.
Now the feature will be disabled without entering the password but this can only work for iOS 7.
To conclude, this article introduces a variety of methods to turn off Find My iPhone feature without using a password, LockAway is recommended to meet the needs of users because it is very simple and with only three steps you will be able to turn off Find My iPhone quickly.

