Accidental erasure or losing your iPhone are some of the most common causes of iPhone data loss. Fortunately, while these causes are inevitable, you can regain your data if you had a backup. Since losing your iPhone is unpredictable, regularly backing it up on your Mac guarantees that your data is safe and retrievable. Now, if you are pondering how to go about it, this guide holds everything you need to know. Let's dive in.
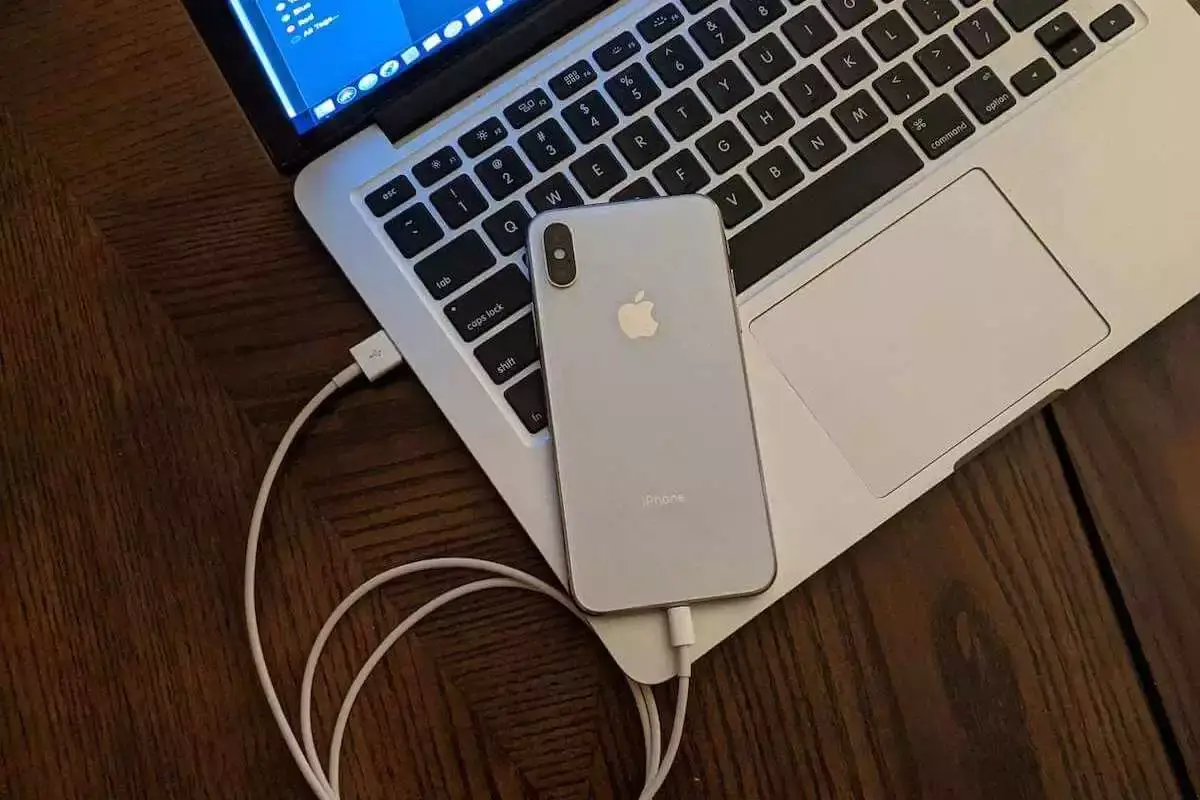
How to backup iPhone to Mac.
Part 1. The Most Convenient Way – Via Mobitrix Toolkit
Using a specialized application is the easiest and most time-saving way to back up your iPhone on Mac. For this purpose, Mobitrix Toolkit is the ideal tool. It is designed to specifically aid iPhone backup on Mac, amongst other iPhone operations. As a dedicated iOS tool, it offers a simple and few-clicks method to back up your iPhone's data securely.
Features
The following are features that make Mobitrix the best iPhone backup software:
- Security
Mobitrix guarantees 100% privacy protection when transferring your data. The software implements top-notch security standards.
- Selective backup and restore
You can select which data/files to back up on your Mac and which to leave out. Similarly, when restoring a backup, you don't have to restore everything.
- Easy navigation
This software features an easy-to-navigate interface that doesn't require any technical expertise to interact with.
- Device compatibility
Whether you use an iPhone 5s or the latest iPhone 14, this software will allow you to back it up on Mac.
- Money-back guarantee
Once you opt into the premium feature to access Mobitrix's full functionality and want out, you can request your fee back within 30 days.
- Quick backup
While an iTunes or iCloud backup can take hours or days, backing up via Mobitrix only takes a few minutes.
Steps:
- Download, install, and launch Mobitrix on your Mac.
- Click iPhone Backup and Restore > Backup .
- Select the file types you want to backup.
- Then click backup, your data will be backed up from your phone to Mac.
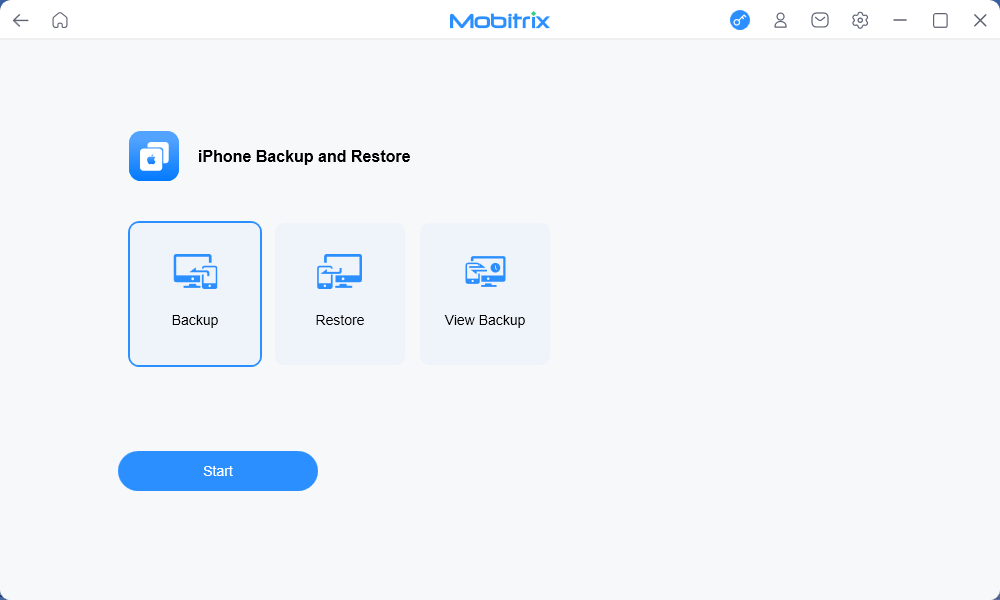
Click Mobitrix Toolkit Backup
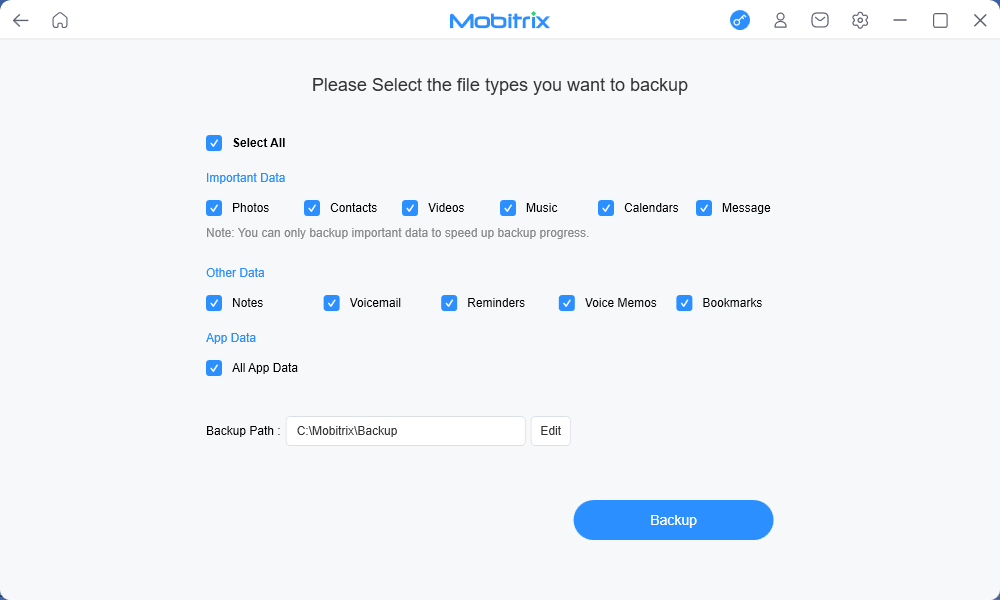
Select File Types
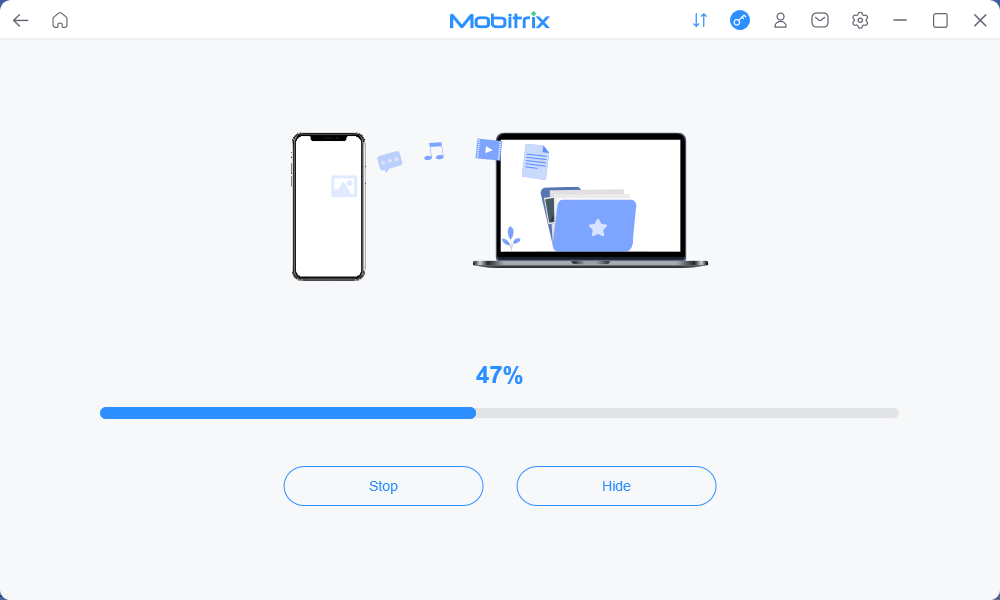
Click Backup
Give it a minute or two and your backup will be ready. You can now manage your precious data from the Mac safely.
Part 2. How to Back Up iPhone to Mac with iTunes/ Finder?
Although Apple is phasing out iTunes in favor of Finder, the software is still functional on macOS Mojave and earlier versions and enables you to back up your iPhone. Thus, it provides a convenient way to back up your iPhone data on Mac.
Steps Via iTunes
- Use a USB lightning cable to connect the iPhone to your Mac.
- Launch iTunes.
- Unlock your iPhone and tap 'Trust This Computer' when prompted.
- On your Mac, navigate to the upper left side of iTunes and click the iPhone icon.
- Click Summary, go to Backups, select This Computer, and hit Back Up Now.
- You can view the backup progress on the sidebar and will notice once the process is completed.
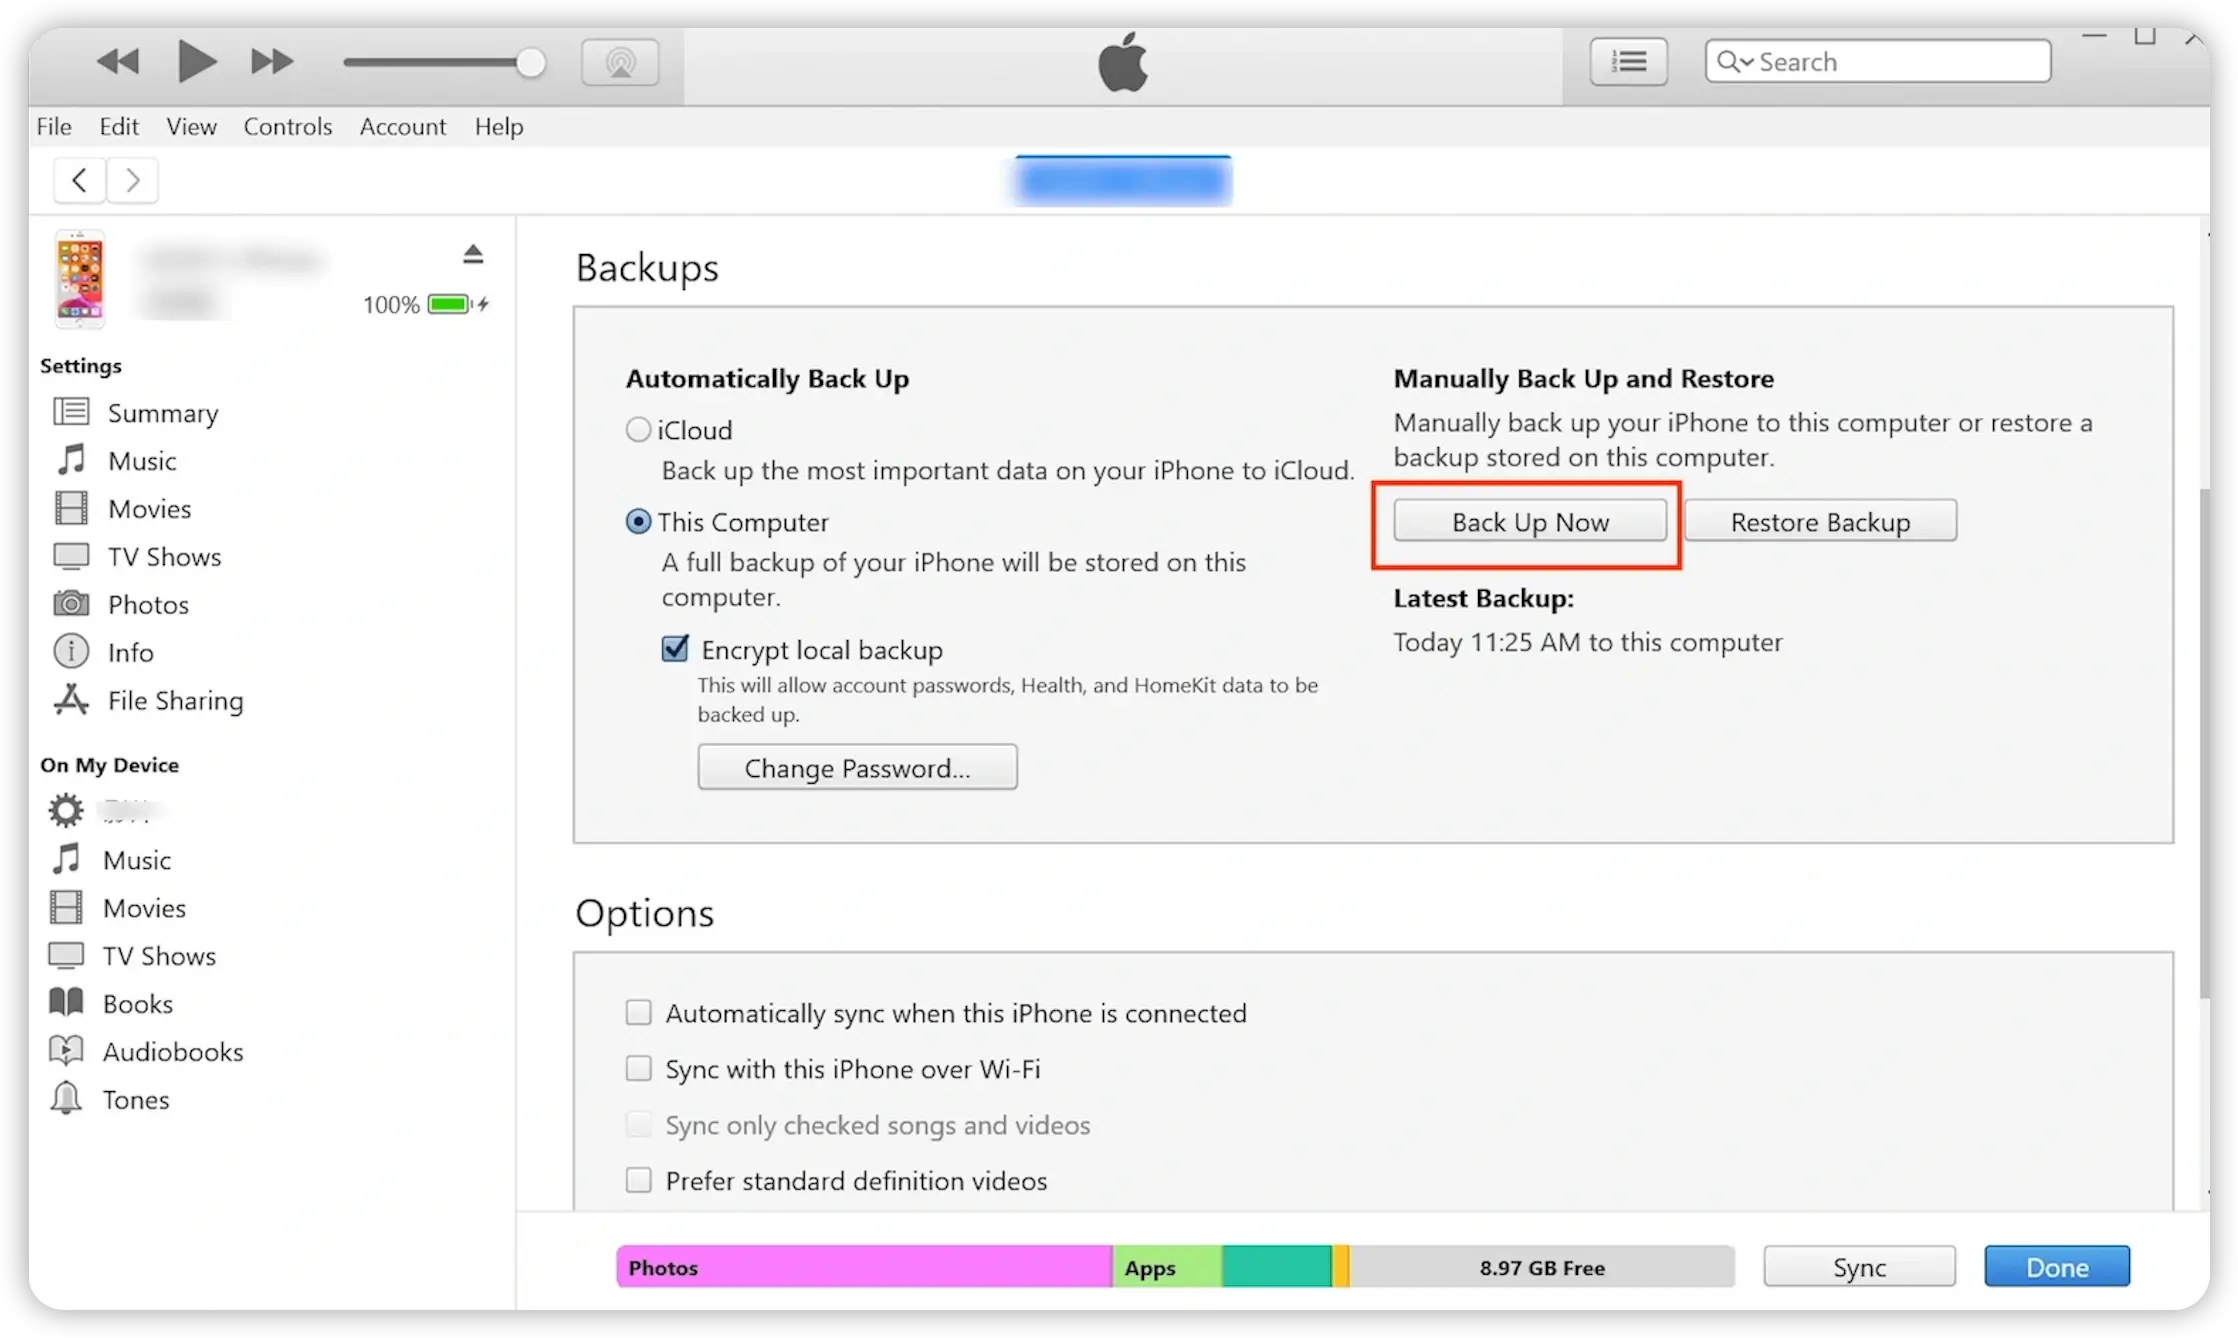
Back up iPhone to Mac via iTunes.
If your Mac is using macOS Catalina or later, you can use the Finder on your Mac to sync content between your Mac and your iPhone, iPad, or iPod touch. The experience is similar to using iTunes to sync in earlier versions of macOS.
Steps Via Finder
- Launch Finder and connect the iPhone to your Mac via a USB lighting cable.
- Unlock your iPhone and tap 'Trust This Computer' when prompted.
- Navigate to the left sidebar. Under the Locations tab, click on your iPhone's name.
- Your iPhone's information will be displayed on the computer.
- Go to the Backups section, and select Back up all of the data on your iPhone to this Mac.
- If you wish to protect your data by encrypting it, tick the checkbox next to Encrypt local backup and provide a password (You will need it to restore the backup).
- Click Back Up Now.
- Finder will display a backup progress bar at the bottom.
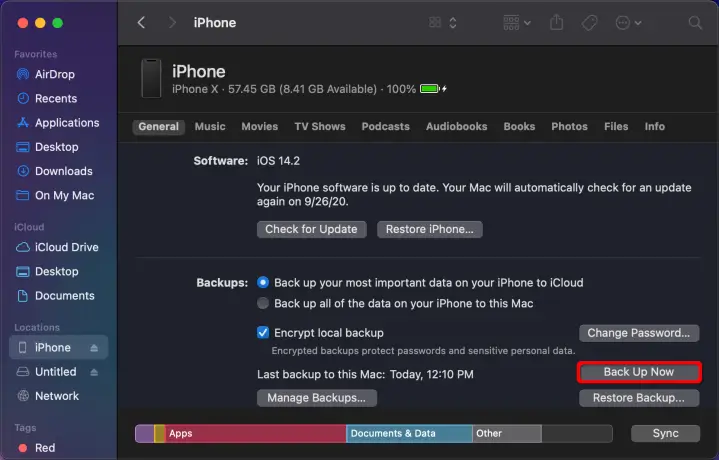
Back iPhone on Mac via Finder.
Part 3. How to Back Up iPhone to Mac Via iCloud?
If you find it difficult to connect your iPhone to your Mac in order to backup your iPhone using iTunes, you may prefer utilizing iCloud to backup your iPhone to your Mac without iTunes. Using iCloud, backing up an iPhone to a Mac is rather simple. The network's stability is the only thing you need to confirm. The procedures to backup an iPhone on a Mac using iCloud rather than iTunes are listed below.
Steps to backup iPhone to Mac with iCloud
- Connect your iPhone with Wi-Fi and make sure the network is stable;
- Tap Settings > iCloud. From here, you should enter your iCloud account or Apple ID. If you don't have one yet, you should register one first.
- Tap Storage > Backup and then wipe the iCloud Backup on. Tap Back Up Now.
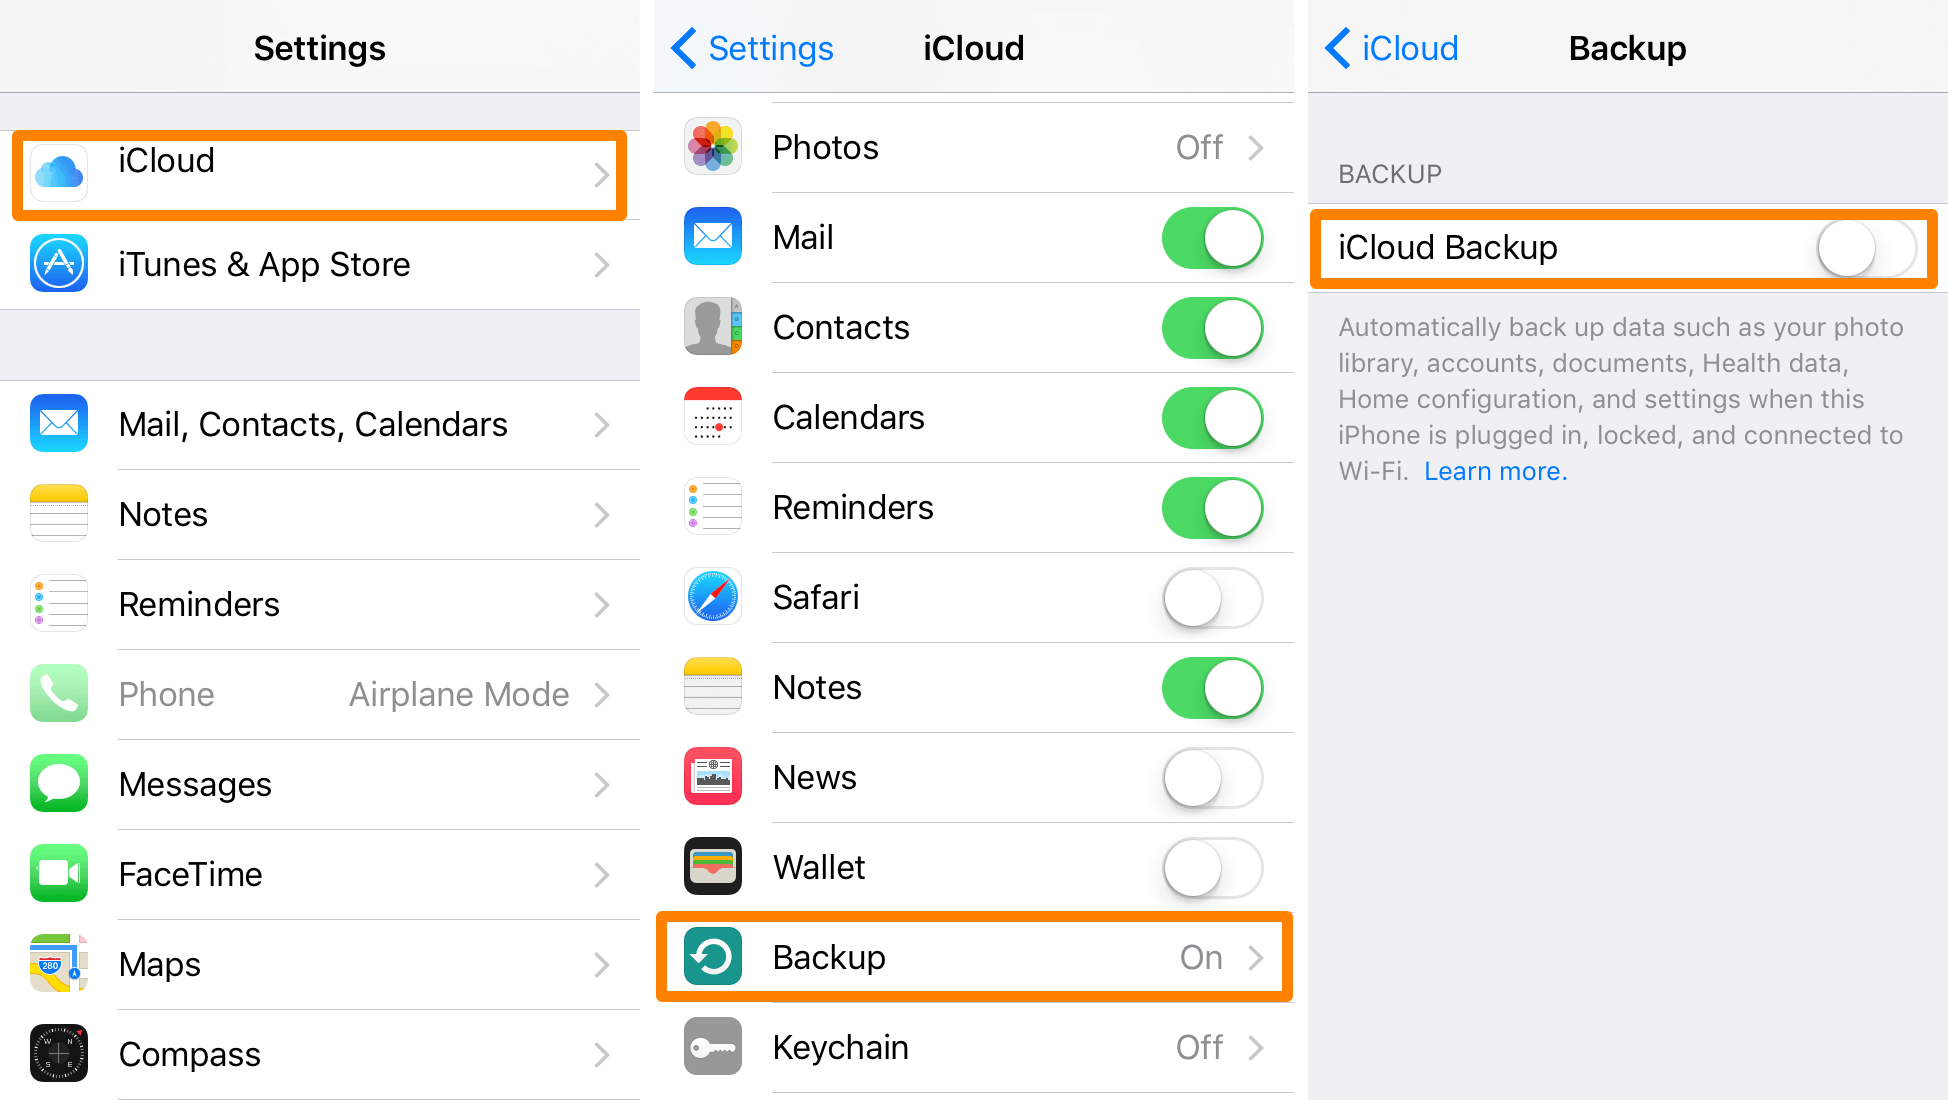
Backup iPhone to Mac With iCloud
Part 4. How to Back Up iPhone to Mac Without USB Cable (via Wifi)?
If you don't have a USB or USB-C cable, you can still back up your iPhone to your Mac via Wi-Fi.
Requirements:
- Connecting both the iPhone and Mac to the same Wi-Fi network
- Previously synced your iPhone to the computer via a USB cable
- If your Mac and iPhone are connected over Wi-Fi, go to the left sidebar and sync them or enable automatic sync.
Use the steps below to enable Wi-Fi syncing:
- Launch Finder, and select your iPhone under the Locations tab.
- Click General, then scroll down to Options.
- Tick the checkbox next to Show this iP
- Click Apply.
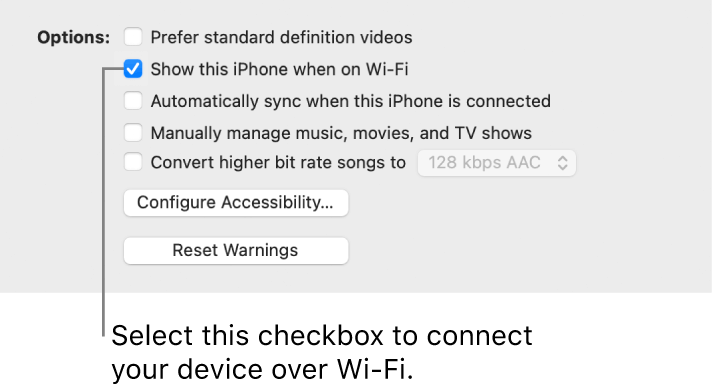
Back up iPhone to Mac over Wi-Fi.
FAQs
1. Why can't I back up my iPhone to Mac?
If your backup attempt is unsuccessful, you can try the following solutions to eliminate the problem:
- Inspect your USB cable for signs of damage. Alternatively, try a different one.
- Connect the USB or USB-C cable to a different port on the Mac.
- Check whether your macOS version is compatible with iTunes or Finder for iPhone backup.
- Ensure you unlock your iPhone and trust your Mac when prompted.
- Restart your Mac.
2. How Long Does Backing up an iPhone to a Mac Take?
An iPhone backup includes most of your device's iOS data and content, such as contacts, photos, browser bookmarks and history, calendar, and iMessage history. Thus, depending on the backup size, it can take up to 20-40 minutes. Wi-Fi backups also tend to be slower and take longer than USB cable backups.
3. How Do I Confirm If My iPhone Is Backing Up to Mac?
You can confirm your backups are available by locating them via Finder or iTunes, depending on which software you used.
For Finder:
- Open Finder and select your iPhone.
- Navigate to the General tab and click Manage Backups. You will see a list of your iPhone backups.
- Right-click on the specific backup you want, then select Show in Finder.
For iTunes:
- Launch iTunes, then click iTunes in the menu bar.
- Go to Preferences > Devices. You will see a list of your iPhone backups.
- Right-click on the specific backup you want, then select Show in Finder.
Alternatively, to view a list of available backups, click the magnifier icon in your Mac's menu bar, type in ~/Library/Application Support/MobileSync/Backup/, and hit Enter.
Summary
Evidently, there are multiple simple ways to back up your iPhone to your Mac. Once you implement this information, you shouldn't worry about losing your iPhone's data. Whatever happens to your iOS device, your photos, music, and other files will be stored and protected on your Mac.
As you back up the data, I recommend using Mobitrix since it is the fastest method. Although the others are effective, they are not time conscious and may have you waiting for hours. It also requires much fewer steps. Try Mobitrix Toolkit and secure your backups today.

