Guide in 5 Minutes: How to Use Files App on iPhone & iPad
In today's digital world, many iPhone and iPad users are surprisingly unaware of the potential lurking in the Files app, a hidden gem for managing documents and media.
This guide aims to unveil its capabilities, offering clear, step-by-step instructions on how to use the Files app effectively.
From organizing to editing and sharing files, this article will transform your understanding and usage of this powerful tool, making file management on your device a breeze. Let's dive in!
Introduction to the Files App
Before iOS 11, iPhone users faced difficulty managing and browsing files, as file access was restricted to the specific apps they originated from. This limitation spurred a need for a more comprehensive file management system.
In response, Apple's iOS 11 introduced the Files app, a transformative tool for iPhone and iPad users. It provided a central local and cloud-based file management platform, seamlessly integrating with services like Google Drive and Dropbox.
The Files app streamlines file interaction on iPhone and iPad, offering an efficient, user-friendly experience. It ensures that all documents and media are easily accessible, enhancing productivity and file organization.
Key Features of the Files App
Easy Access: Tap the Files icon on your Dock or Home screen to open files swiftly from anywhere.
External Drive Connectivity: Connect an external drive or SD card to your device to directly browse and manage these files.
File Organization with Tags: Use tags to neatly organize and locate files stored across different cloud providers and apps.
Network File Access: Effortlessly connect to a file server at work or your home PC using SMB protocol within the Files app.
Quick Access to Favorites: In the Browse view, you can pin your most-used folders for speedy access.
File Sharing via iCloud Drive: Share any file stored in iCloud Drive directly from the Files app by sending a link.
Types of Files Stored in the Files App
Overview of the Files App Tabs
The Files app on iPhone and iPad organizes your documents and media through three primary tabs: Recents, Shared, and Browse. Each tab serves a distinct purpose:
Recents Tab: This shows high-resolution thumbnails of your recently accessed files, making it easy to pick where you left off.
Shared Tab: Here, you'll find files that you have shared with others or that others have shared with you.
Browse Tab: This tab categorizes files into three areas: Locations, Favorites, and Tags, offering a structured view of your files. It's a versatile space for managing all your files, whether on your device, in the cloud, or on external drives and servers.
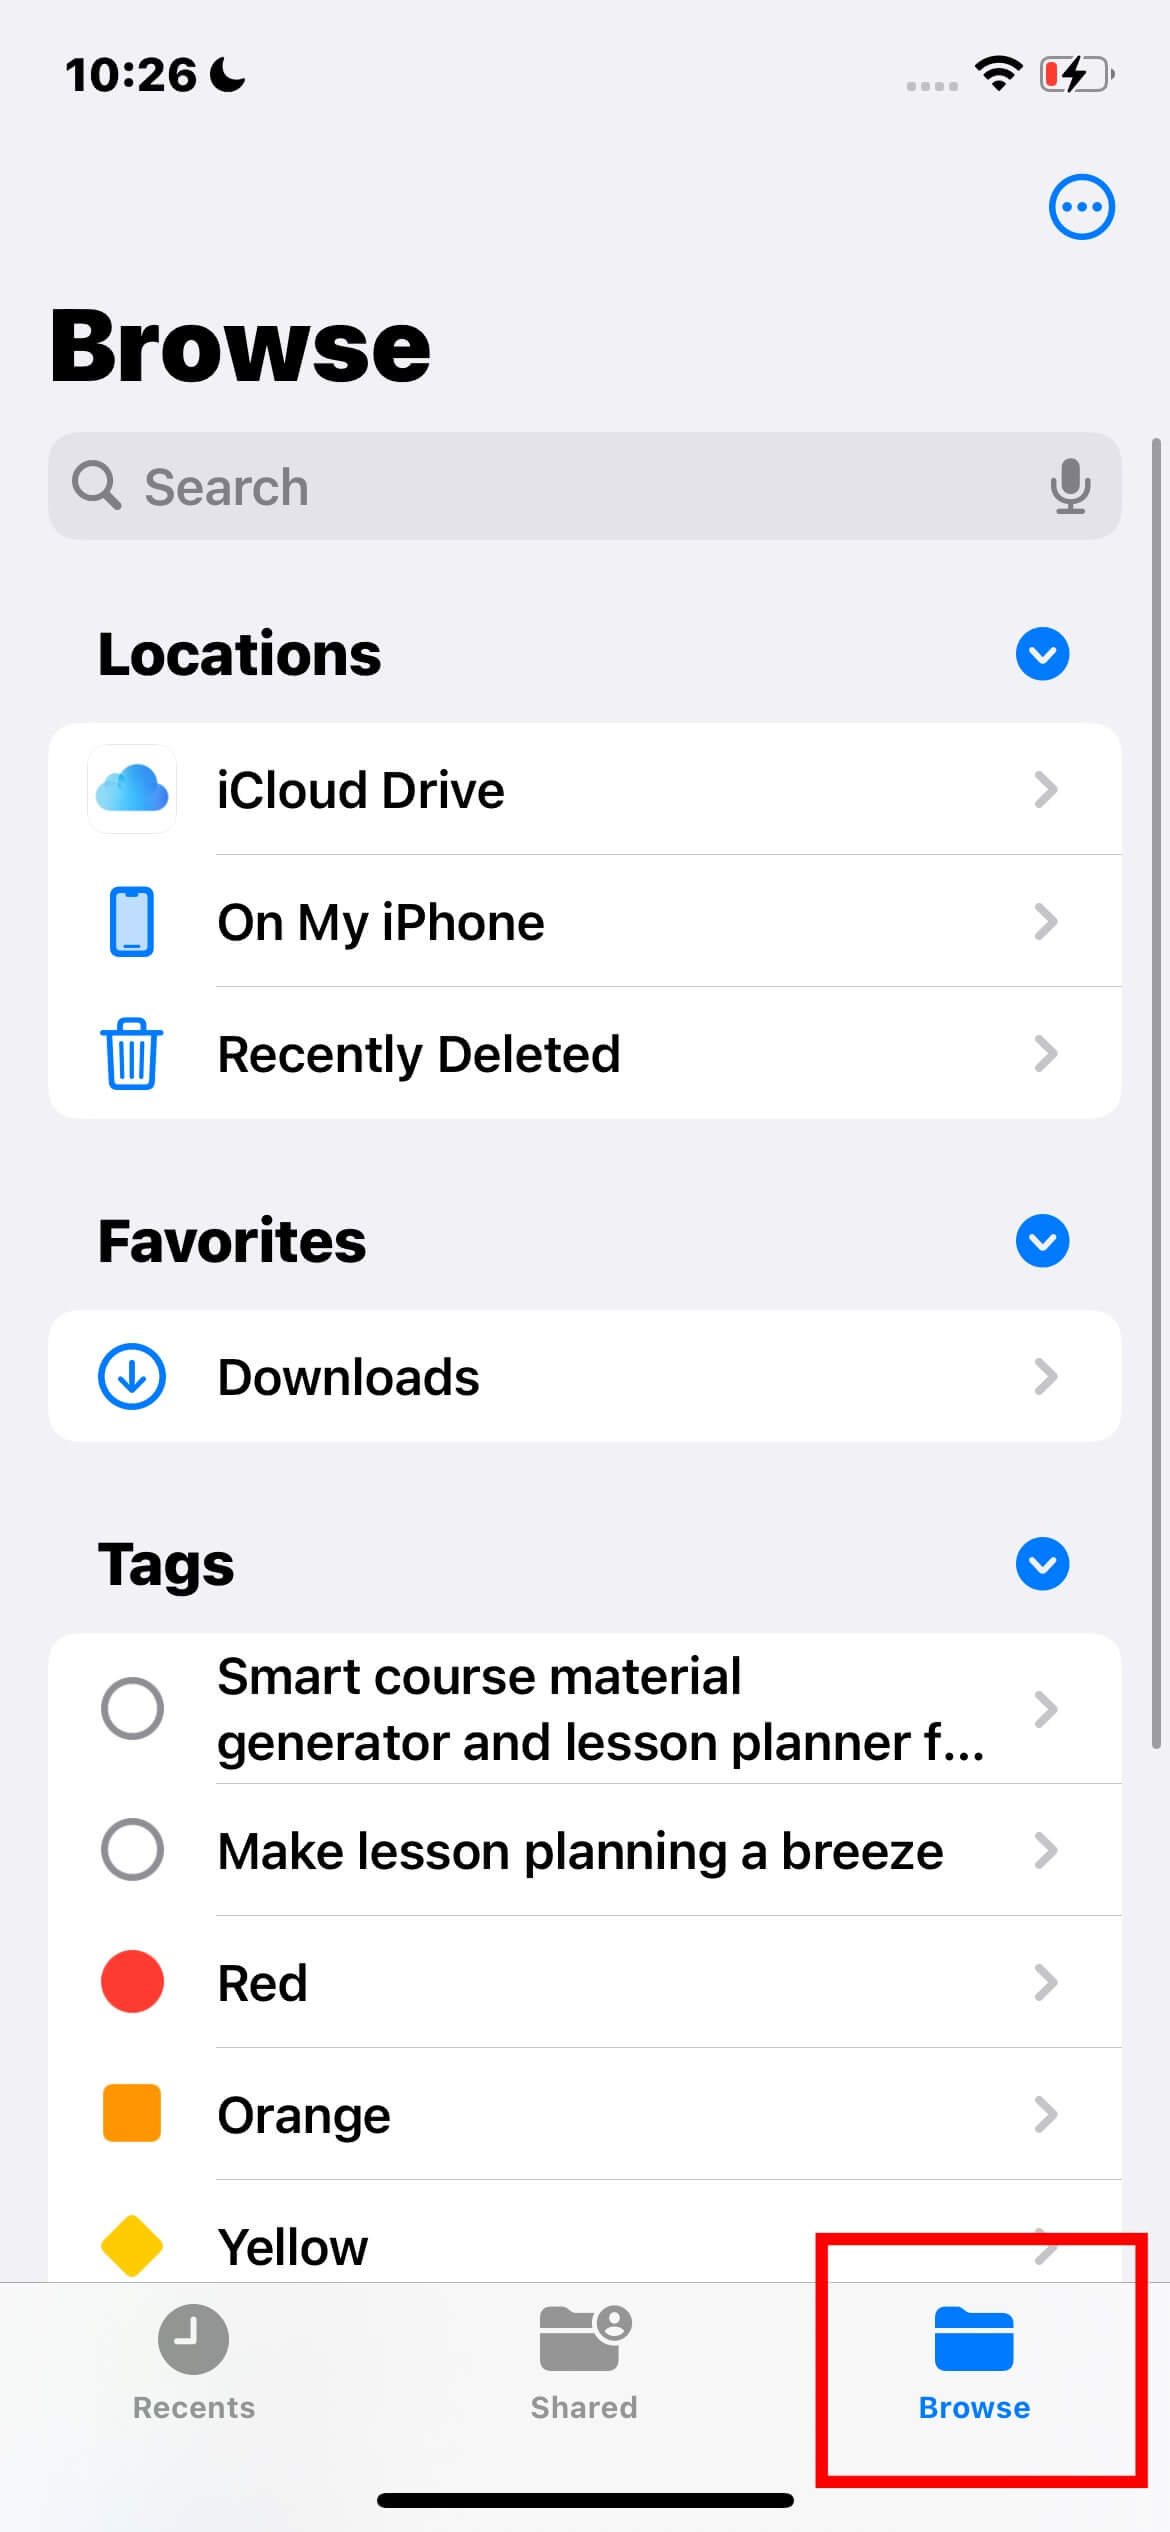
Understanding the Locations Section
Under the Locations section in the Browse tab, you'll encounter several vital areas:
On My iPhone/iPad
The "On My iPhone/iPad" section in the Files app is specifically designed for managing files stored directly on your device. This area primarily contains files from third-party apps essential for their functionality. As well as some downloaded files.
It's crucial to handle these files carefully, as deleting them might affect the operation of the associated apps. This section is ideal for accessing files that need to be readily available, independent of cloud storage.
iCloud Drive
iCloud Drive contains all the files you backed up. It is a comprehensive solution for storing, accessing, and editing files across all your Apple devices. It facilitates easy file synchronization, making documents available through the Files app on iOS devices or via iCloud.com on computers.
This integration includes automatic syncing of Desktop and Documents folders for Mac users, providing a unified and accessible file management system across platforms.
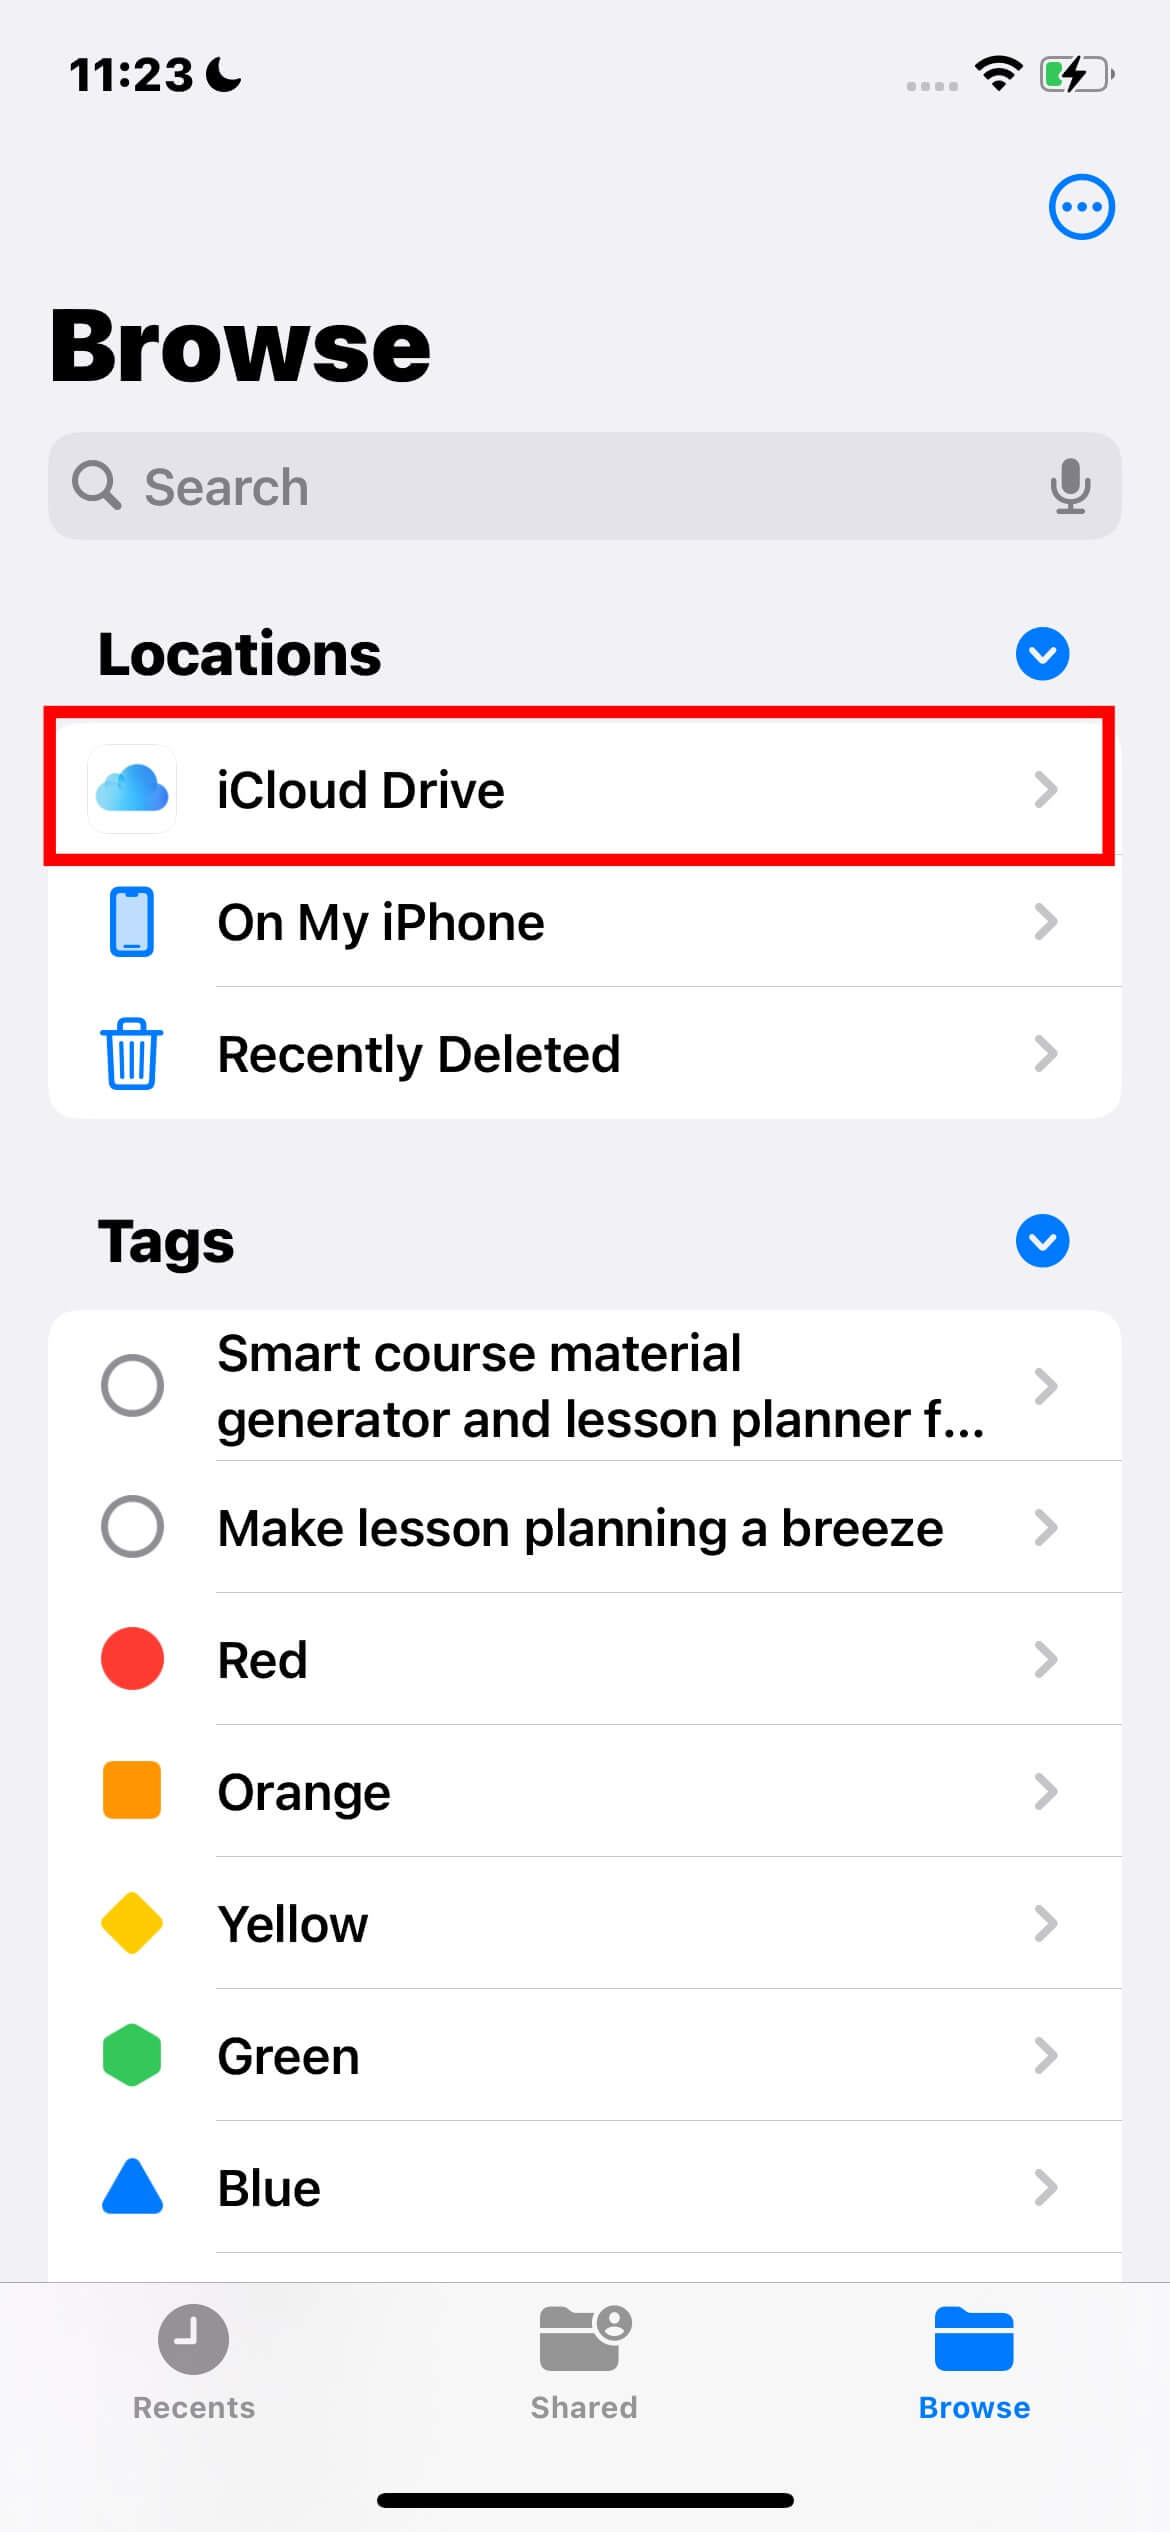
Recently Deleted
Files you delete from your iPhone or iCloud Drive appear here, remaining recoverable for 30 days before permanent deletion.
Notes:
The Files app does not contain your photo library. However, you can save photos to the Files app if needed. Also, the Files app does not support password-protected zip folders or directories.
Locating Files on Your iPhone or iPad Using the Files app
Accessing the Files App
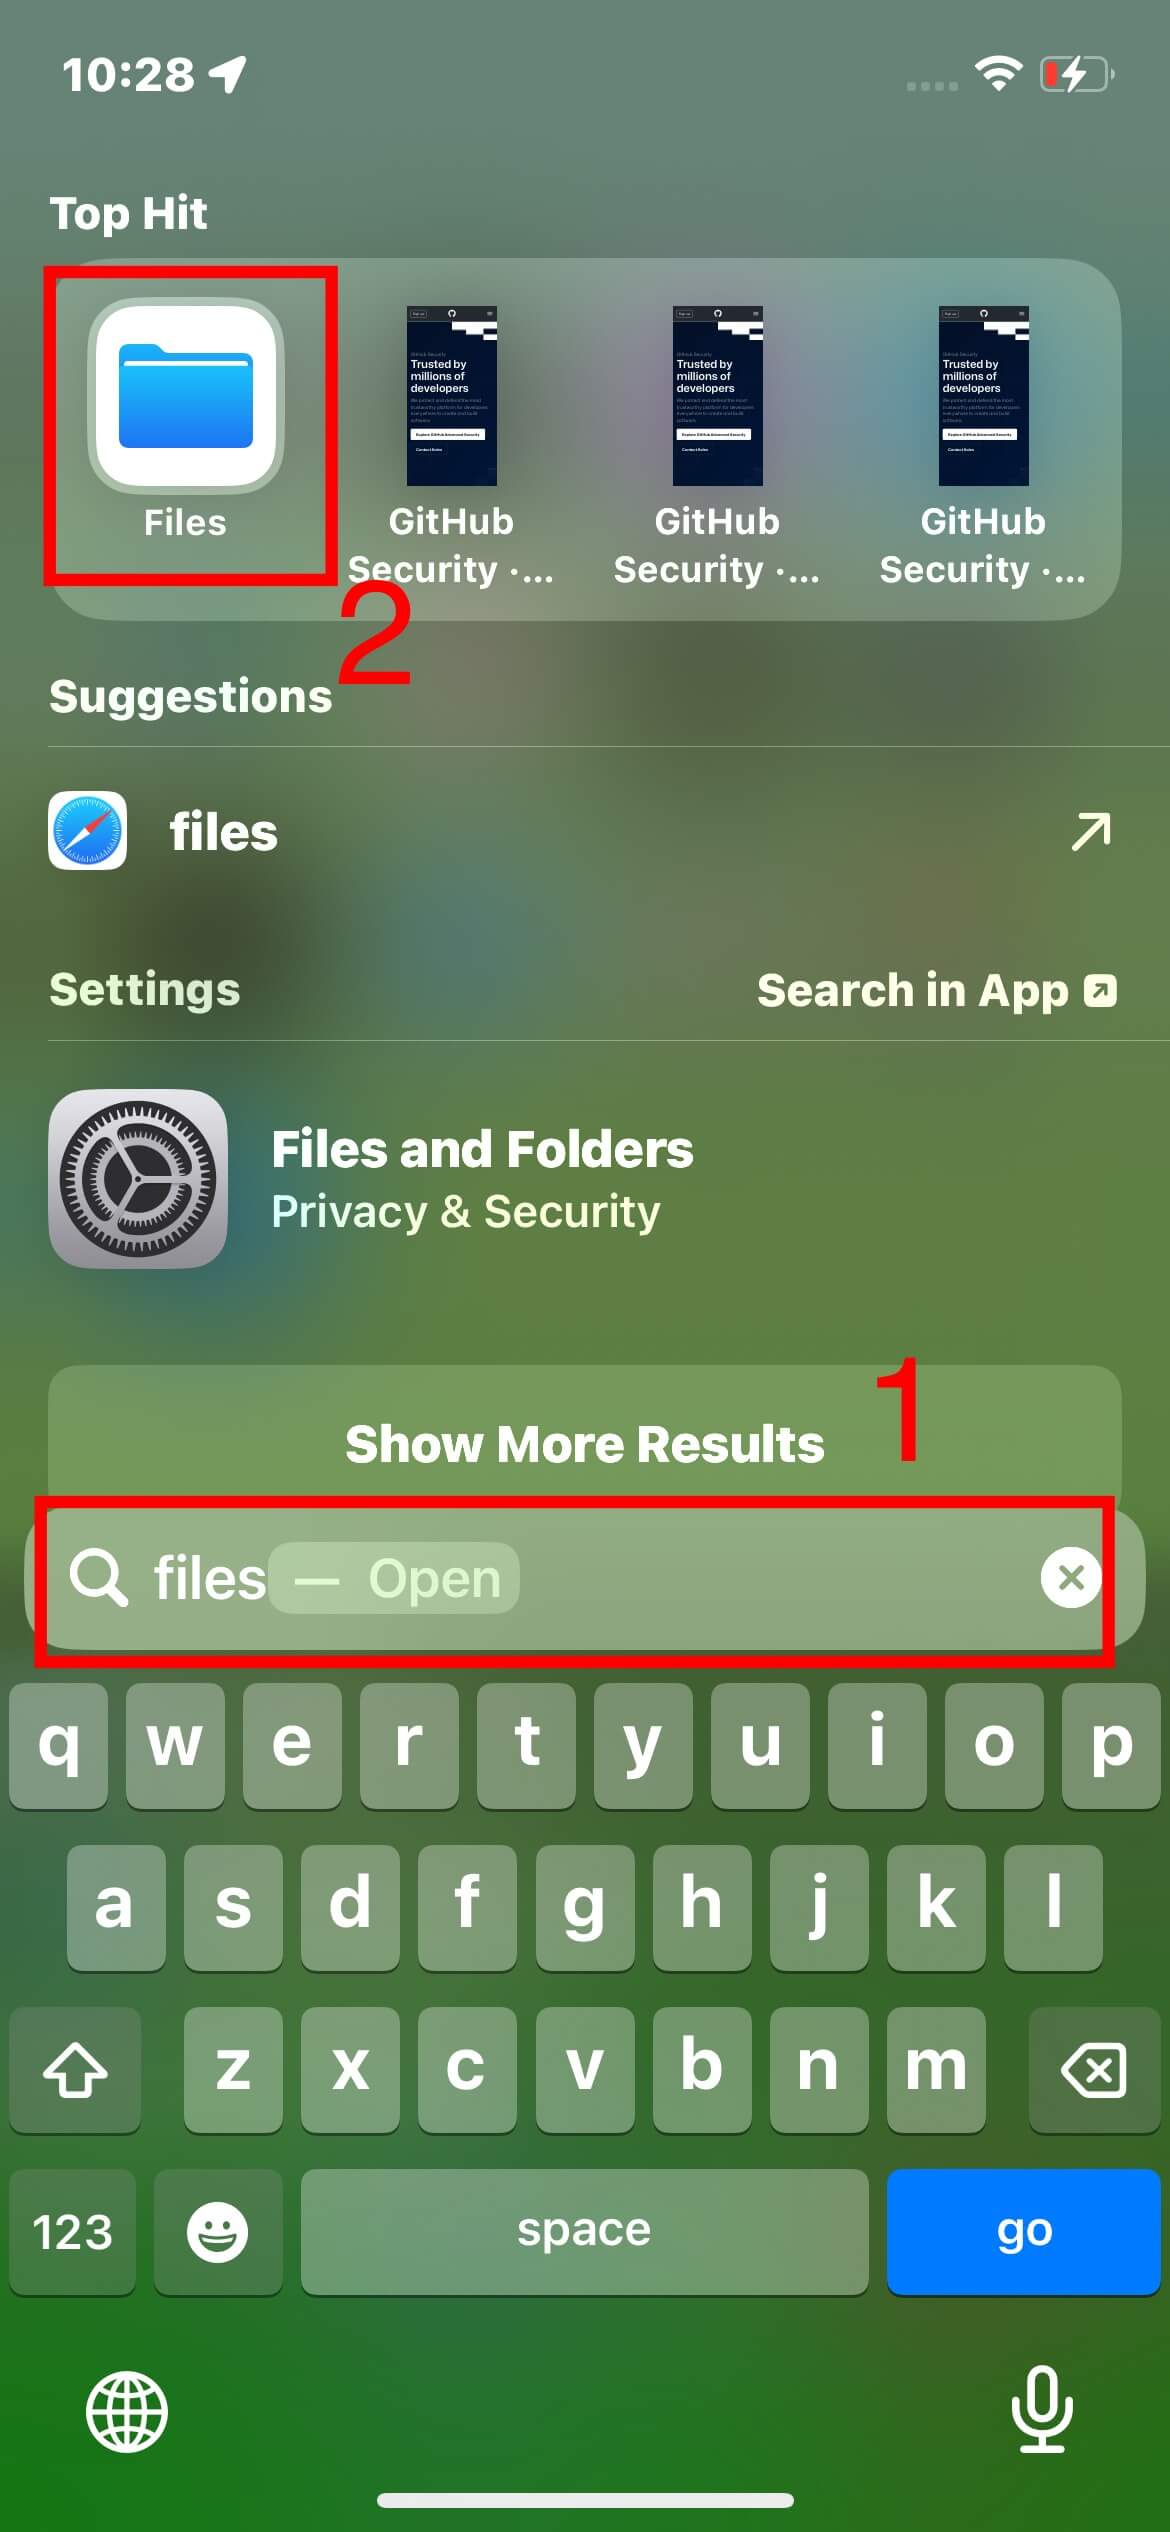
To begin using the Files app on your iPhone or iPad, first locate the app.
Look for the blue Files app icon on your Home Screen.
If it's not immediately visible, swipe on your Home Screen.
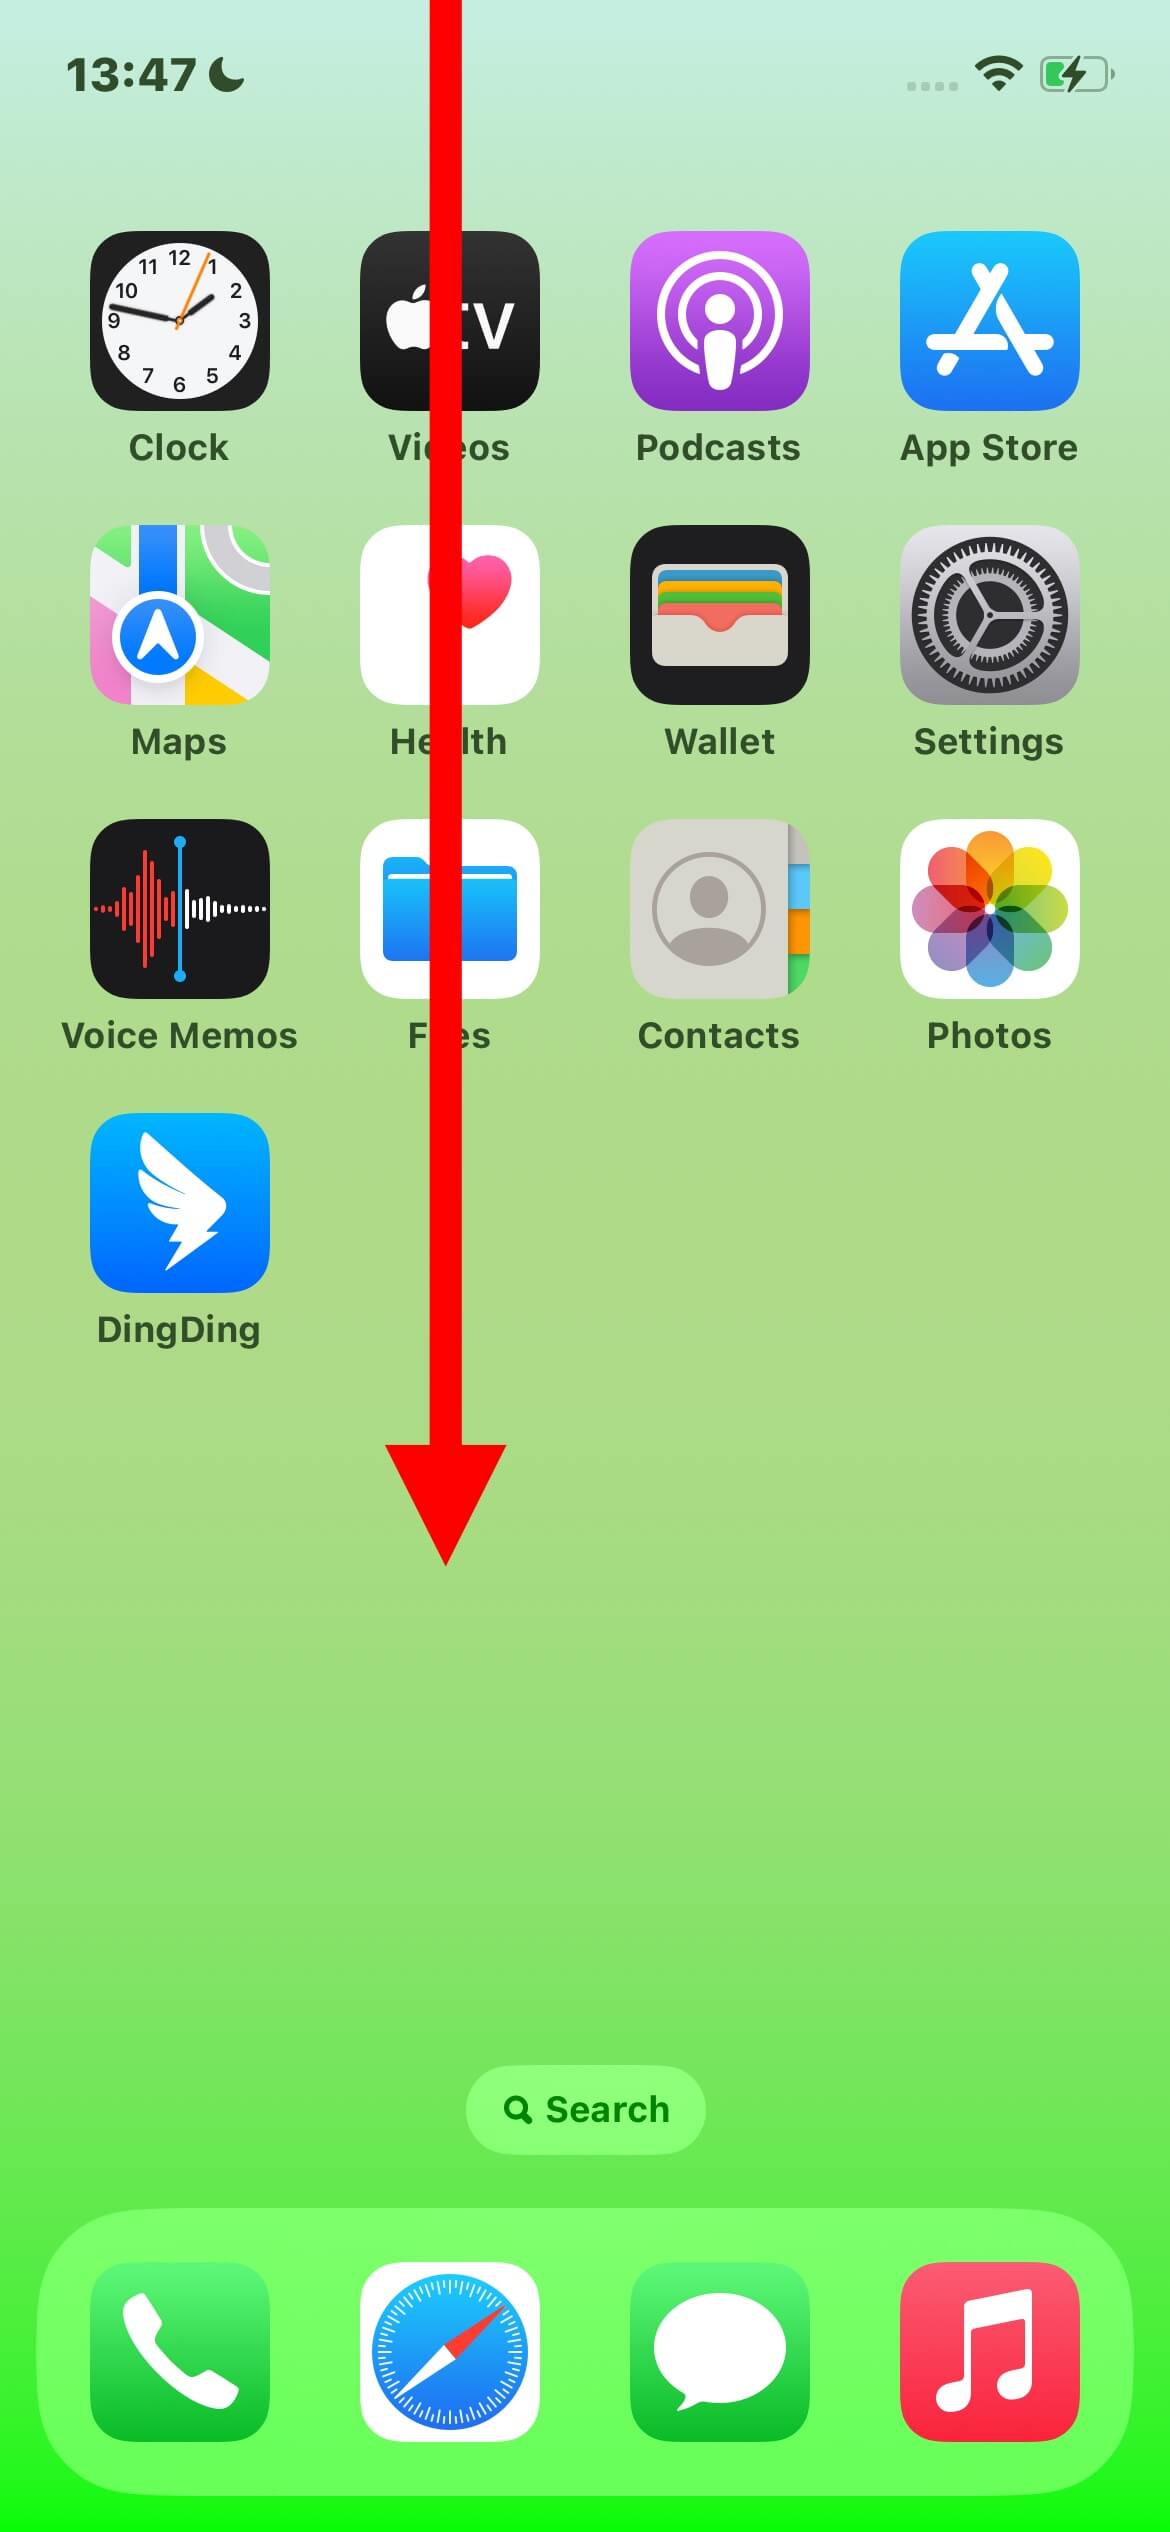
Use the search feature to find the Files app.
Steps to Find Files
Once you have opened the Files app, follow these steps to locate your files:
Launch the Files app on your iPhone or iPad.
Choose Your View:
Tap "Browse" at the bottom of the screen, then select an item from the Browse screen. If the Browse screen isn't displayed, tap "Browse" again.
To view files you've recently opened, tap "Recents" at the bottom of the screen.
To open a specific file, location, or folder, tap on it.
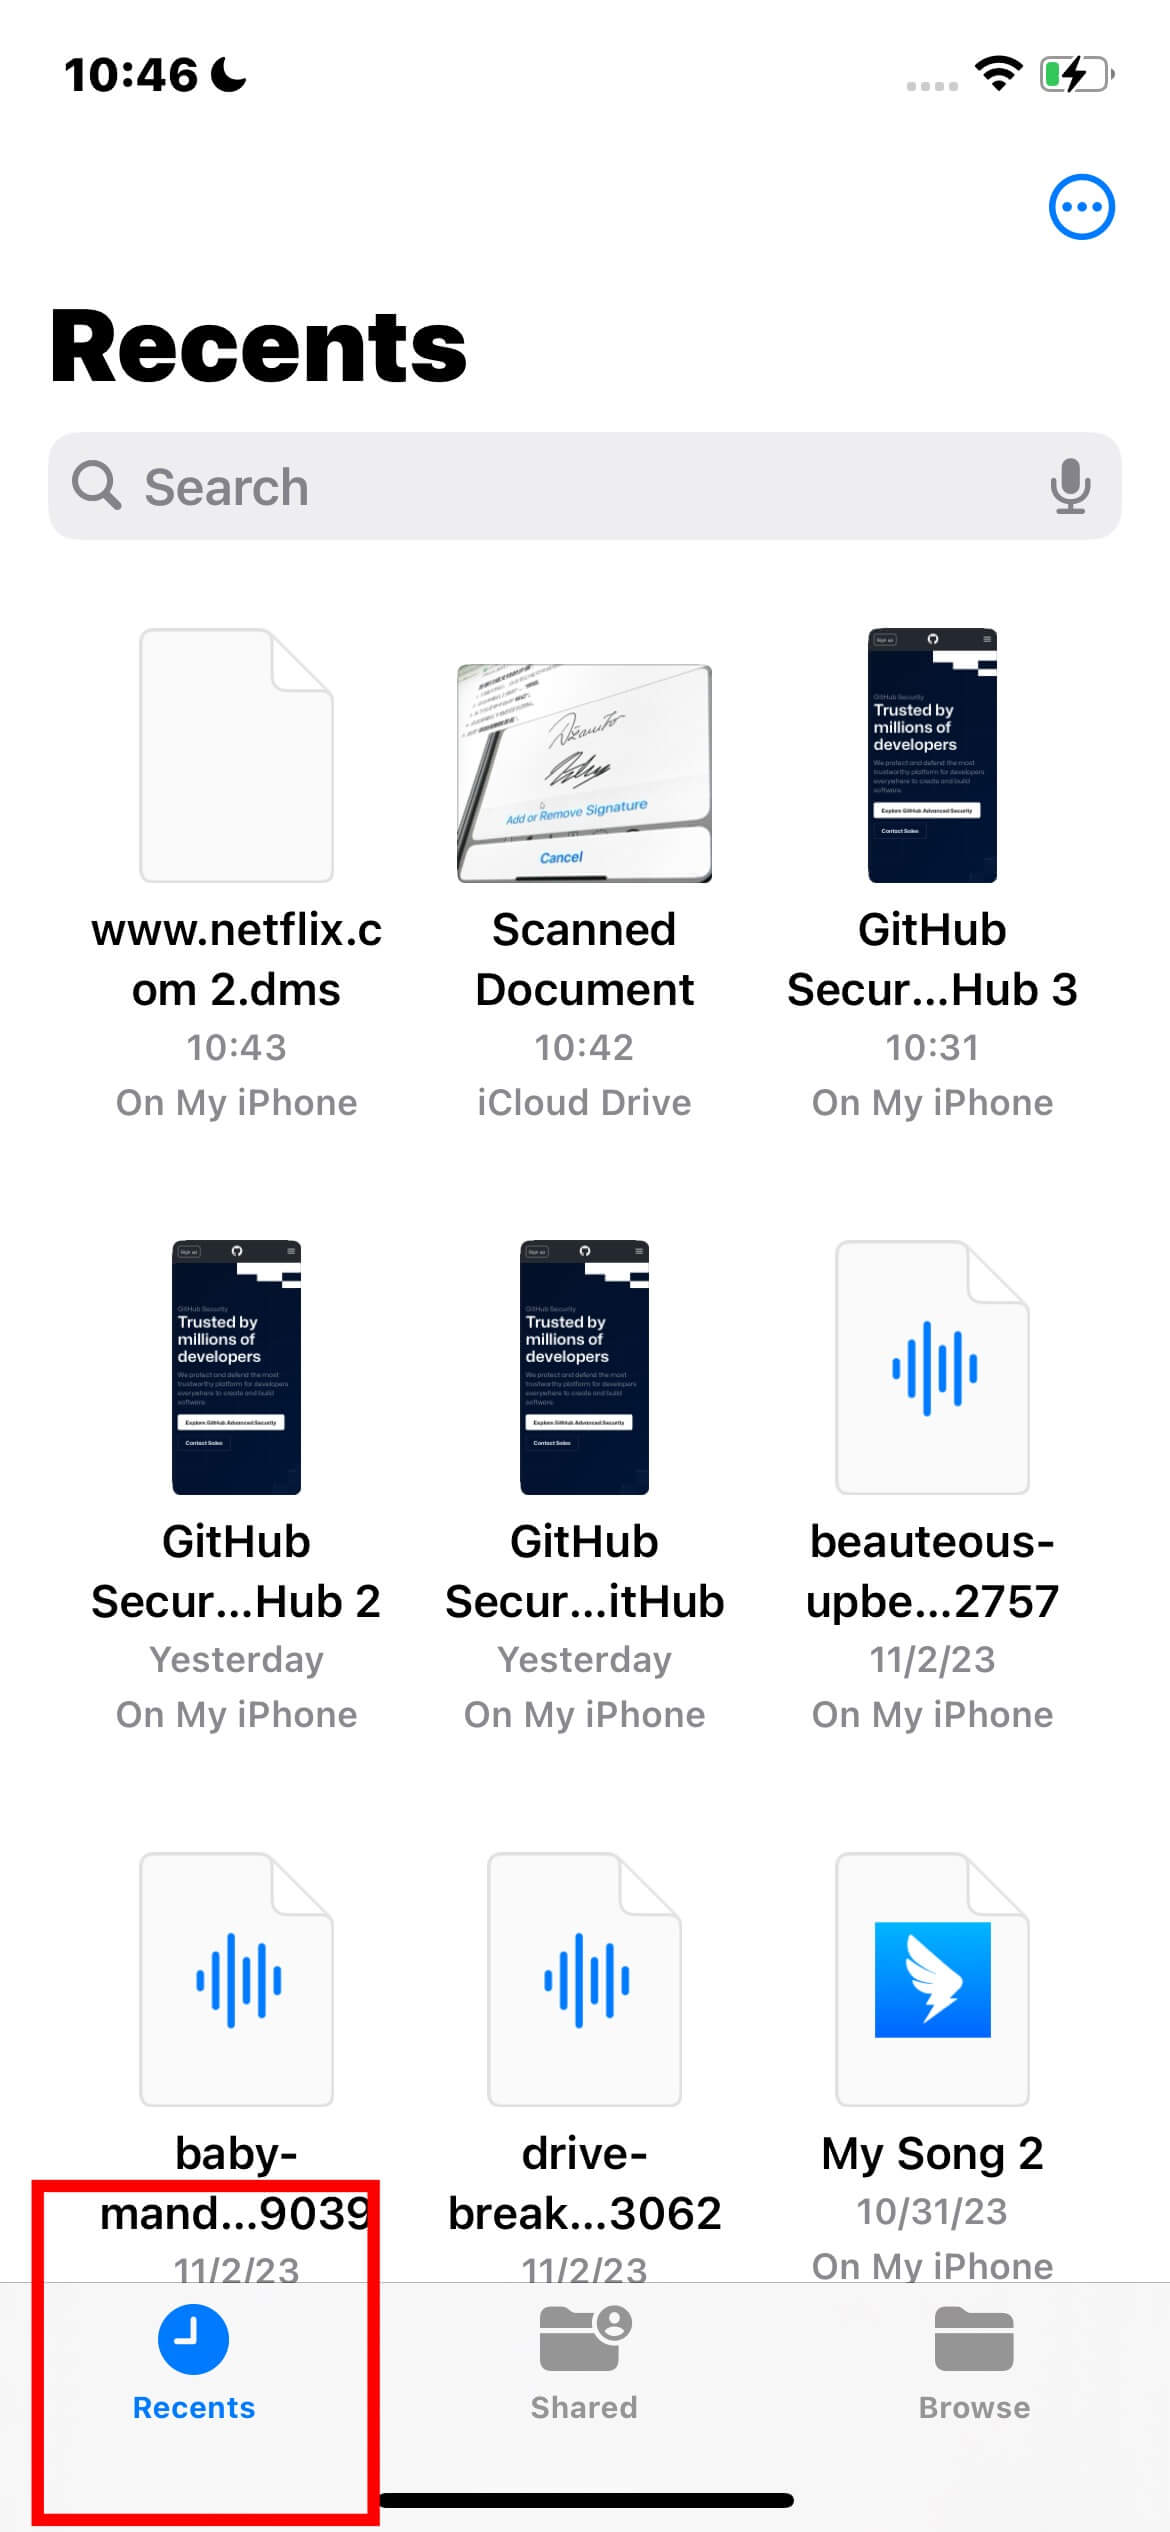
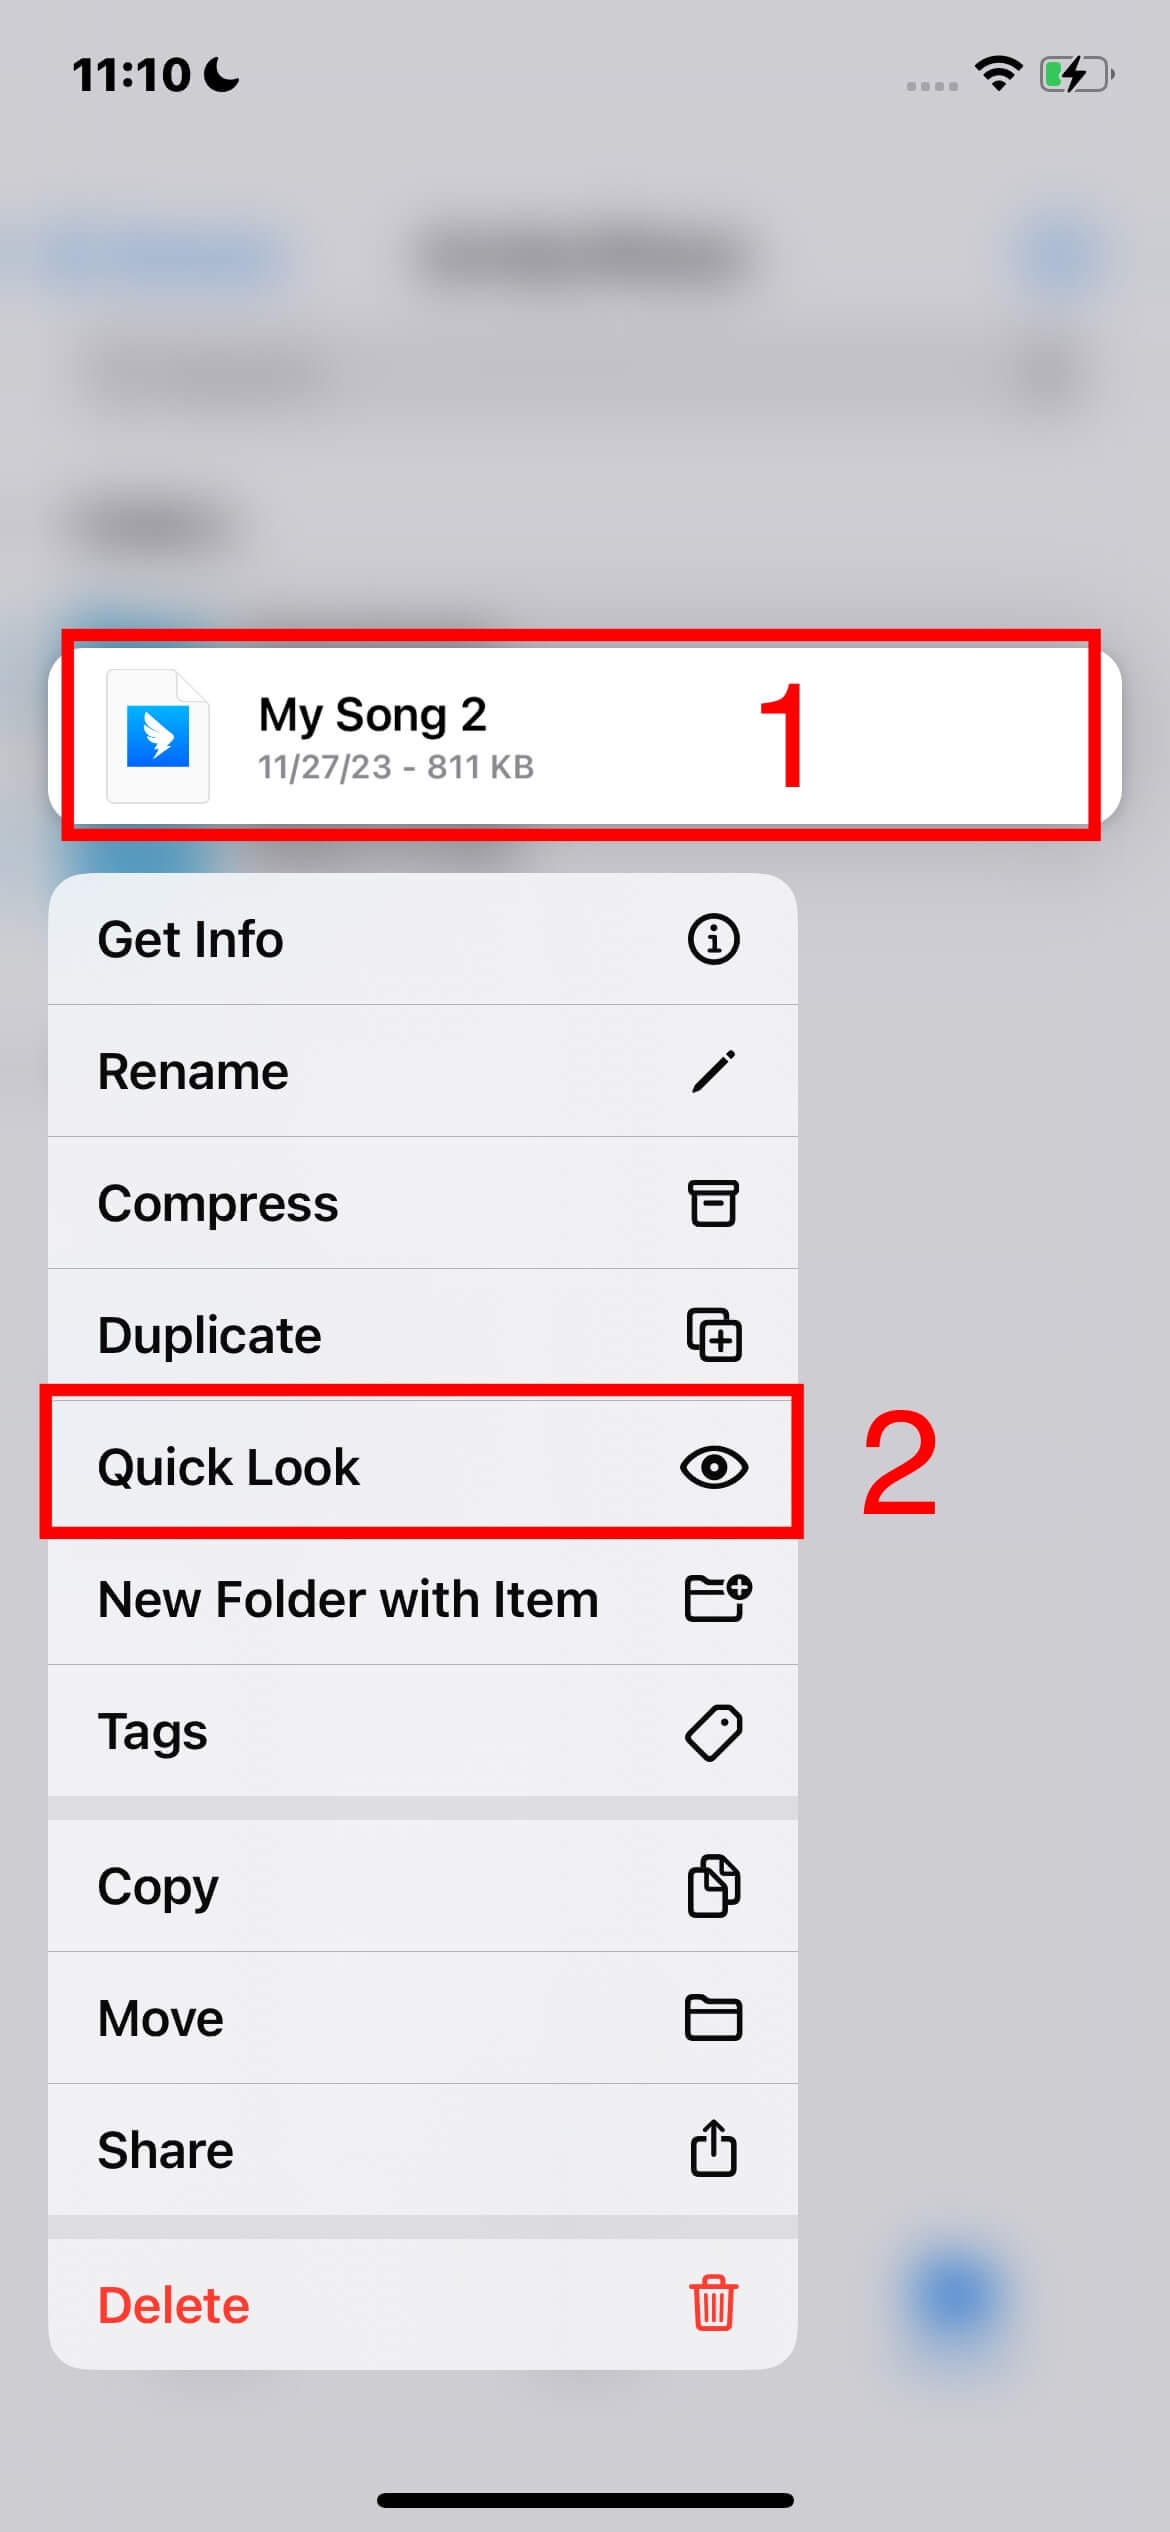
Note: If a file was created with an app that is not installed on your device, a preview of the file will be shown in Quick Look.
Finding a Specific File or Folder
For a more targeted search:
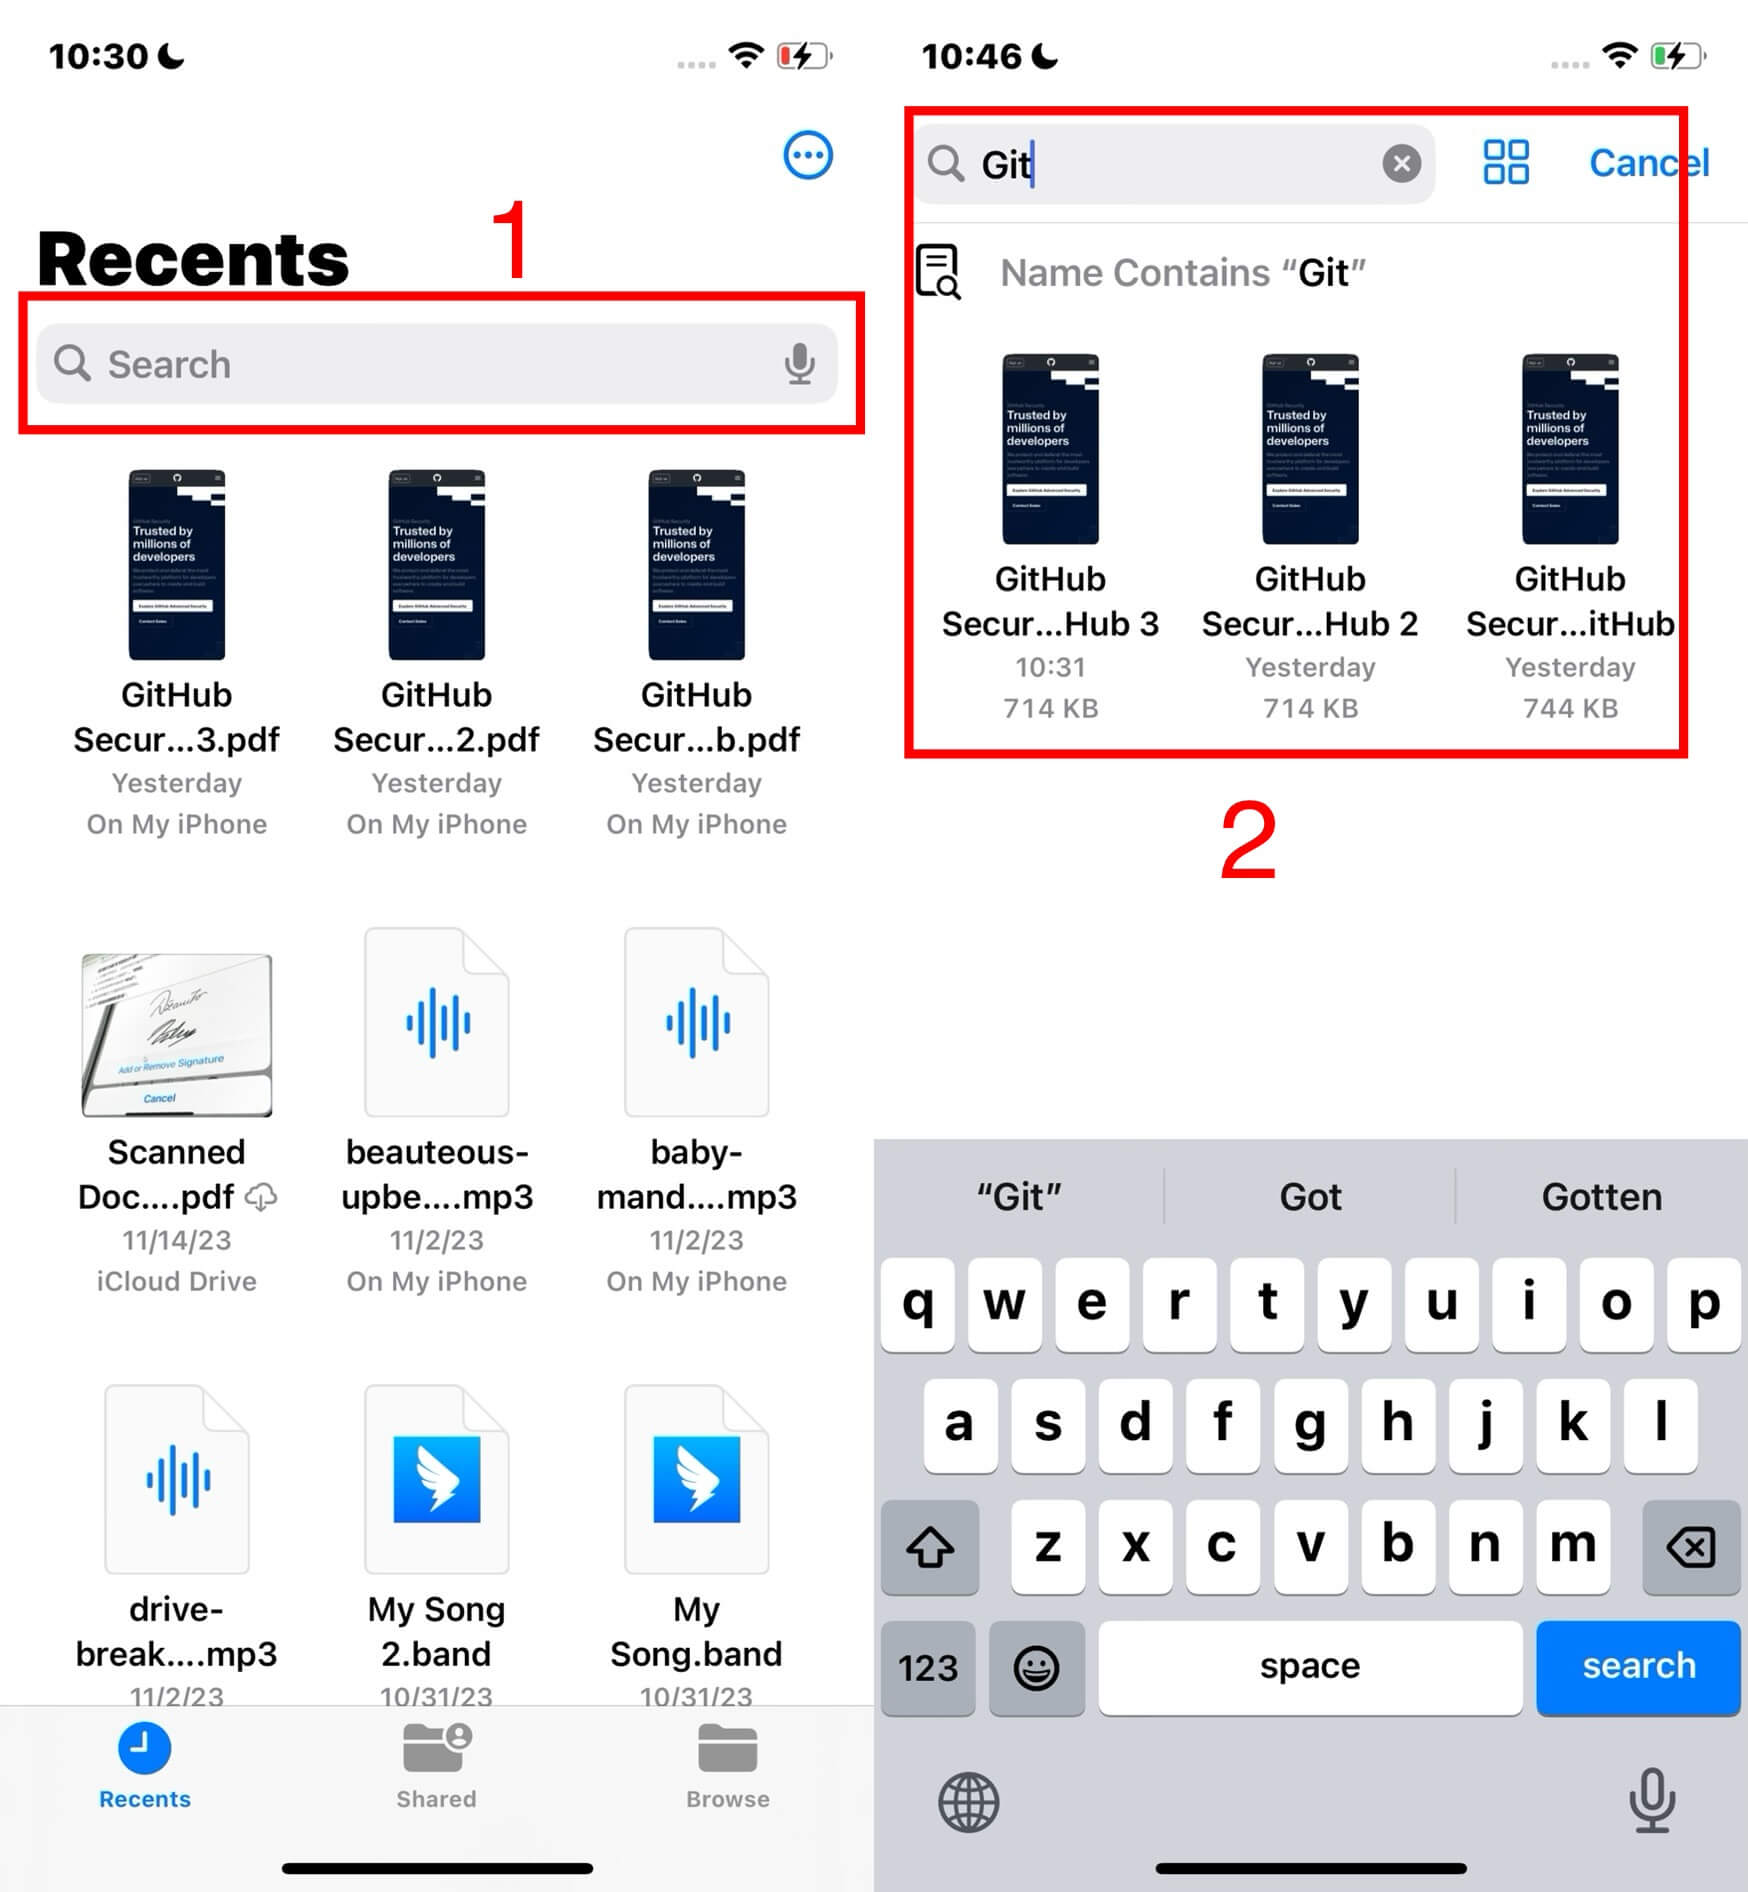
Use the Search Field: Enter the name of the file, folder, or document type you're looking for in the search field.
Refine Your Search:
To narrow your search results, tap "Recents," the name of a specific location, or a tag below the search field.
To hide the keyboard and view more results on the screen, tap "Search."
Manage Your Search: Tap the Clear Text button in the search field to start a new search.
Opening a File: Once you find the file or folder you're looking for, tap on it to open.
Editing Files in the Files App
After locating the file you wish to edit in the Files app, you can modify it, depending on the file type. Here's a general overview of what you can do:
Use Markup for Enhancements: Markup allows you to draw, add text, insert a signature, and more on your files; it is beneficial for screenshots, photos, and PDF documents.
Edit with Specific Apps: Files can be edited using applications like Pages, Keynote, Numbers, and others, depending on the file format.
File Management: Beyond editing, you can also delete files within the Files app. Any changes made to files stored in iCloud Drive or other cloud services will automatically update across all your devices.
Getting Started with Markup
Markup is a versatile tool for editing screenshots, photos, and PDFs. You can adjust the opacity of the font thickness and even add signatures to documents.
To initiate editing in the Files app:
Open the Files app and locate the file you want to edit.
Select the File: Tap the file to open it.
Choose an Editing Option: Depending on the file type, select the appropriate editing tool or app.
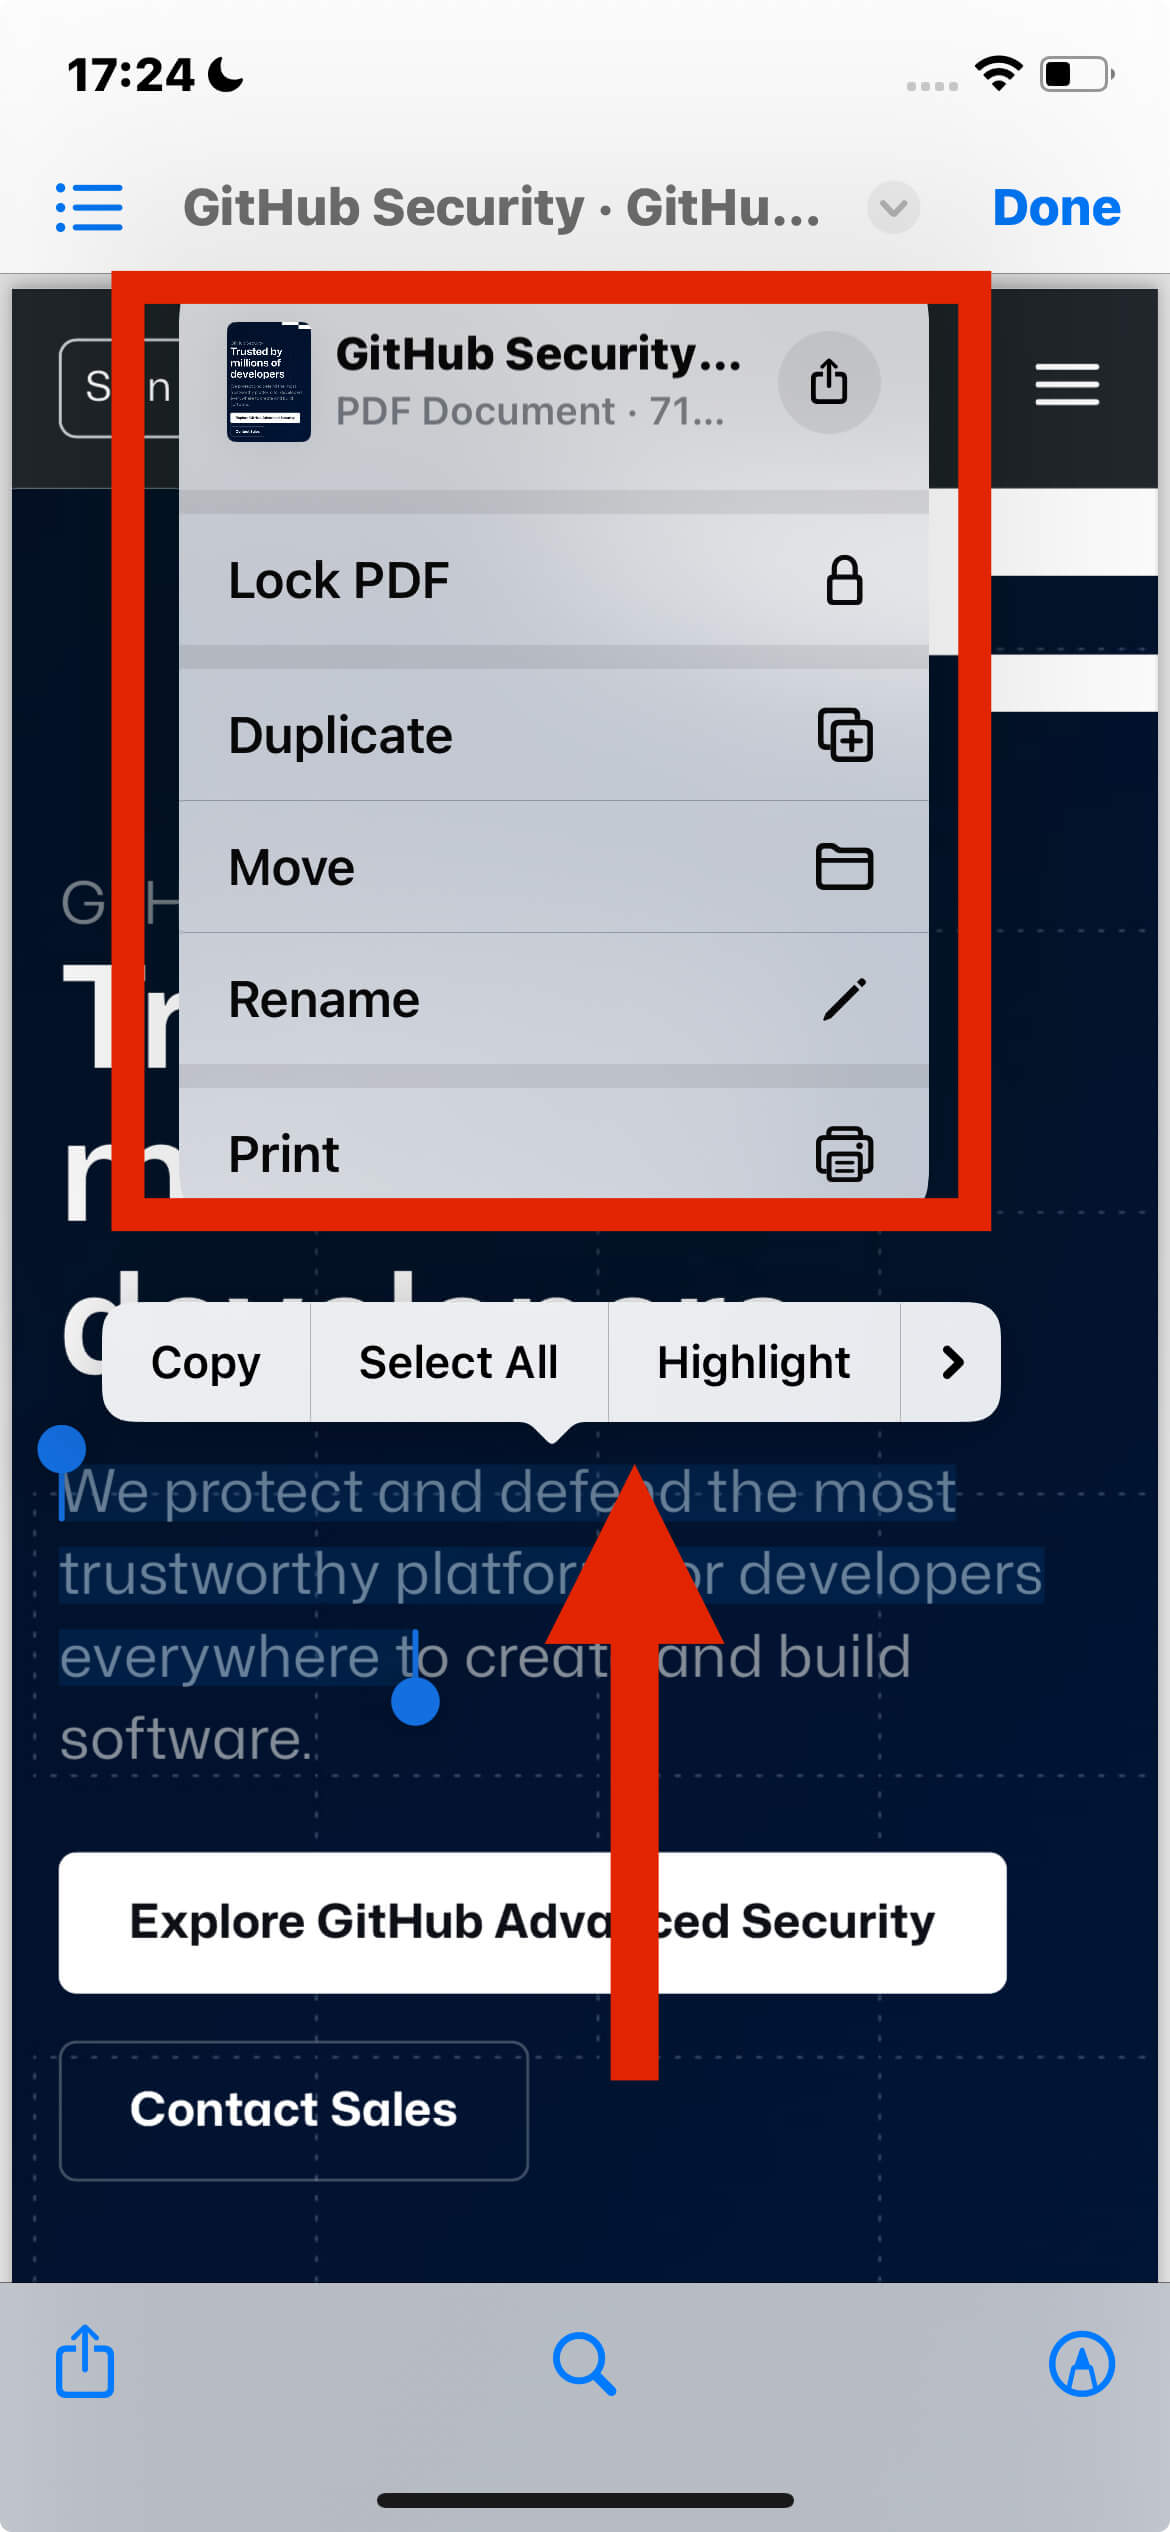
Make Edits: Use Markup or another application to make your edits.
Save Your Changes: Ensure all edits are saved before exiting the file.

How to Organize Files and Folders on iPhone/iPad
#1 Sorting Files and Folders
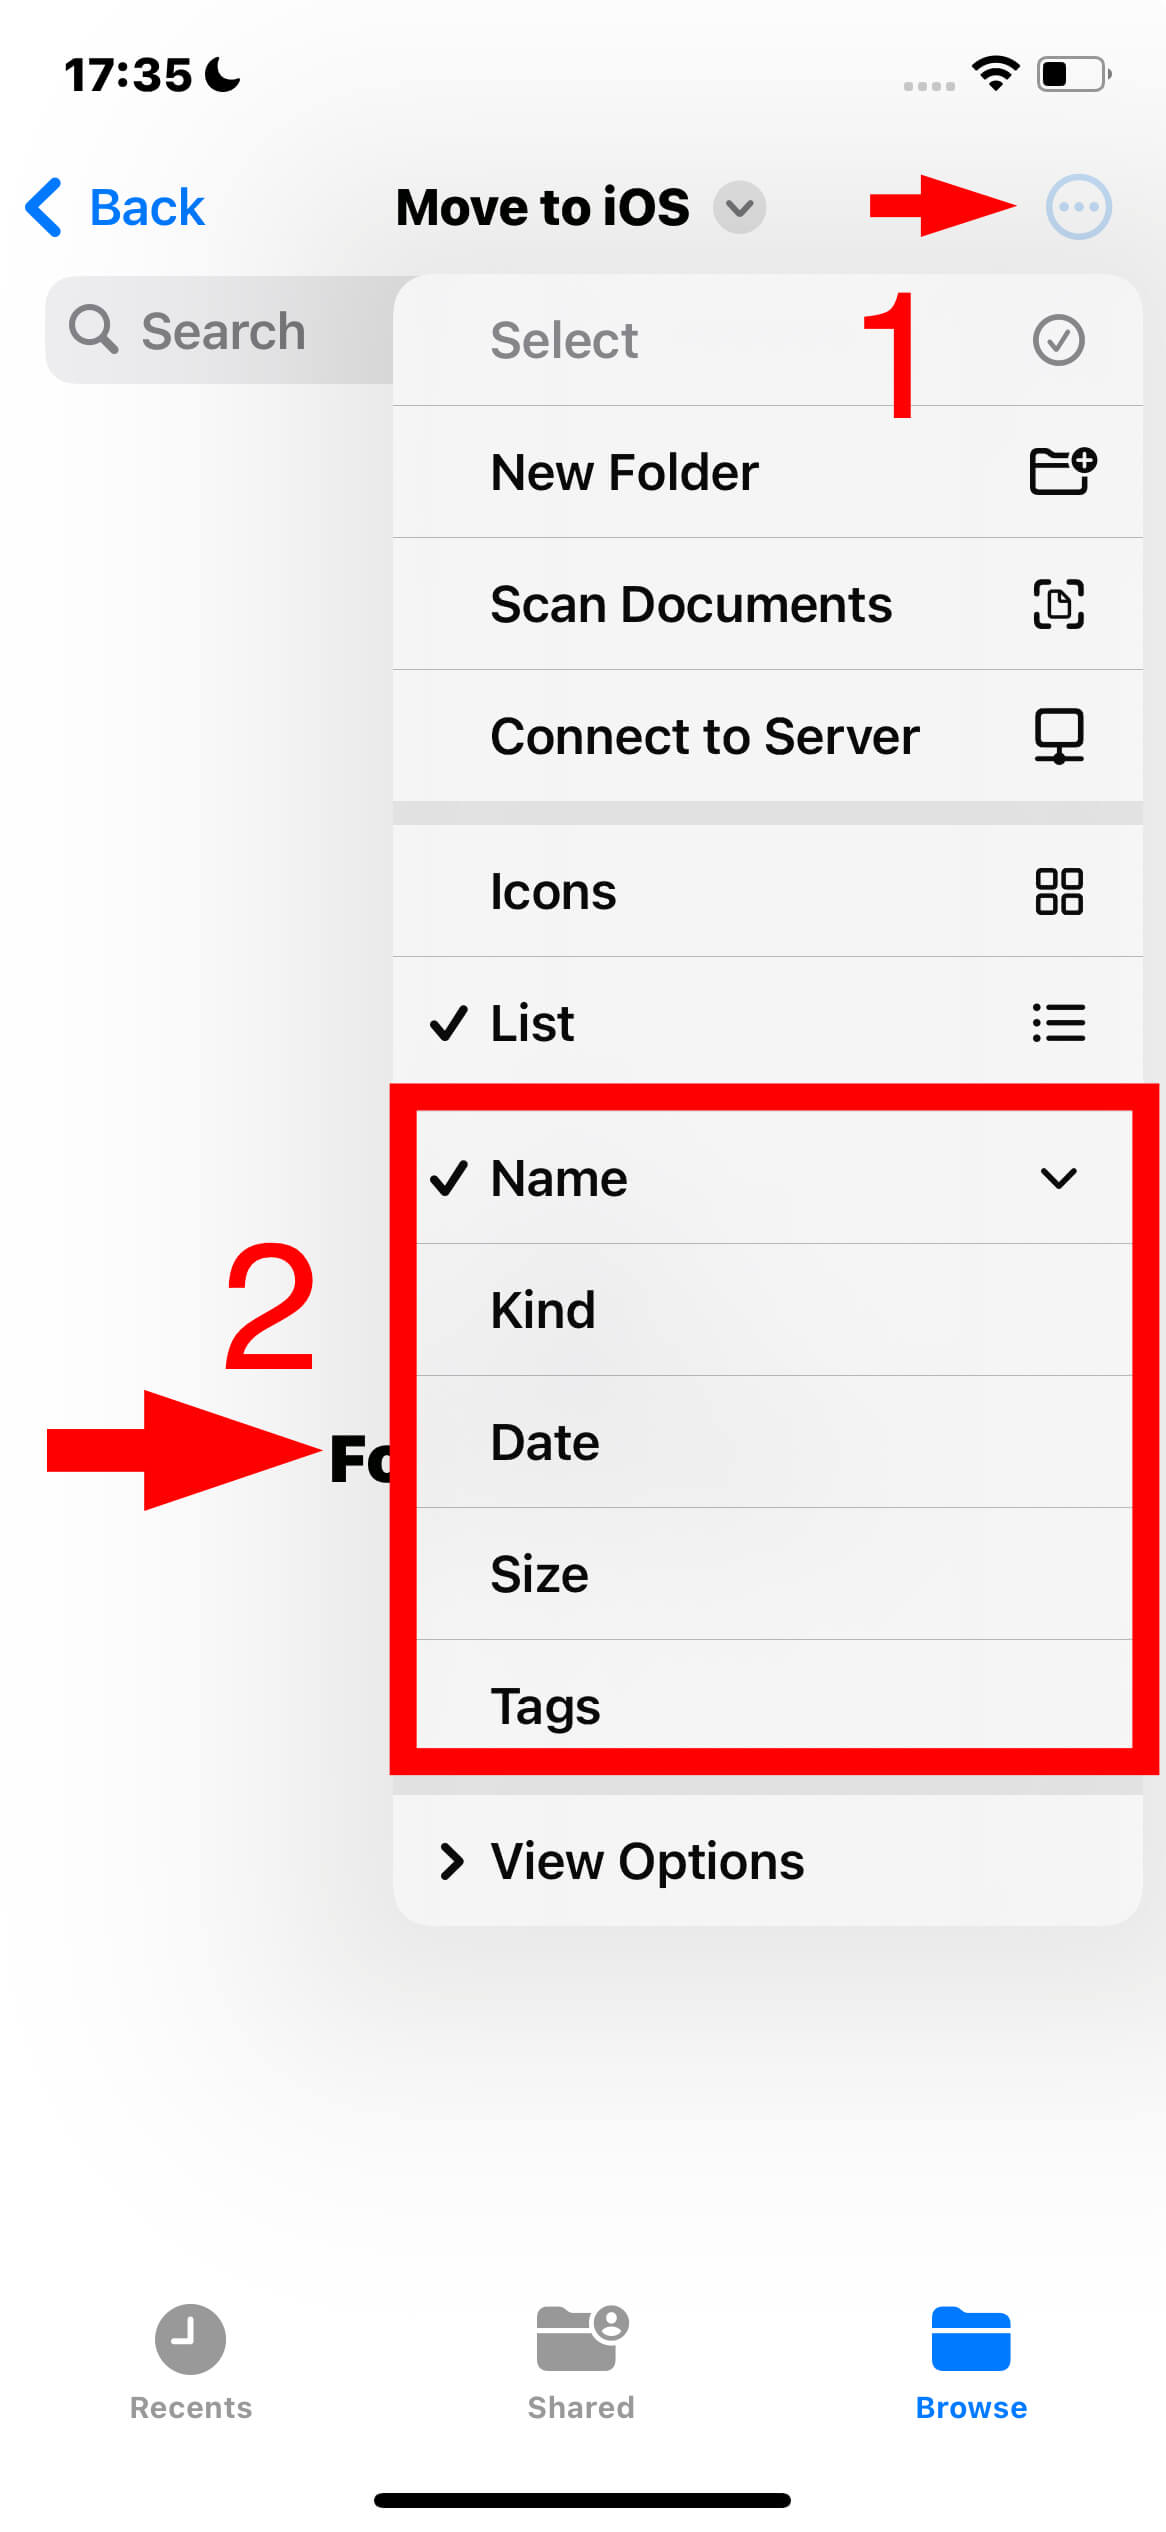
Access Sorting Options: Tap the More button (usually represented by a three-dot icon) in any open location or folder in the Files app.
Choose a Sorting Criterion: Select from options like Name, Date, Size, Kind, or Tags to sort your files and folders.
#2 Creating a New Folder
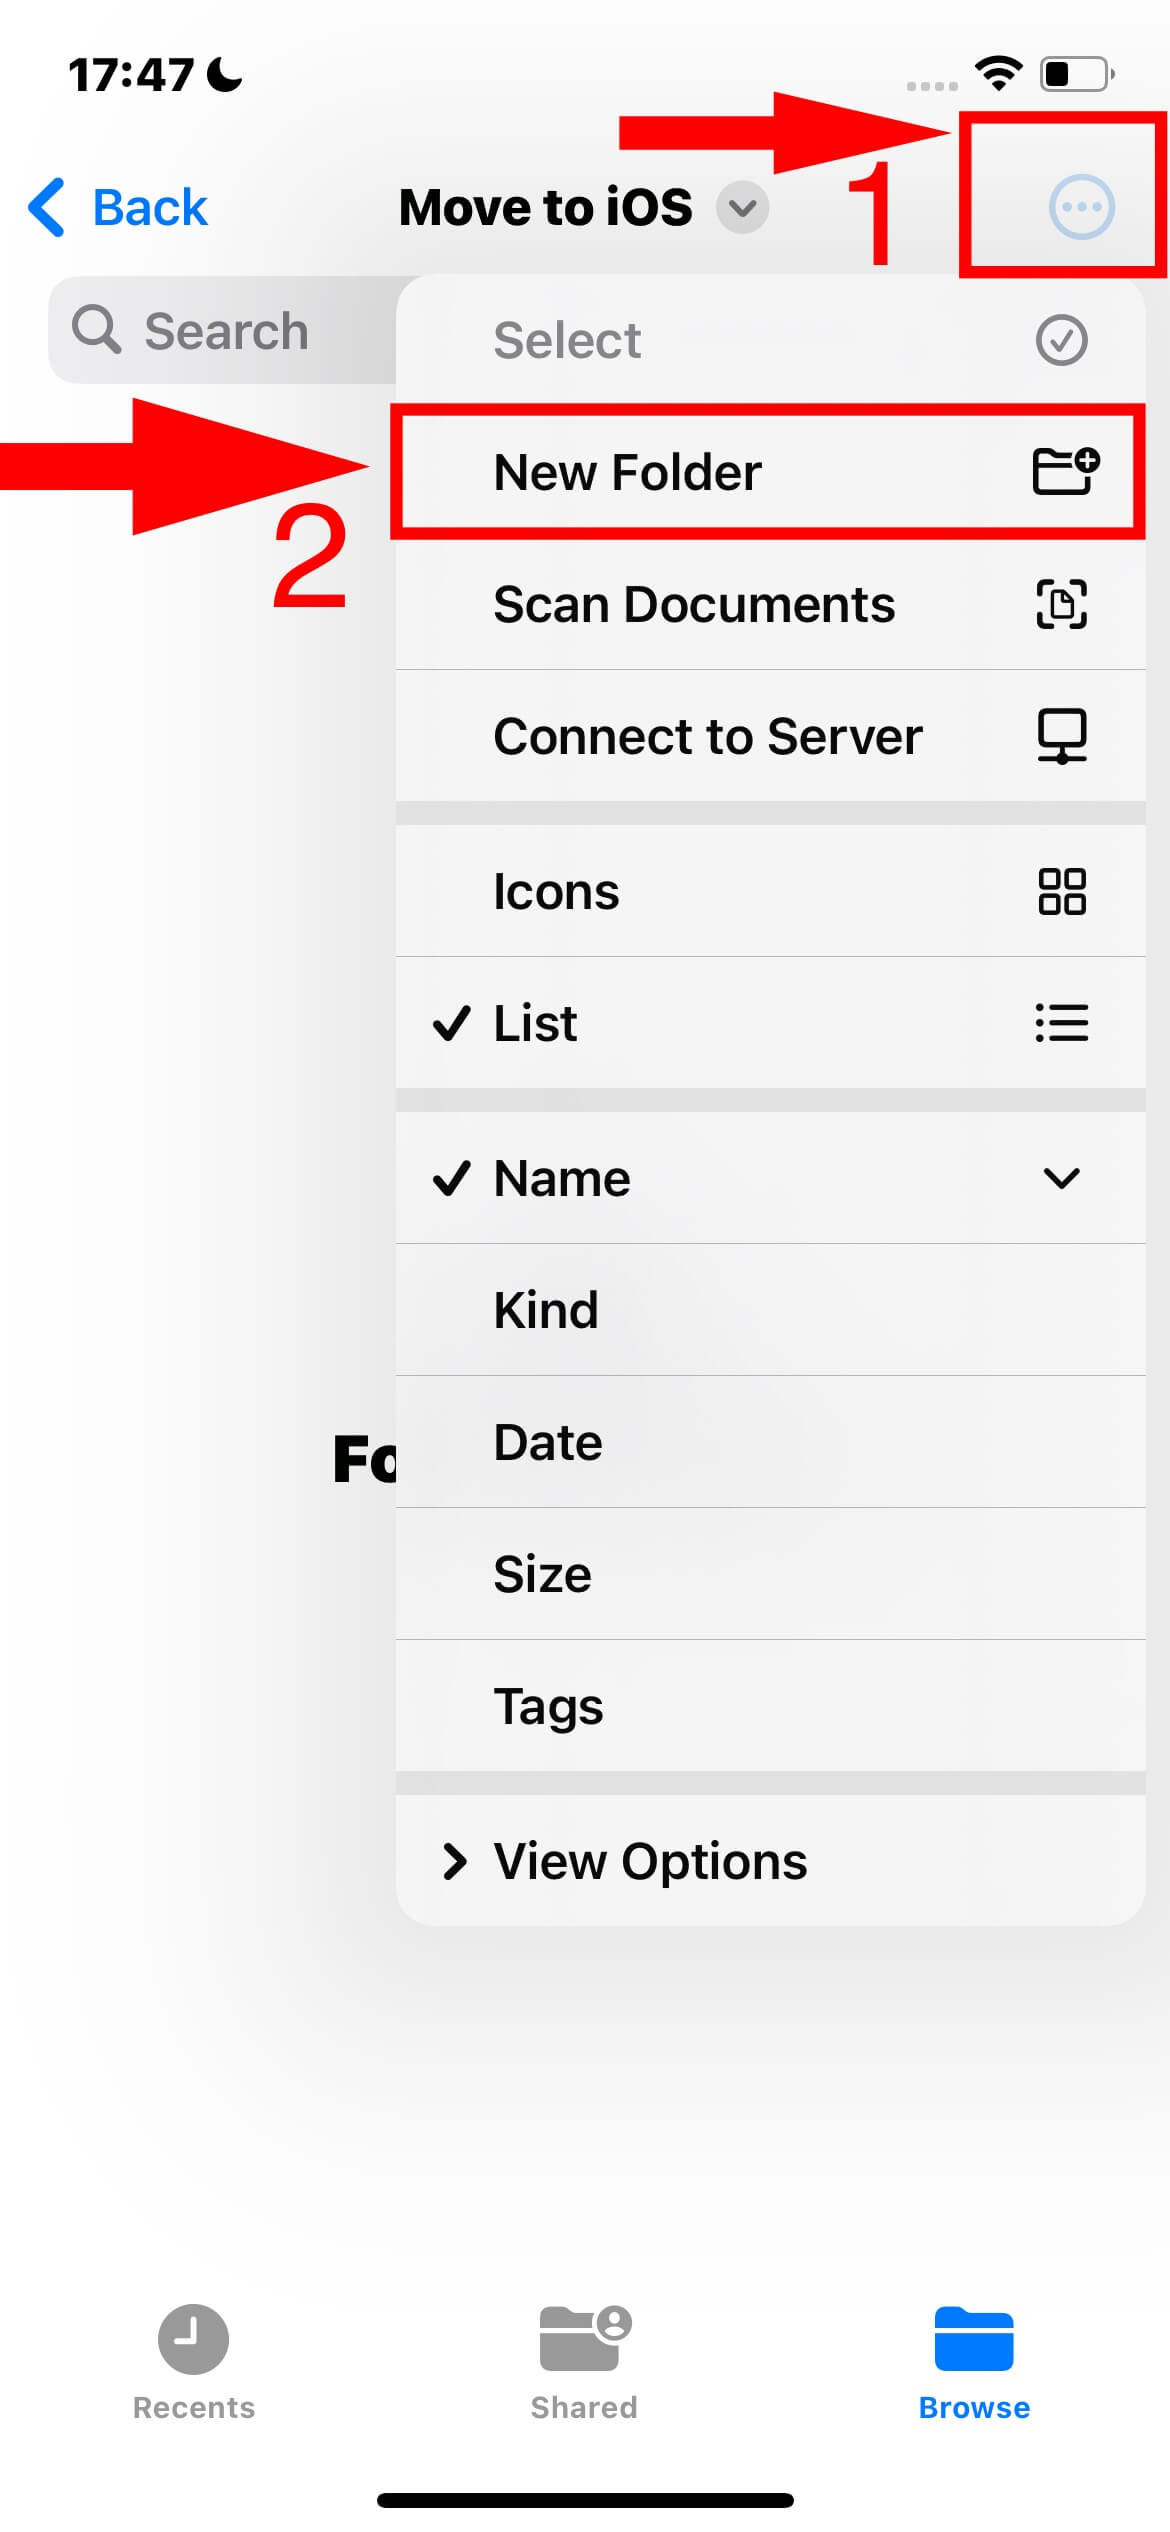
You can make folders on iPhone or iPad with the Files app.
Open a Location or Folder: Navigate to where you want to create the new folder.
Initiate New Folder Creation: Tap the More button, then select New Folder.
Note: If 'New Folder' isn't visible, creating a folder in that location isn't possible.
#3 Renaming, Compressing, and Other File/Folder Modifications
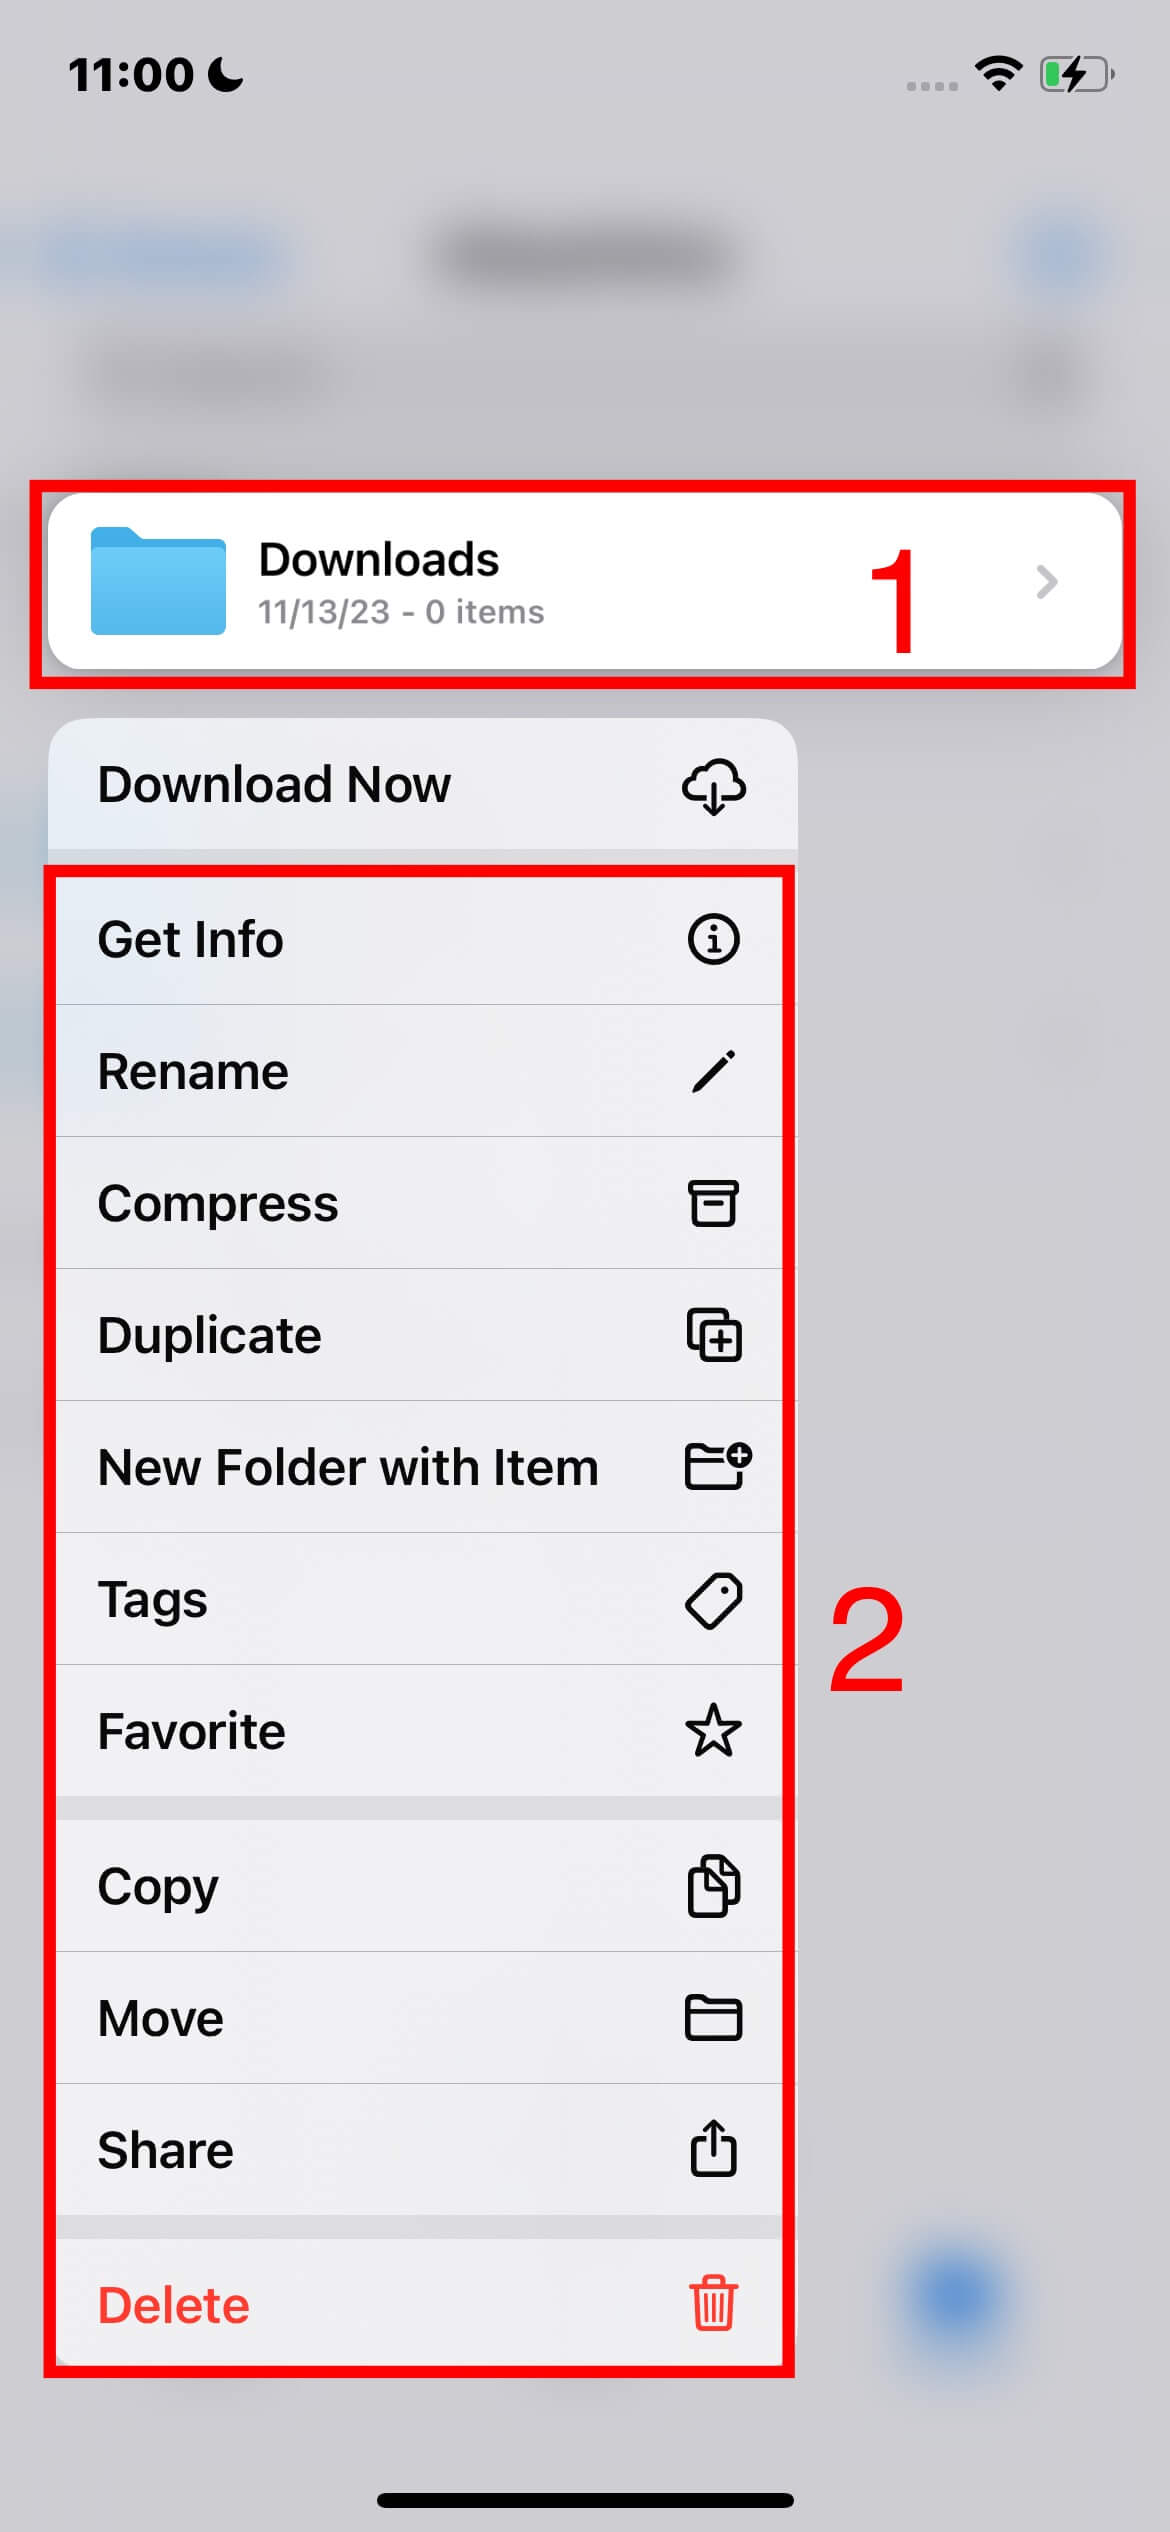
Touch and hold the file or folder you want to modify.
Choose an Action: Options include Copy, Duplicate, Move, Delete, Rename, or Compress.
Bulk Modifications: To modify multiple files or folders, tap More, select Select, choose your files/folders, and then choose an action from the options on the screen's bottom.
Note:
Availability of options varies with the type of item selected. For instance, app libraries (folders labeled with an app name) cannot be deleted or moved.
#4 Tagging a File or Folder
Touch and hold the file or folder.
Add Tags: Tap Tags, then select one or more tags.
Tap Done.
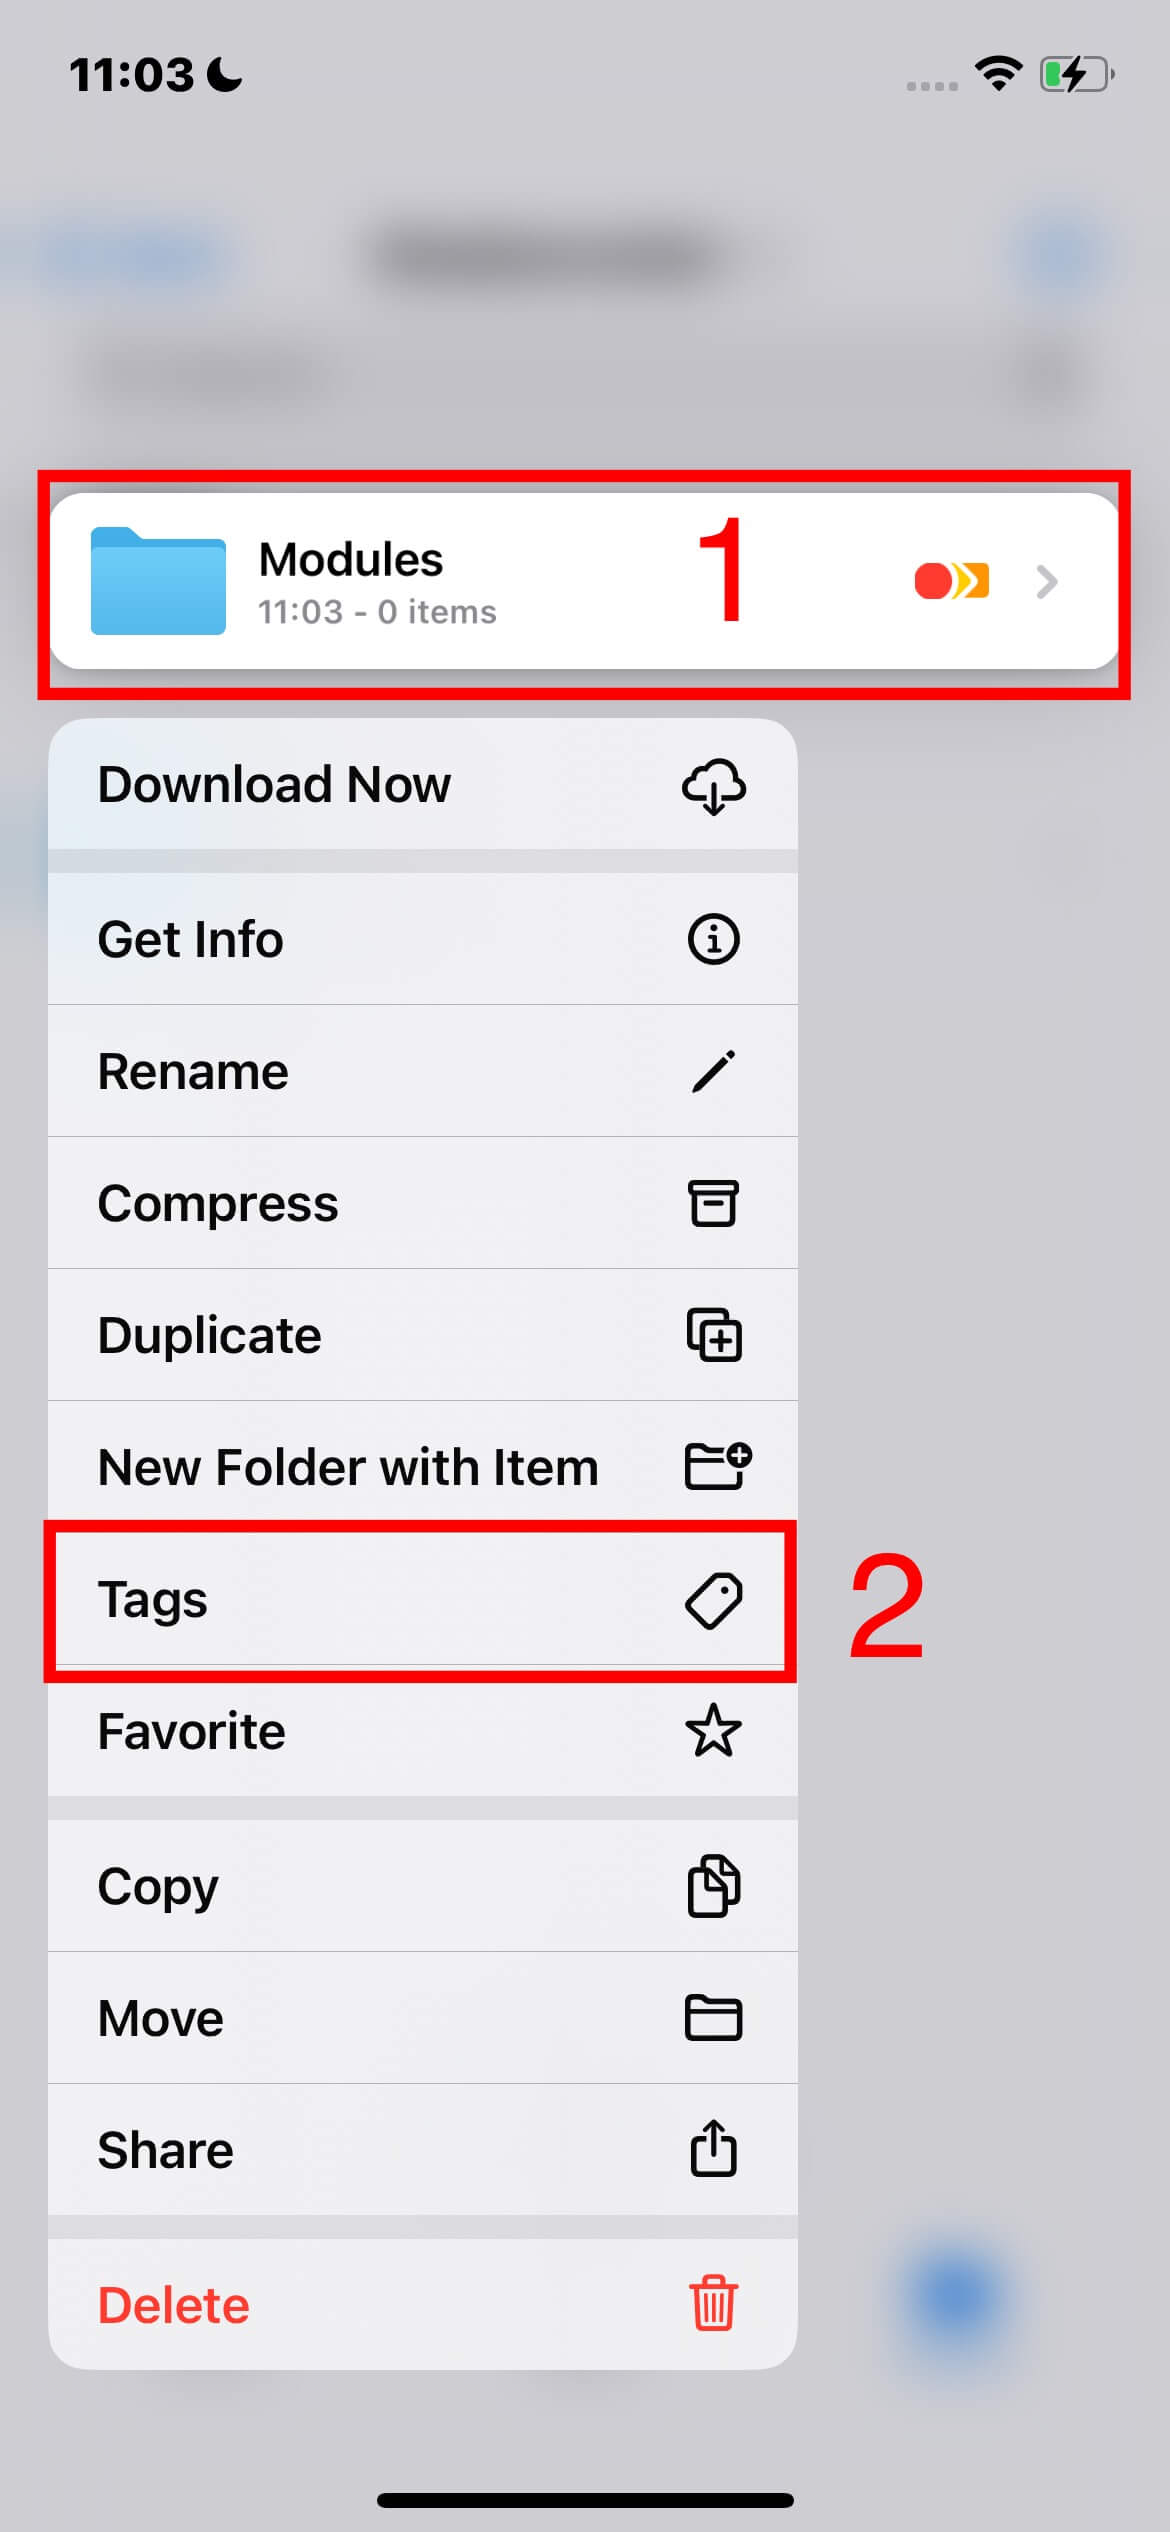
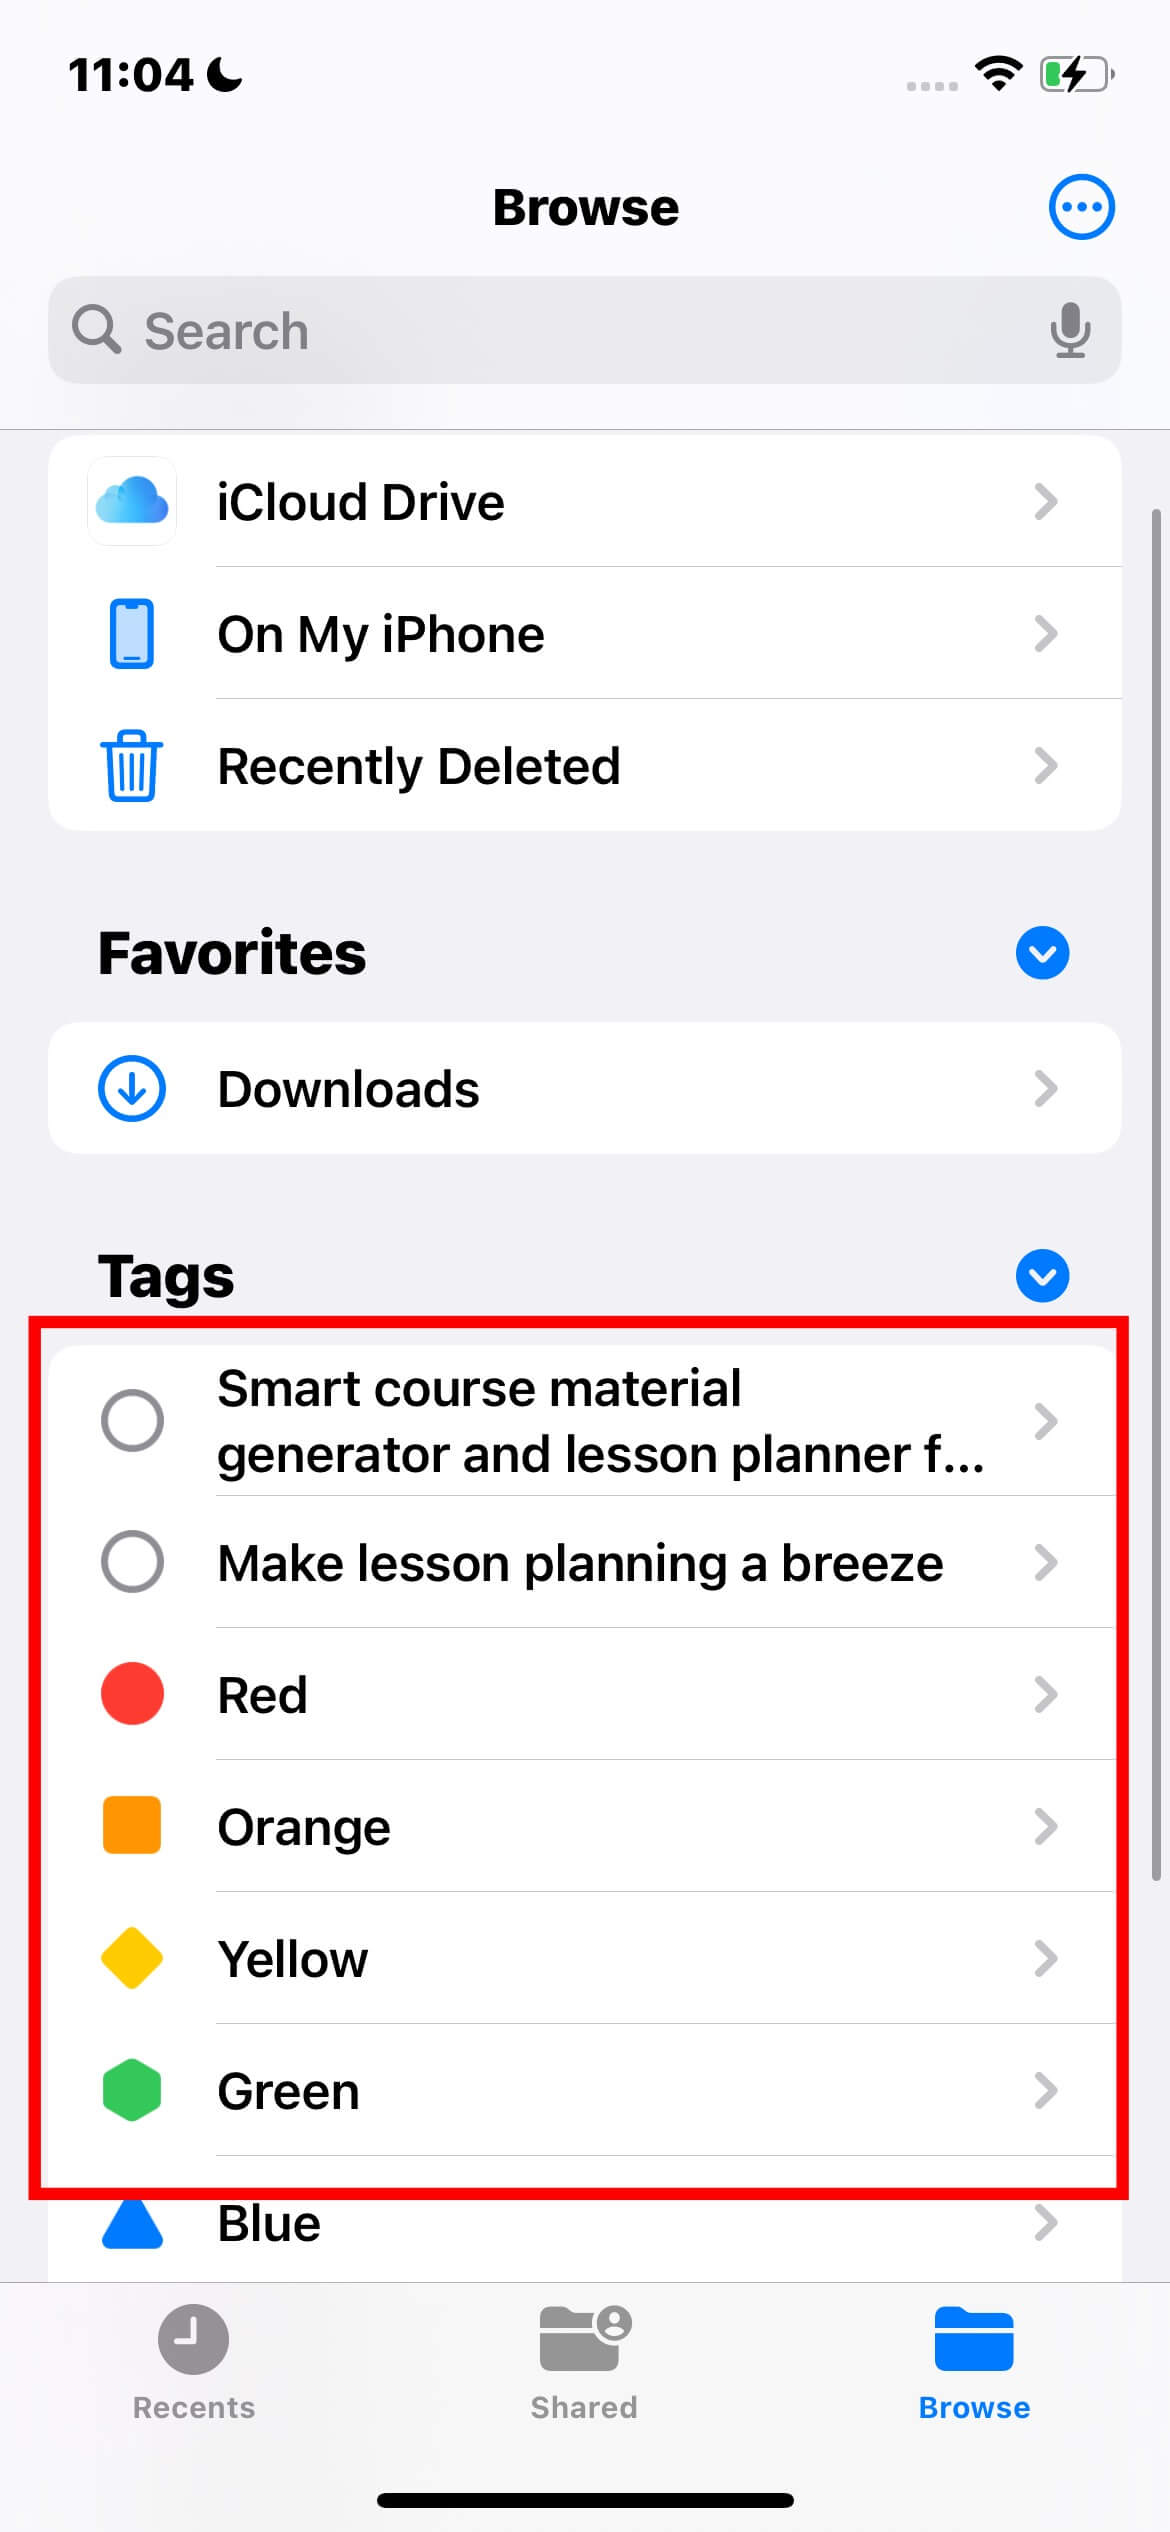
Finding Tagged Items: Tap Browse, then select an item under Tags.
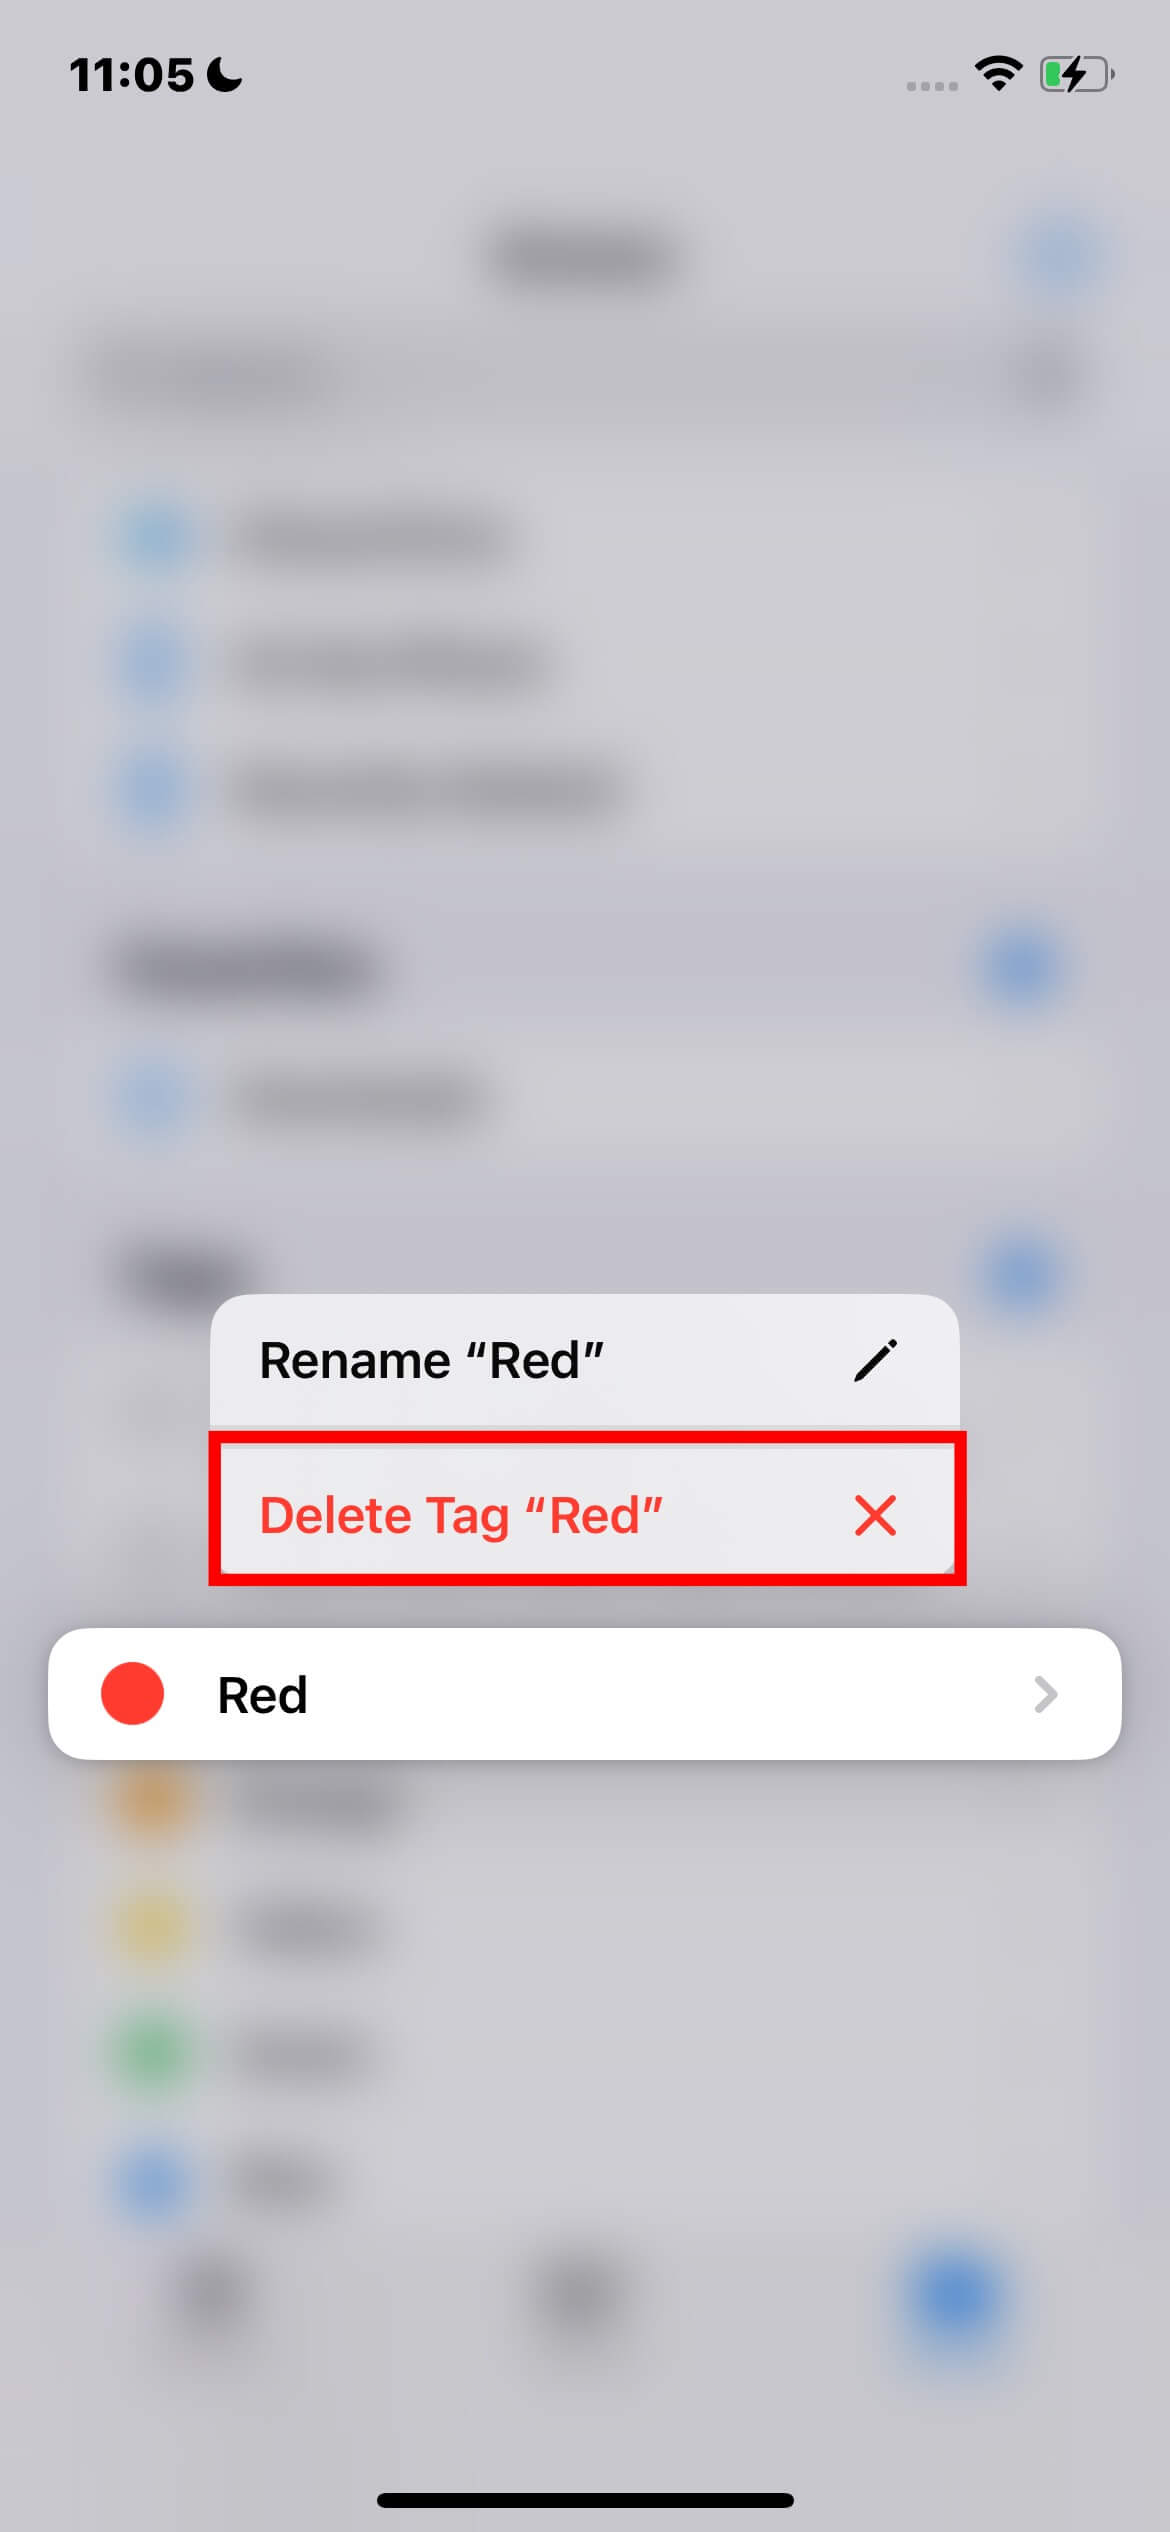
To Remove a Tag: Tap on the tag again.
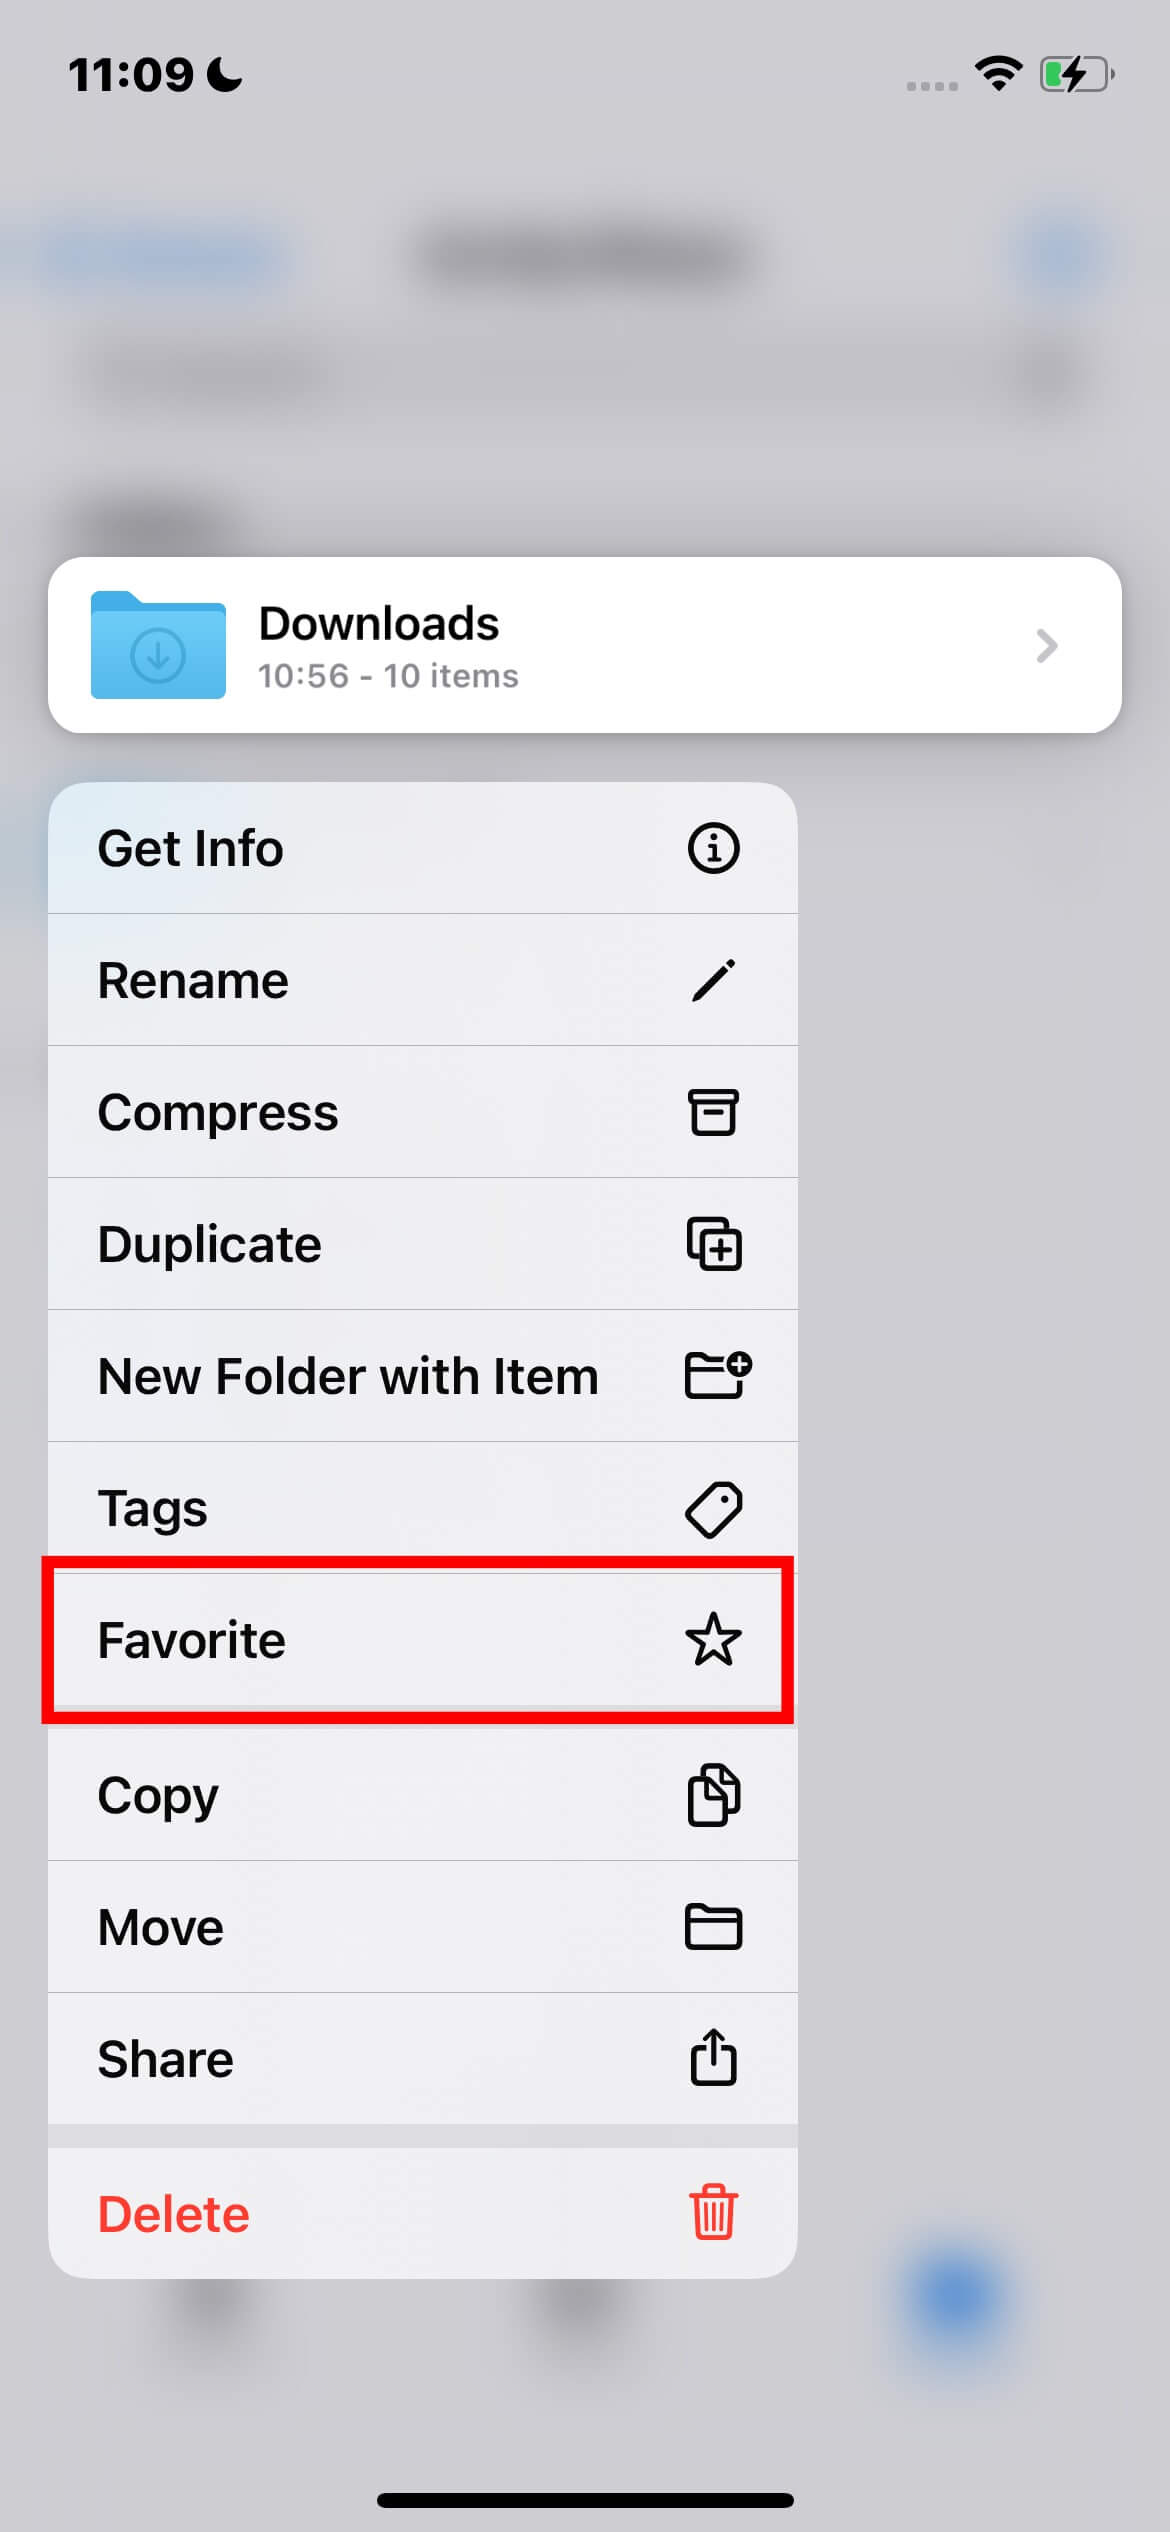
#5 Marking a Folder as a Favorite
Select the Folder: Touch and hold the folder you want to mark.
Tap Favorite.
To Access Favorites: Tap Browse and look under the Favorites section.
Sending Files from the Files app on iPhone/iPad
Sending a File
Touch and hold the file you wish to send.
Tap the Share button.
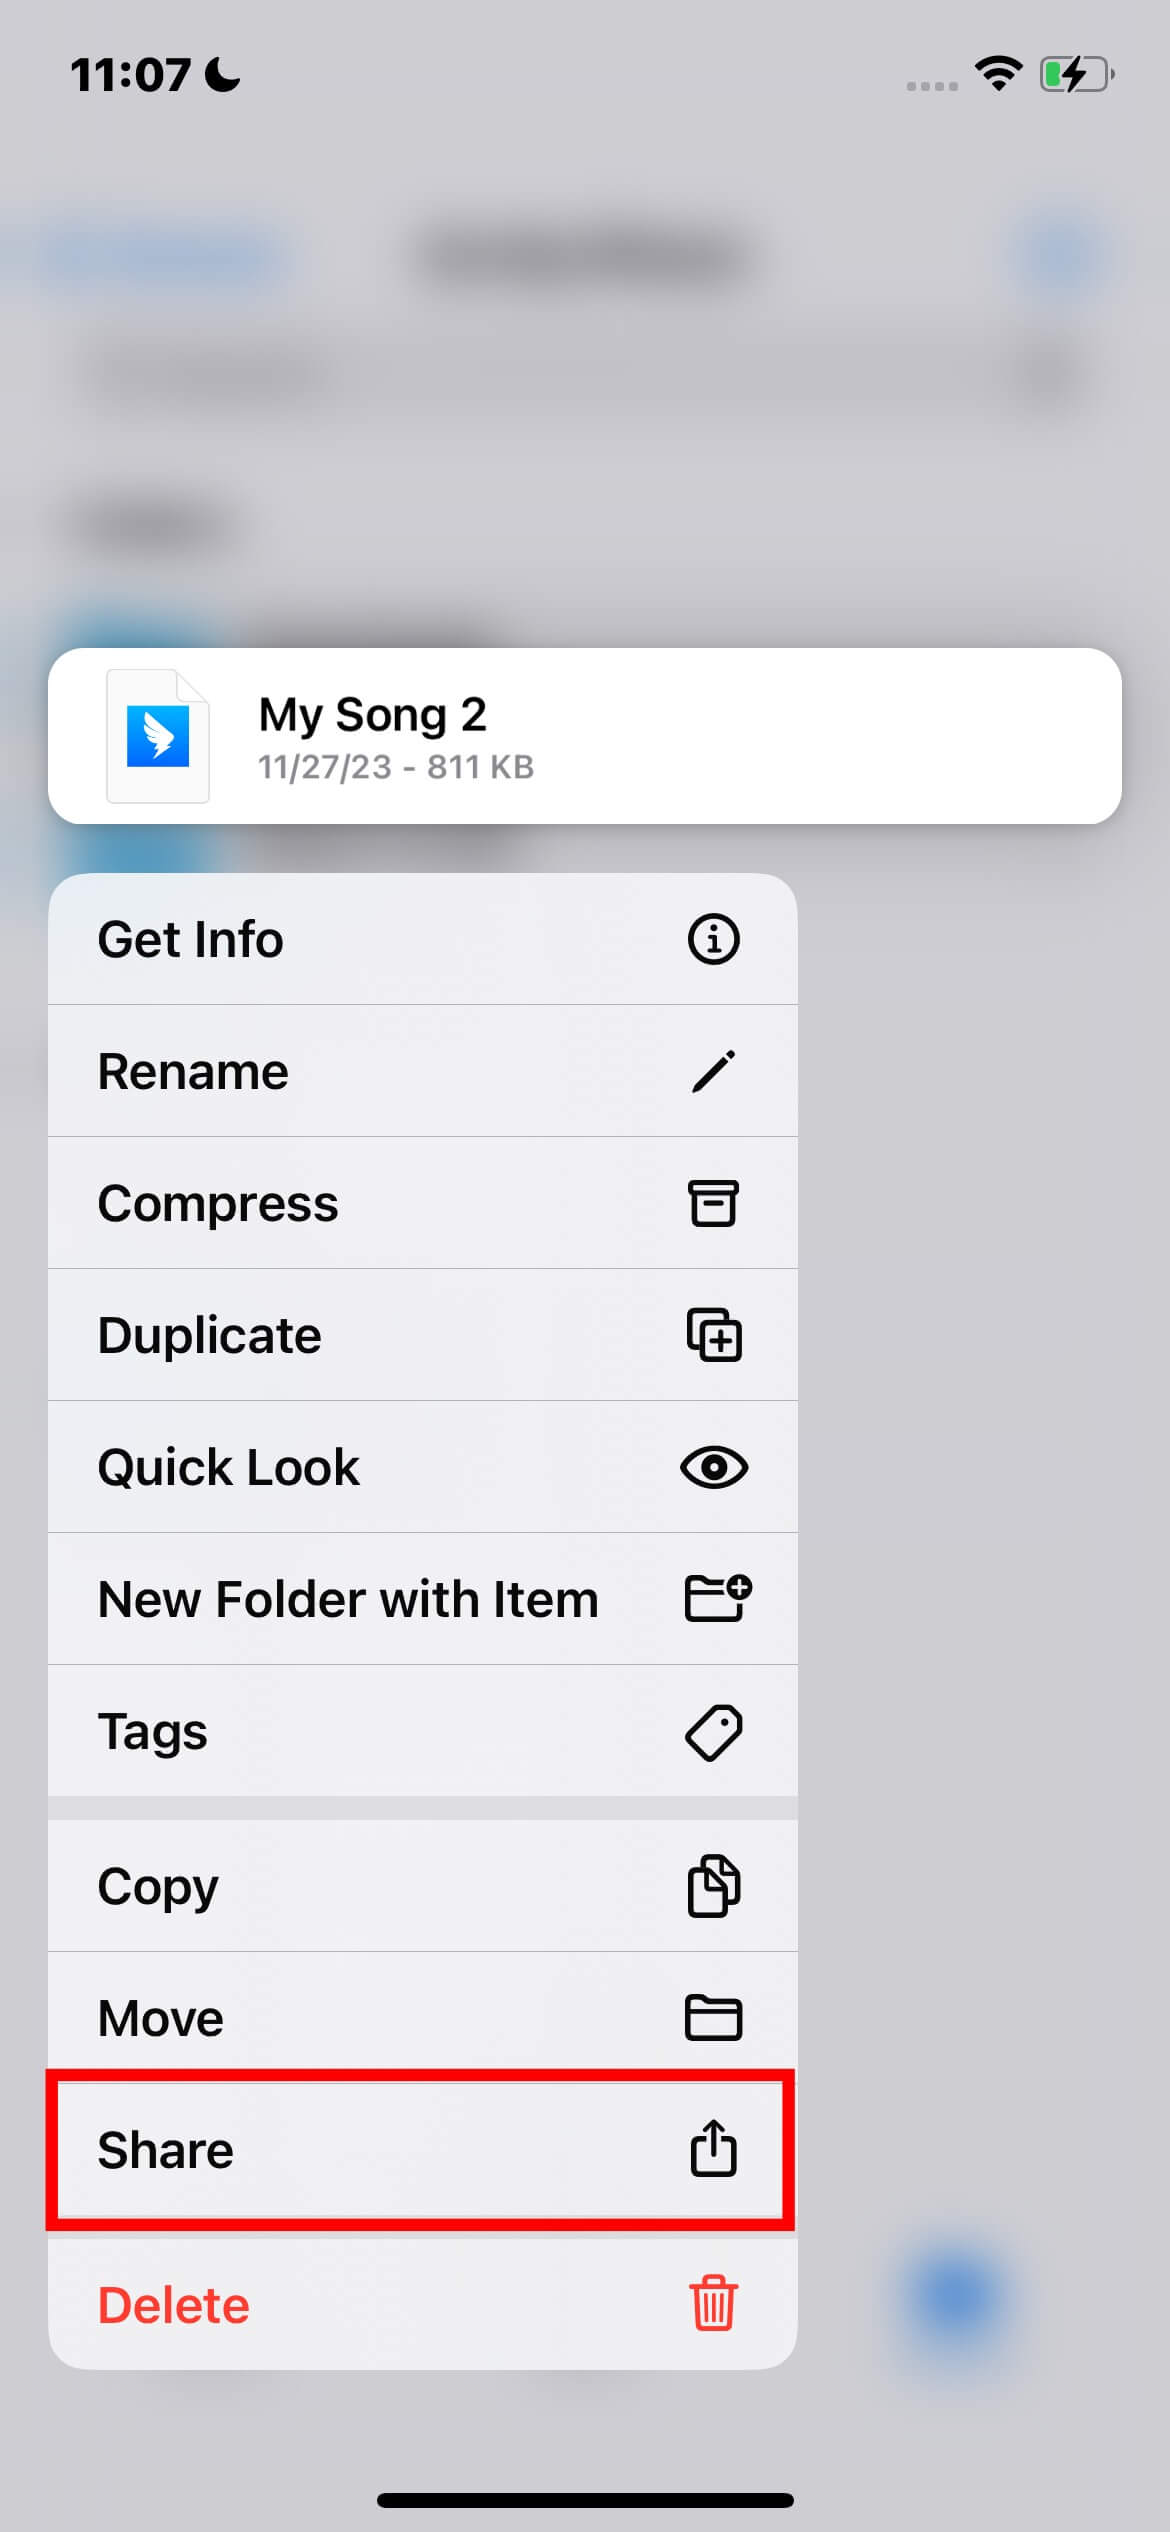
Tip: To send a smaller version, tap Compress, then Share the compressed zip file.
Choose a Sending Method: Select how you want to send the file (e.g., AirDrop, Messages, Mail), then tap Send.
How to Reply to a Received Document
Find the file in the Files app that was saved from an email attachment.
Initiate a Reply: Touch and hold the file and tap “Reply to.”
Scanning a Document
Open the Files app.
Click Browse.
Tap the More button at the top of the Browse screen.
Select Scan Documents.
Tip: If the files or folders are stored in iCloud Drive, consider inviting others to view or edit them directly instead of sending copies.
The Bottom Line
You're now equipped with the knowledge to use the Files app on your iPhone effectively. Whether it's organizing, editing, or sharing files, these steps will enhance your productivity and streamline your file management experience. Embrace the convenience and capabilities of the Files app to keep your documents and media organized and accessible at your fingertips. Happy file managing!

