How to Print From Your iPhone With or Without Airprint [Easy Steps]
Getting a printout from your iPhone or iPad is a breeze! The easiest method is to link up with a printer that supports AirPrint, letting you print stuff wirelessly in no time.
But don't worry if you don't have an AirPrint-compatible printer. You can still print without a hitch by grabbing your printer's app or by connecting your devices with a USB cable and an adapter.
Here's your step-by-step guide to getting it done.
How to print from an iPhone or iPad with AirPrint
Almost all modern printers with wireless features support the AirPrint function, making it super easy to pair with your iPhone or iPad for quick printing.
You need to contact your printer's manufacturer for details to confirm your printer supports AirPrint.
Before you start, ensure your iPhone or iPad and the printer are on the same Wi-Fi network and within a good range.
Here's how to get started:
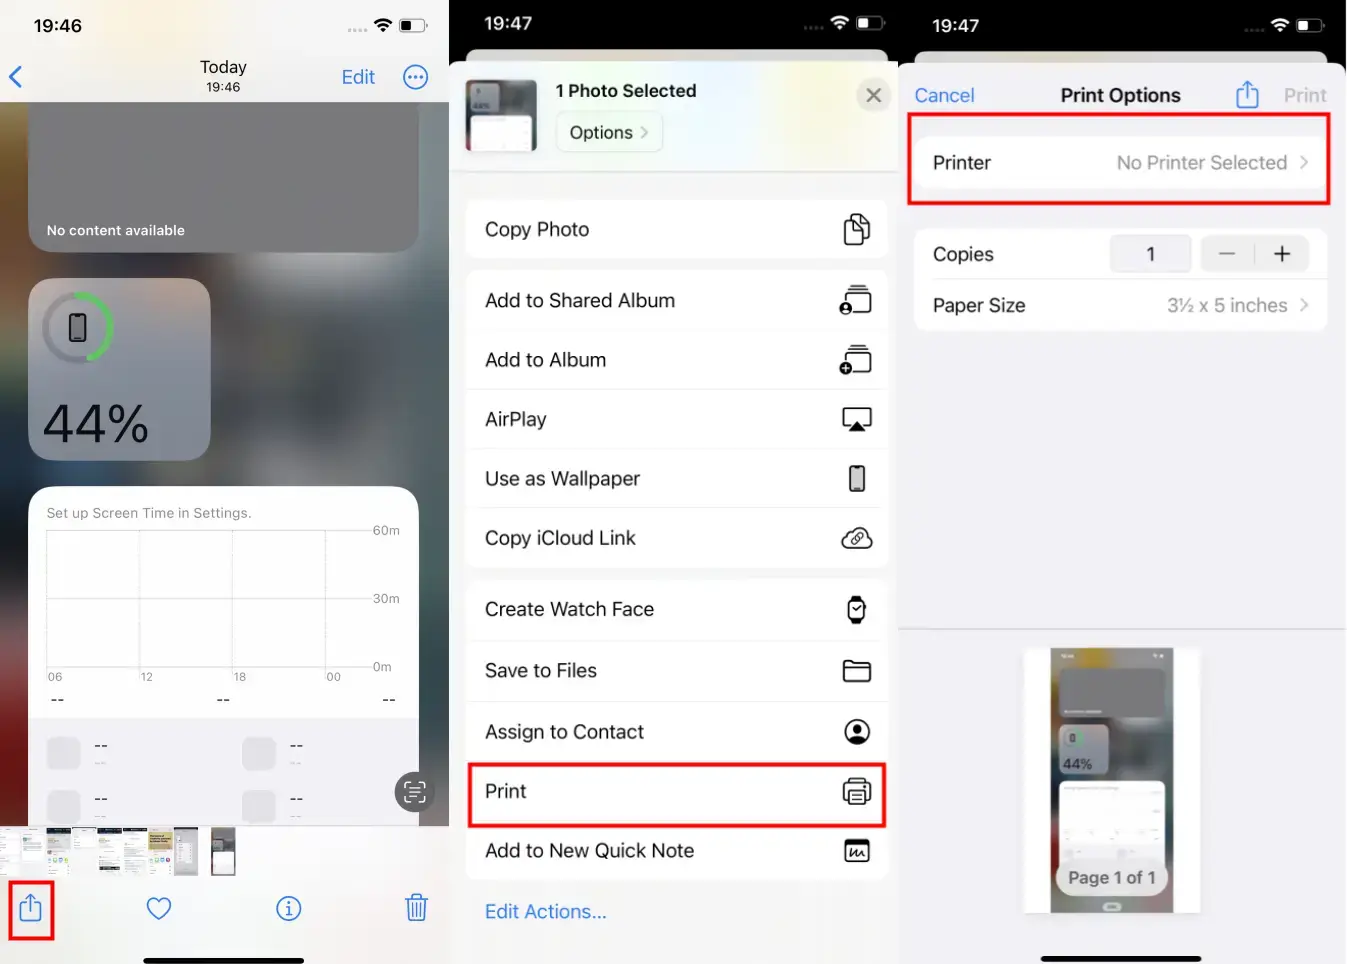
Find and open the item you want to print - it could be a document, picture, or webpage in your email, browser, Photos app, Files app, or another place.
Spot and tap the Share icon; it looks like a box with an upward arrow in the center. If it's not visible, look for either three horizontal dots or a left-pointing arrow, depending on the app you're in.
In the window that pops up, scroll until you find a printer icon beside the word 'Print'. Give it a tap.
Touch where it says 'No Printer Selected', then pick an AirPrint-enabled printer from the list that appears.
Set your preferences, like the number of copies or specific pages you want to print.
Hit 'Print' at the top right to finish the process.

How to View or Cancel Your Print Job
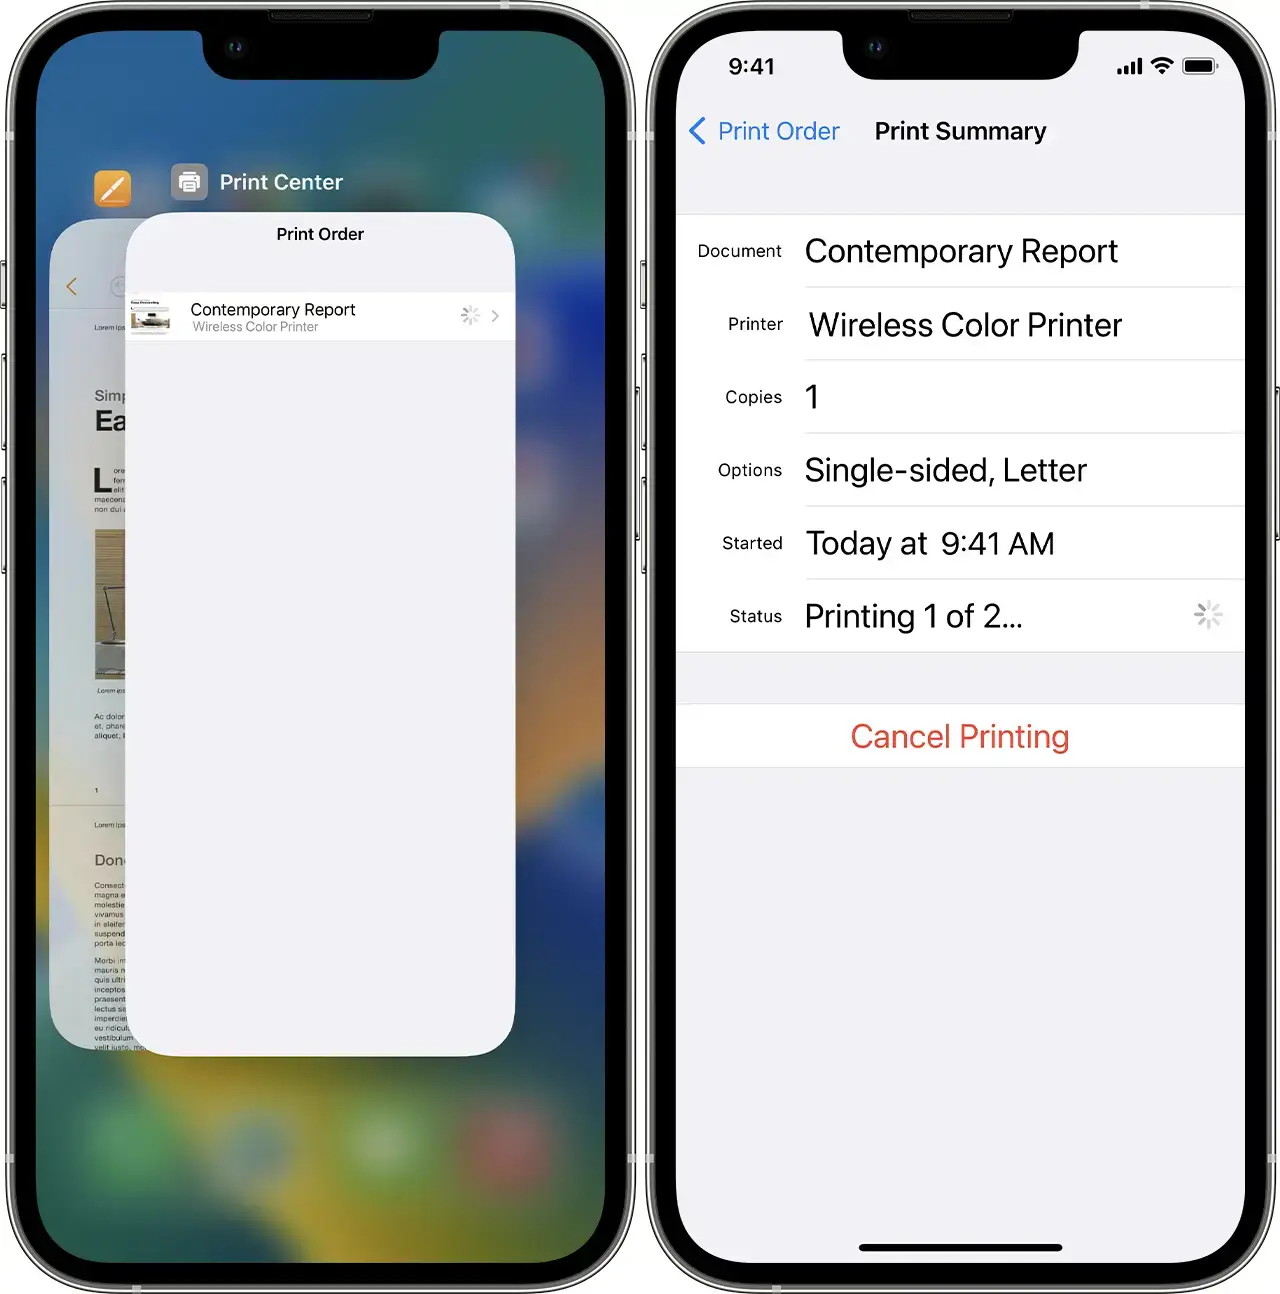
During a print process, you can easily check the status of your print tasks or stop them using the App Switcher.
To View a print job:
If you're using an iPhone X or newer, slide your finger up from the bottom of the screen halfway and hold until the App Switcher appears.
Swipe either left or right to locate the app, and then select Print Center. You'll see a badge on the icon indicating the number of documents lined up to print.
To cancel a print job: Activate the App Switcher, select Print Center, and then tap 'Cancel Printing'.

How to print from an iPhone or iPad without AirPrint
Use Your Printer's Brand-Specific App
Even if your printer doesn't support AirPrint, particularly the older models, you can still print wirelessly if it has wireless capabilities. In this case, you'll need to get your printer's dedicated app from the App Store.
For HP printers, grab the HP Smart app for your iPhone or iPad. If you have a Canon, the Canon PRINT InkJet app is your go-to.
Remember, your printer and iPhone must be connected to the same Wi-Fi network.
Here's the step-by-step guide:
Launch the respective app for your printer on your device.
Activate your printer's Wi-Fi feature.
Navigate to the Wi-Fi settings on your iPhone or iPad.
Spot your printer listed under 'OTHER NETWORKS' and select it.
Open the item (document, image, or webpage) you wish to print and tap the Share icon.
You're now set to link up with the printer via the app and initiate printing.
Print with a USB Cable
If your printer doesn't have wireless connectivity options, fret not! You can still print using a USB cable. You'll need a USB cable and a USB OTG (On-The-Go) adapter to bridge the connection between your iPhone or iPad and the printer.
Here's how to print using a USB cable:
Switch on your printer and link one end of the USB cable to your printer and the opposite end to the USB OTG adapter. Next, connect the USB OTG adapter to your iPhone or iPad.
A notification will pop up on your device — hit 'OK'.
Now, find and open the document you want to print on your iPhone or iPad and tap the Share icon.
In the Share menu, choose the 'Print' option.
Your connected printer should now be visible in the 'Printer' section on the Printer Options page.
Press 'Print' located at the top right to finalize the process.
How to Print to PDF on iPhone
Transforming a file or a webpage into a PDF and then printing it on your iPhone is both quick and straightforward. This function allows you to easily save and share information in a convenient format. Here's how to do it:
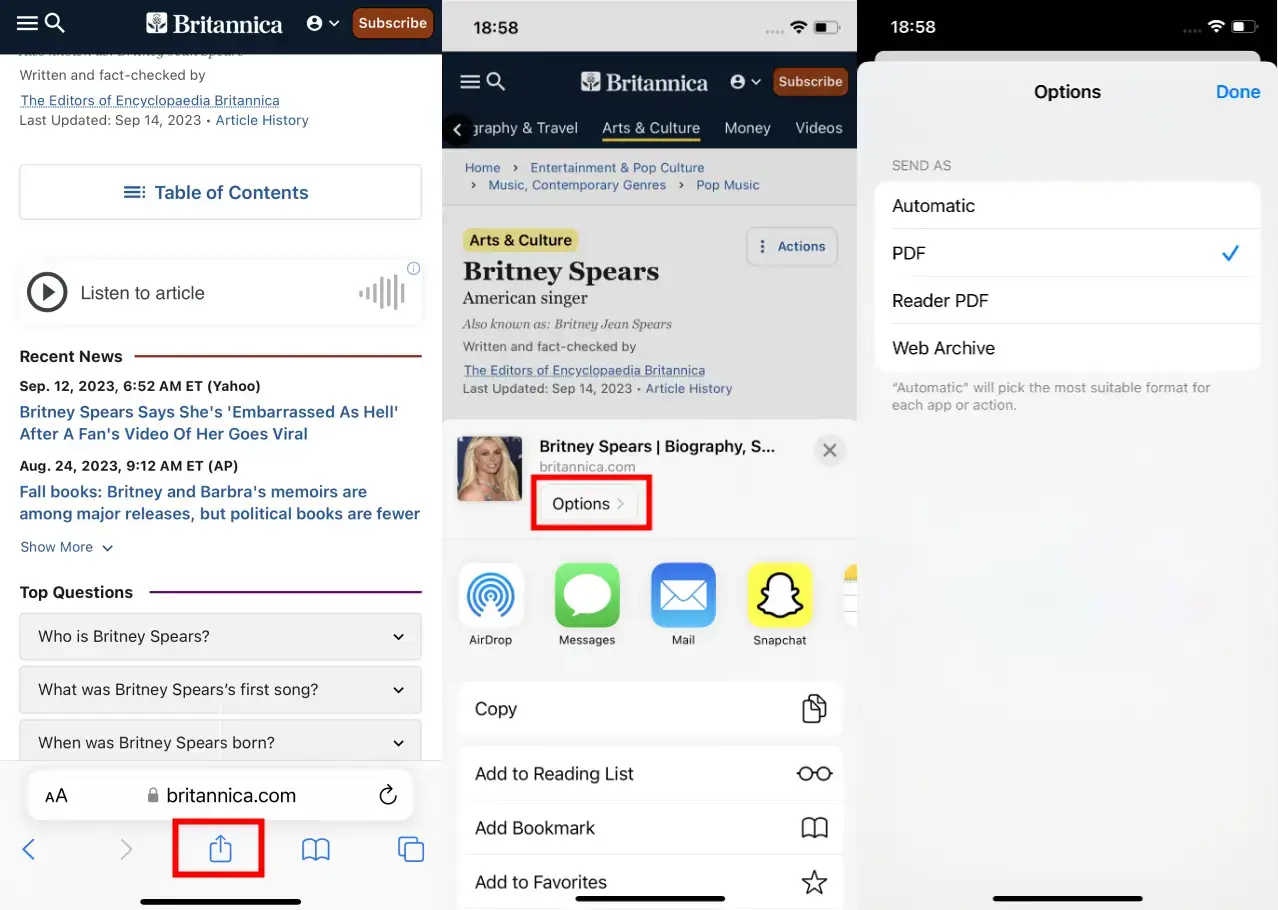
Navigate to the file or webpage you wish to convert to PDF.
Locate and tap the 'Share' button, typically represented by a square with an arrow pointing out from it.
In the pop-up menu, select the 'Options' tab.
From the available choices, select 'PDF' and then tap 'Done'.
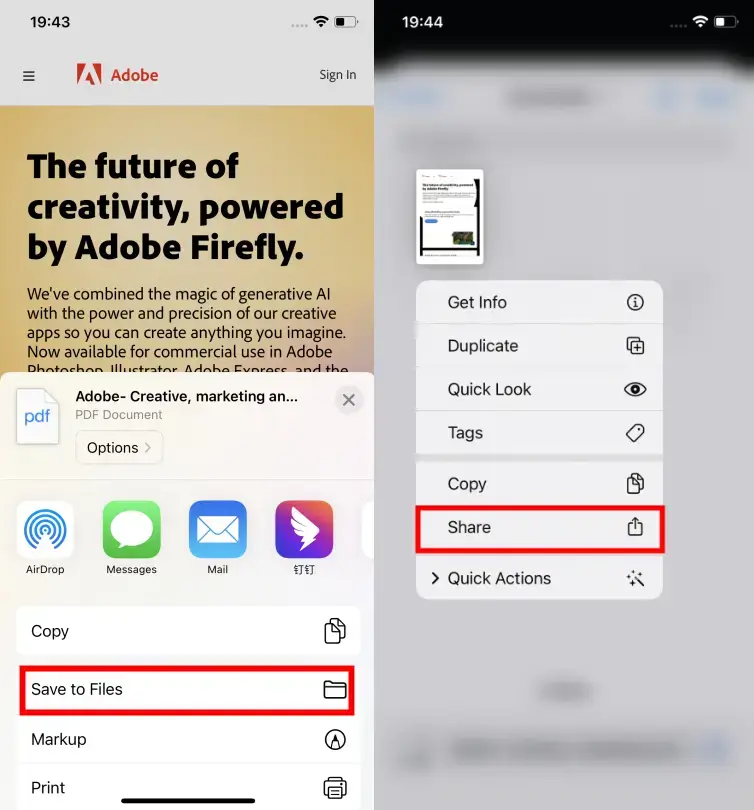
Scroll down the list of options and select 'Print'.

If you wish to download and store the document in your files, simply tap 'Save to Files'. This section houses all your downloaded items for easy access. To share a specific file, press and hold its icon, then select the 'Share' option that appears.

Voila! You have successfully converted your content into a PDF format, ready for easy viewing, saving, or sharing.

