5-Min Read: Guide on iPhone Backup, Restore & Transfer
Navigating iPhone data management can be challenging, as terms like backup, restore, and transfer, though often used interchangeably, have unique implications.
This guide simplifies these concepts, presenting a comparison table to demystify each process. It delineates the potential for data loss, typical use cases, necessary tools, and the extent of user involvement, offering a clear understanding of these crucial iPhone functionalities. Let’s dive in!
iPhone Data Management: Backup, Restore, and Transfer Simplified
To help clarify, here is a comparison table that succinctly breaks down these key concepts. This table highlights the differences in data loss risks, appropriate use scenarios, tools required, and the level of user involvement for each process.
Feature | Backup | Restore to Factory Settings | Restore from Backup | Transfer iPhone |
Definition | Creating a copy of data on your device for later use. | Resetting the device to its original state, and erasing all data and settings. | Applying a previously saved state (backup) to a device, replacing its current data. | Moving data and settings from one iPhone to a new one. |
Data Loss | No (intended to prevent data loss). | Yes (all data is erased). | Depends (replaces current data with data from the backup). | No (data is copied to the new device). |
Use Scenarios | Regularly saving data to prevent loss in case of device failure, loss, or upgrade. | Troubleshooting major issues, preparing for resale, or starting fresh. | Recovering data after a problem, setting up a new device, or reversing changes. | Setting up a new iPhone or iPad with data from an old device. |
Tools/Methods | iCloud, iTunes, Finder. | Settings on iOS, iTunes, Finder. | iCloud, iTunes, Finder, iOS app, Mac or PC. | Quick Start, iCloud, iTunes, Finder. |
Process Involvement | Passive (performed periodically in the background or manually). | Active (initiated by the user when needed). | Active (initiated by the user when needed). | Active (initiated during the setup of a new device). |
Backup Required | Not applicable (this is the process of creating a backup). | Recommended (to save data before erasure). | Yes (requires a pre-existing backup). | Recommended (to ensure current data is saved). |
Network Requirement | Yes for iCloud, No for iTunes/Finder. | No (done on the device or via a computer). | Yes for iCloud, No for iTunes/Finder. | Yes for iCloud and Quick Start, No for iTunes/Finder. |
User Involvement | Minimal (mostly automated). | High (requires navigating settings and confirming data deletion). | Moderate (involves choosing a backup and waiting for the restore). | Moderate (involves following on-screen instructions during setup). |
What is iPhone Backup?
iPhone Backup involves copying and saving information from your iPhone, iPad, or iPod touch. This is particularly crucial when you plan to make significant updates reset, or repair your device. A backup ensures that you can transfer all your data effortlessly if you switch to a new device.
Why Backup Your iPhone?
Backing up your iPhone is essential for a few key reasons:
Preserving Your Data: Whenever you're about to make a significant change to your iPhone, like an update or reset, a backup ensures your data is safe.
Easy Device Replacement: If you get a new iPhone, you can quickly transfer your data from your old device.
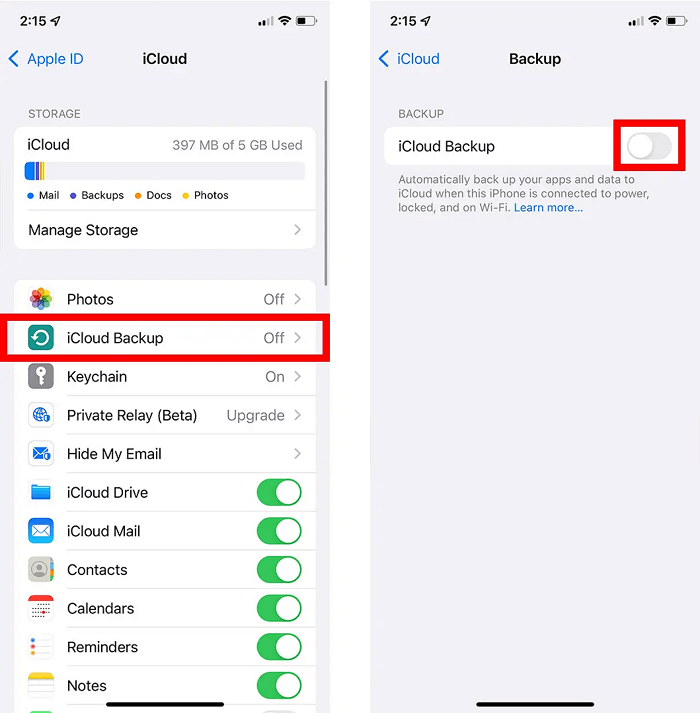
Real-Time Backup: By enabling iCloud backup sync, your data is continuously updated in real-time.
Types of iPhone Backups
iCloud Backup
Storage Space: iCloud offers free 5GB storage, but you can upgrade to up to 14TB with an Apple One Premier plan.
Encryption: Your backups are always encrypted for security.
Accessibility: Create and use backups from anywhere with Wi-Fi.
Content Included: iCloud backs up all information and settings on your device that aren't already synced to iCloud.
Content Excluded: Data already in iCloud (Contacts, Calendars, Notes), iCloud Photos, synced messages, data in other cloud services, Apple Mail data, Apple Pay, Face ID or Touch ID settings, iCloud Music Library, and App Store content.
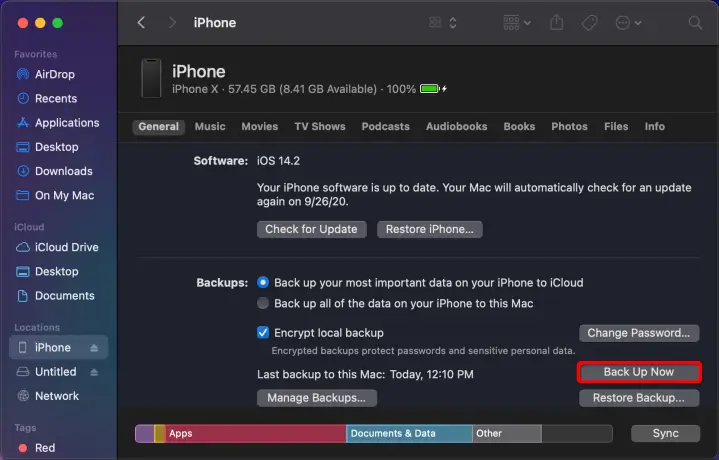
Computer Backup
Storage Space: The storage depends on your computer's available space.
Encryption: Offers encrypted backups, though it's not enabled by default.
Content Included: A computer backup includes almost all data and settings.
Content Excluded: iTunes and App Store content, PDFs in Apple Books, content synced from your computer, data already in iCloud, Face ID or Touch ID settings, Apple Pay, and Apple Mail data. To back up Activity, Health, and Keychain data, you must use Encrypted Backup.
What is iPhone Restore?
The term "restore," when used about an iPhone, can refer to two different processes, each with a distinct purpose and outcome. Understanding the difference between these two is crucial for effectively managing your iPhone.
1. Restore to Factory Settings
What It Is
Complete Reset: This process involves erasing all the information and settings on your iPhone and reinstalling the latest version of iOS or iPadOS. It essentially resets the iPhone to its original state, as if it were new.
How to Do It
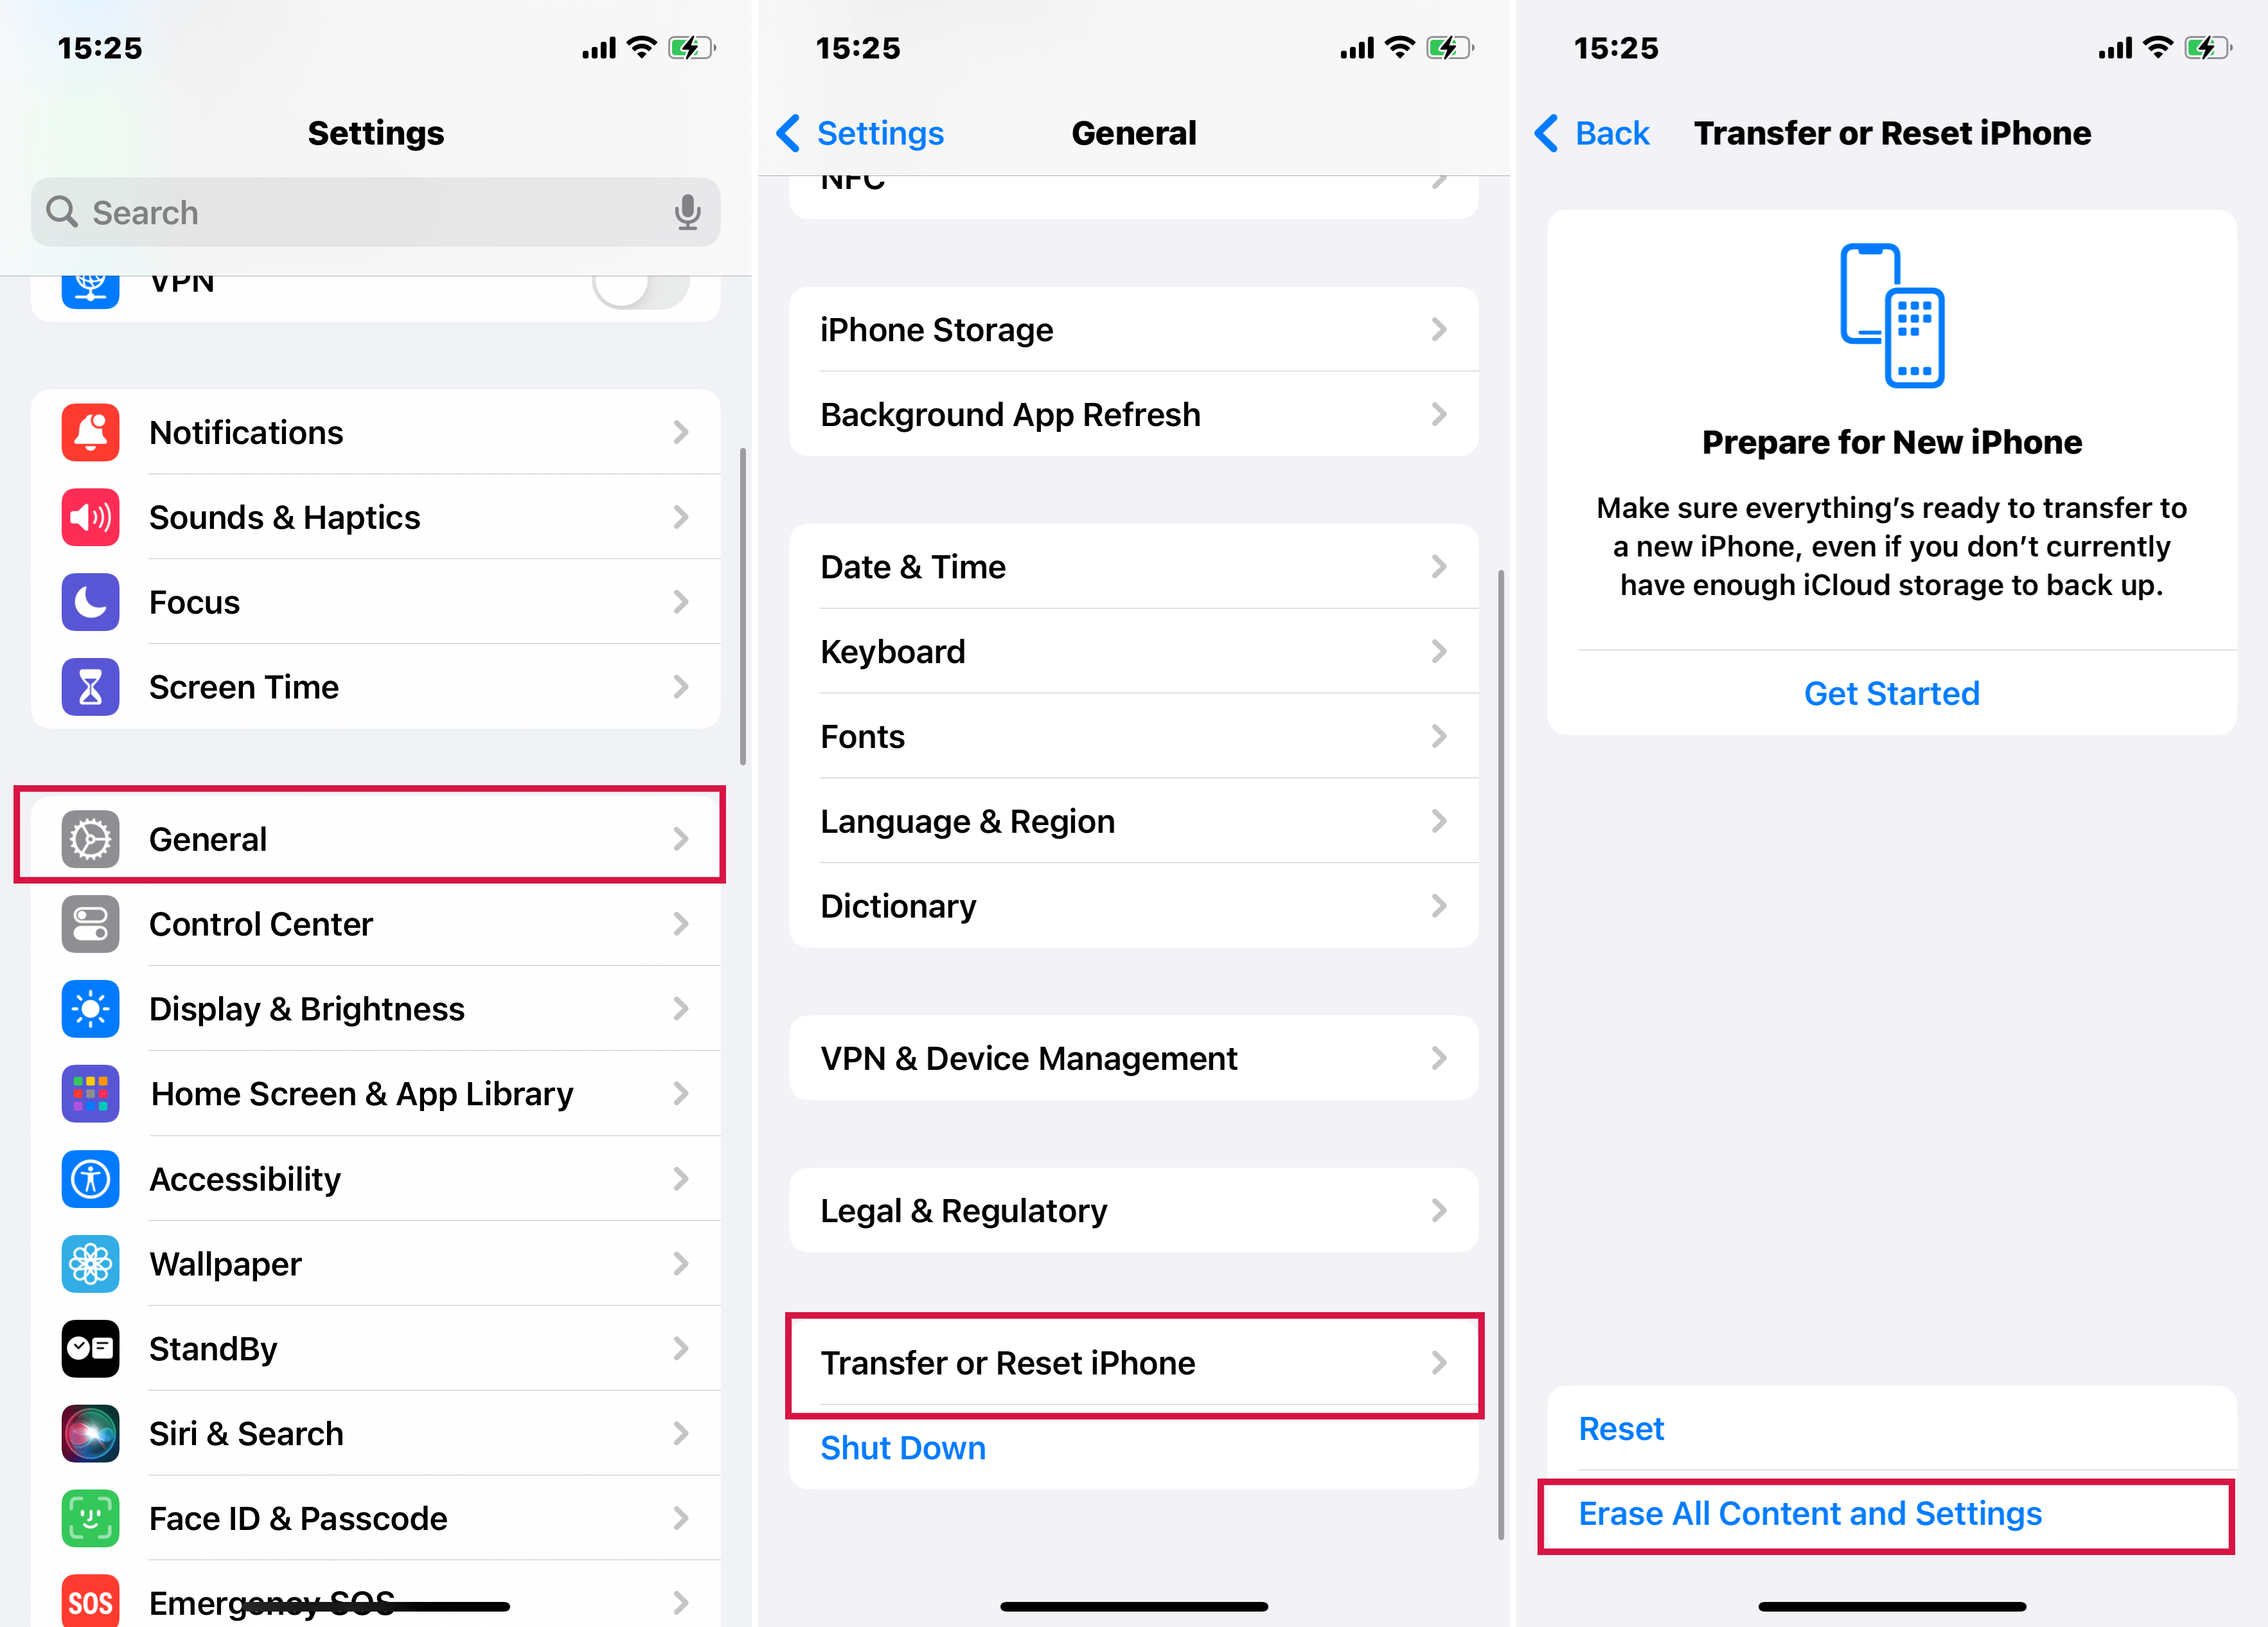
Go to Settings > General > Reset > Erase All Content and Settings on your iPhone to perform this. This will wipe all data on your device.
When to Use
This is typically done when troubleshooting major issues, preparing the device for resale, or starting fresh with the device.
Data Loss: It's important to back up your data before performing this restore, as all data will be removed.
Minor Resets: For less drastic changes, such as resetting the keyboard dictionary, iPhone network settings, or location and privacy settings, you can reset specific settings without erasing all content.
2. Restore iPhone from Backup
What It Is
Data Restoration: This type of restore involves bringing back data from iTunes or a backup created by other iPhone backup tools. This process replaces the current data on your iPhone with the data stored in the backup.
How to Do It
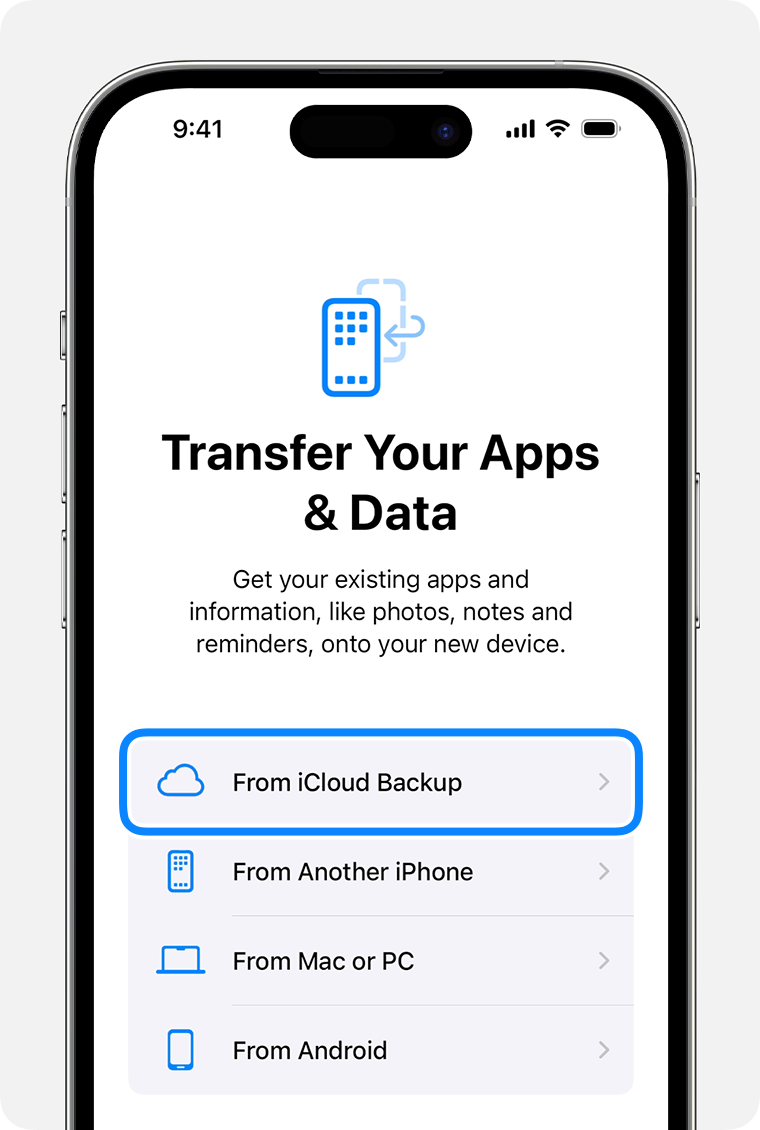
Procedure: You can restore content, settings, and apps from a backup to a new or newly erased iPhone. This is done through iTunes or the Finder on newer macOS versions.
When to Use
Use Cases: This is often used when transferring data to a new iPhone, recovering from data loss, or reverting to a previous state after encountering issues with the current state.
Considerations
Backup Necessity: Ensure you have an up-to-date backup before performing this restore. Without a backup, you cannot restore data.
Overwriting Current Data: Be aware that restoring from a backup will remove all current data on the iPhone and replace it with the data from the backup.
Understanding these two meanings of "restore" in the context of iPhone usage is critical to effectively managing your device, whether you are troubleshooting, upgrading, or simply trying to safeguard your data.
What is iPhone Transfer?
Transferring data to a new iPhone or iPad involves moving your information and settings from an old device to a new one. Apple provides several methods, each catering to different needs and preferences.
1. Quick Start
Overview
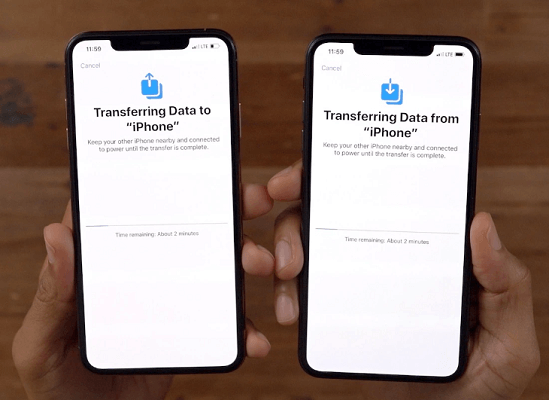
Device-to-Device Migration: Quick Start allows the automatic setup of a new iOS device using data from an existing iPhone or iPad.
Requirements: This method is available if your current device uses iOS 12.4 or later or iPadOS.
Process: It enables wireless transfer of all your data from the current device to the new one.
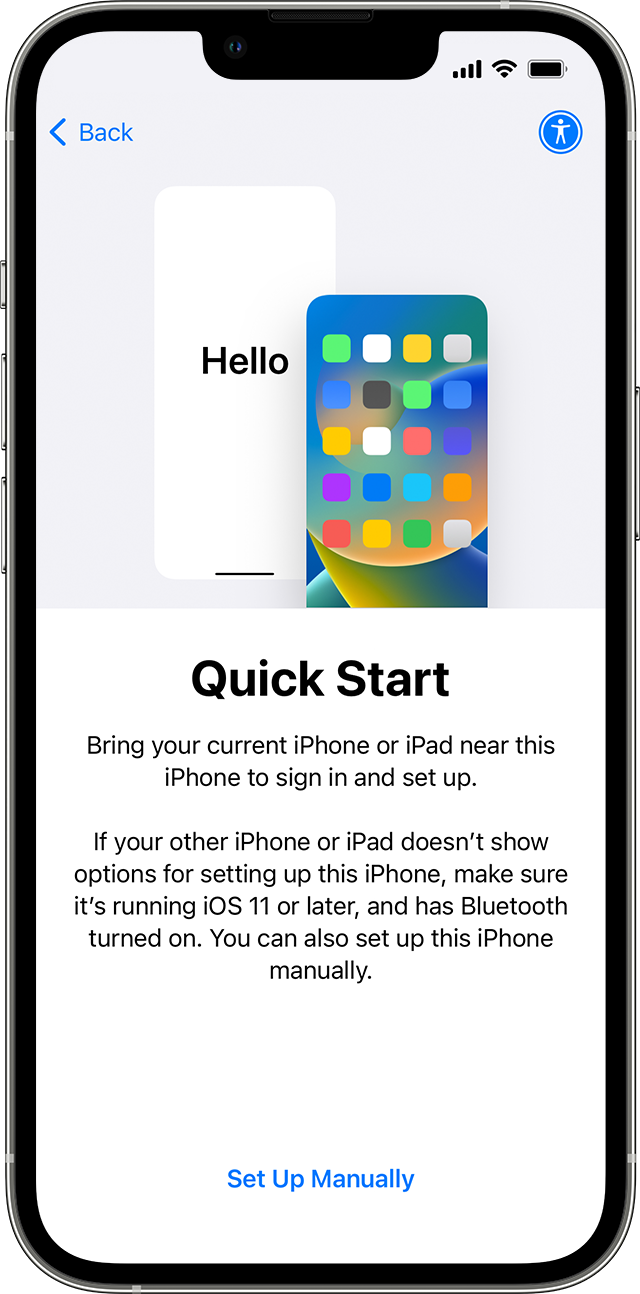
Engage Both Devices: The process occupies both the current and new devices, so it's advisable to choose a time when you won't need to use your current device for several minutes.
Further Steps: After the initial setup, you may need to follow additional steps to complete the data transfer.
2. iCloud
Overview
Backup and Restore: This method transfers your data and purchased content to your new device from your previous iCloud backup.
How to Use
Backup to iCloud: Ensure your old device is backed up.
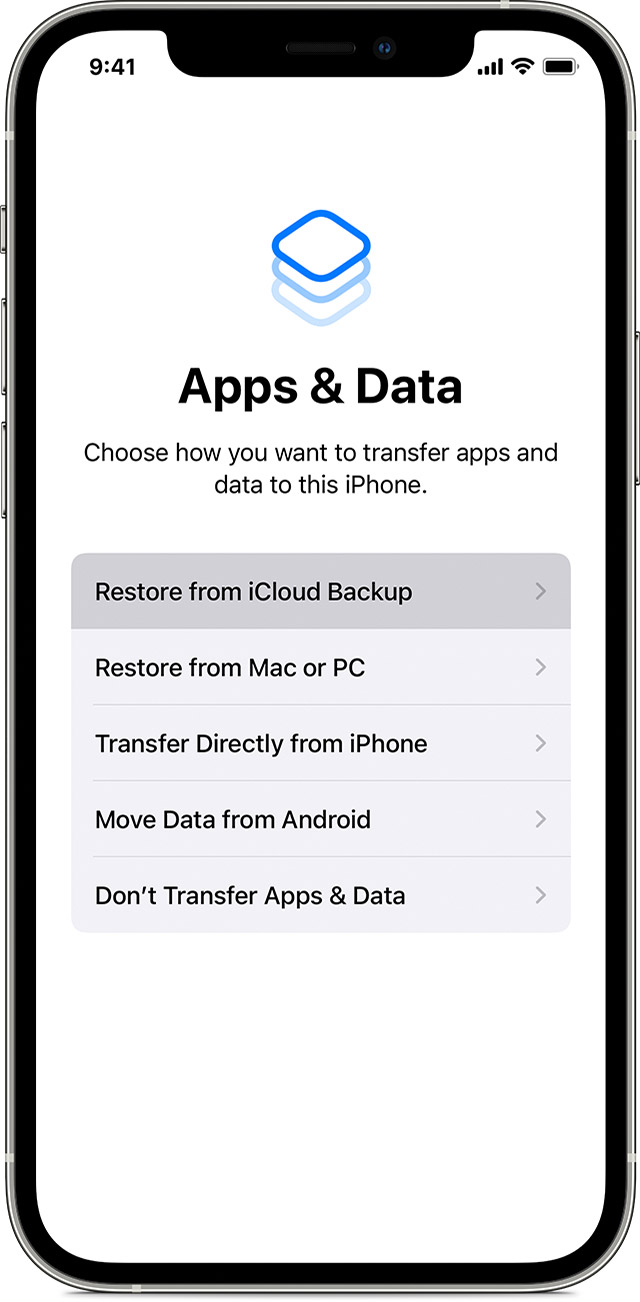
Restore on New Device: During the setup of your new device, choose to restore from the iCloud backup.
3. iTunes or Finder
Overview
Using a Computer for Backup and Restore: Transfer your data and purchased content from a backup made with iTunes (for older macOS versions or Windows) or Finder (for macOS Catalina and later).
How to Use
Backup to Computer: Back up your old device to a computer using iTunes or Finder.
Restore to New Device: Connect your new device to the same computer and restore the backup.
Applicable Devices: Available for iPhone or iPod touch with iOS 4 or later, or an iPad.
Use Case: Transfer files using apps that support file sharing on iTunes.

Additional Steps
Apple Watch: If you have an Apple Watch, you must restore it from a backup and pair it with your new iPhone.
Completion: Some additional steps might be required to finish the setup process on your new device.
4. Moving Data from Android and Mac
A. From Android to iPhone, iPad, or iPod Touch
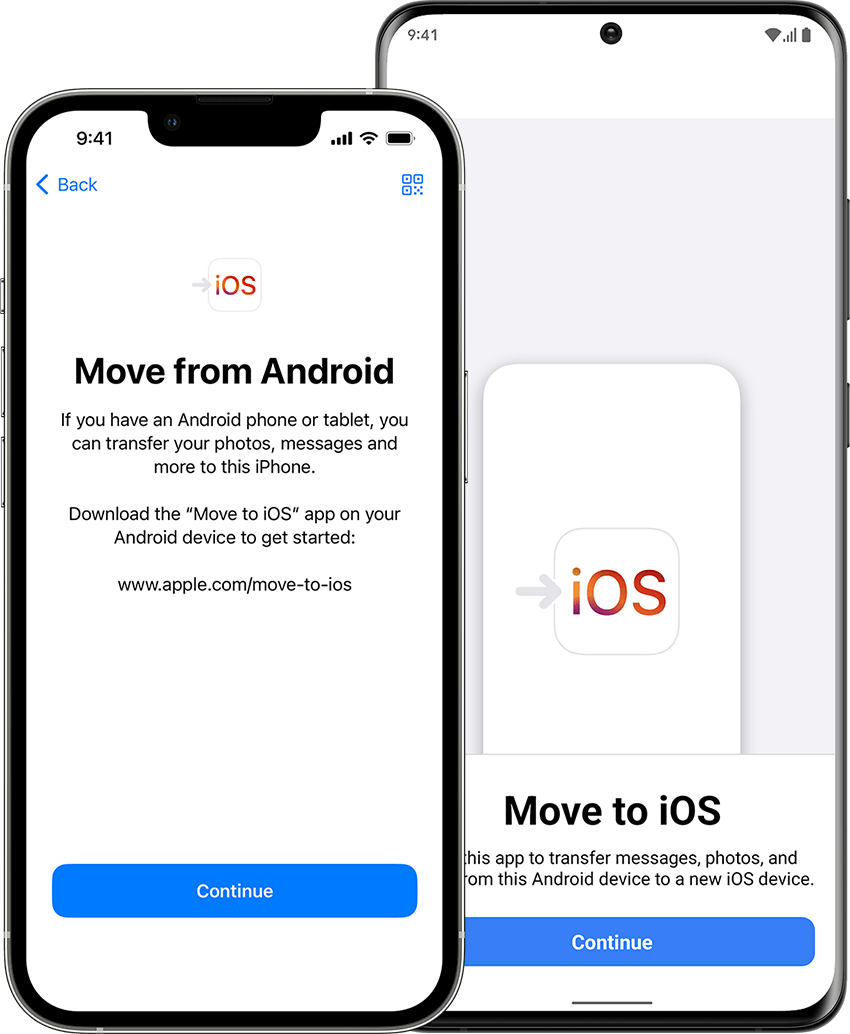
Tool: Use the 'Move to iOS' app for transferring data from your Android device.
Preparation:
Ensure Wi-Fi is on your Android device.
Connect both your new iOS device and Android device to power.
Verify that the content on your Android, including the external Micro SD card, fits on your new iOS device.
Update Chrome on your Android device to transfer Chrome bookmarks.
B. From Mac to iPhone, iPad, or iPod Touch
Syncing Files:
Syncing involves transferring and updating items between your Mac and your iOS device.
You can sync various items including music, movies, TV shows, podcasts, books, etc.
For automatic updates between devices, use iCloud.
Final Words
In summary, this guide demystifies iPhone data management, covering the crucial differences in backup, restore, and transfer processes.
Understanding these methods ensures efficient handling of your data, whether you're securing, restoring, or moving it to a new device. Stay informed and protect your digital assets by selecting the right process for your needs.

